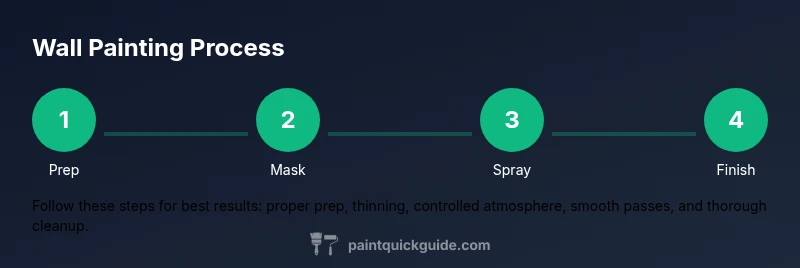
Wall Paint with Spray Gun: Complete How-To
Learn to spray walls with a spray gun—from prep and thinning to technique and cleanup. A practical guide for DIY homeowners to achieve a smooth, even finish with controlled overspray.

By the end of this guide, you will successfully apply wall paint with a spray gun, achieving a smooth, even finish. You’ll learn how to choose between HVLP and conventional sprayers, prep and protect the workspace, thin paint properly, set the right pressure and distance, overlap strokes consistently, and safely clean and maintain the equipment. Safety and ventilation are emphasized throughout.
Why spray guns speed up wall painting and improve finish
Spray guns can cover large wall surfaces quickly and produce a more uniform sheen than traditional brushes or rollers. When used correctly, they reduce visible brush marks and allow you to reach tight corners and ceilings with less manual effort. The trade-off is learning to control overspray, viscosity, and air flow so you don't waste paint or create drips. This section outlines the practical reasons to choose a spray gun for wall projects and how to get predictable results.
Choosing the right sprayer and finishes
For most interior walls, an HVLP (high-volume, low-pressure) sprayer offers the best balance of control and minimal overspray. Turbine-powered spray systems are another option when electrical access is limited. Paint coatings vary; water-based latex dries quickly and cleans with water, while oil-based finishes require solvents and longer dry times. Decide between finishes such as matte, satin, or eggshell based on room lighting and traffic. Always test spray on a small panel before applying to walls and keep a note of nozzle size, distance, and spray pattern.
Prep work and surface preparation
Begin by removing or protecting furniture, fixtures, and flooring. Mask edges, outlets, and trim with painter's tape and plastic sheeting. Clean the walls to remove dust, grease, and chalky residues, and repair any nail holes or cracks. Sand glossy areas lightly to provide tooth for the primer and paint. A clean, dry surface is essential for adhesion and a smooth finish.
Paint thinning and mixing for spray guns
Most spray gun manufacturers recommend thinning paint to achieve the right viscosity for atomization. Use the product label as your guide, adding water or thinner gradually and testing the spray pattern on cardboard or a test panel. Stir thoroughly and screen the mix through a paint strainer to remove lumps. If spraying oil-based paints, follow solvent safety guidelines and keep containers closed when not in use.
Setting up and safety
Ensure the workspace is well-ventilated, ideally with outside air flow. Wear a NIOSH-approved respirator, splash goggles, and hearing protection if your system is loud. Connect the air supply, set the regulator, and perform a small test spray away from walls. Protect floors with drop cloths or plastic, and keep a clean, organized area to minimize trips or accidental spills.
Technique: distance, overlap, and stroke patterns
Maintain a steady hand and a consistent distance from the wall, typically a few inches to keep a fine atomization. Use smooth, overlapping passes and avoid stopping in mid-stroke to prevent lap marks. Move parallel to the wall in light, even passes, and adjust speed to avoid runs. Work from top to bottom or from a guide line to ensure straight, even coverage.
Coating decisions: coats, drying times, and sheen
Most walls benefit from two light to medium coats rather than one heavy coat. Allow adequate drying time between coats according to the paint label and ambient conditions. Recheck corners and edges after the first coat, and touch up any thin areas. Choose sheen level based on room function: eggshell or satin for living areas, matte for ceilings, and semi-gloss only where cleaning is essential.
Cleanup and maintenance of equipment
Flush the gun with the appropriate solvent or water until the stream runs clear. Disassemble, rinse every part, and dry before storage. Clean the nozzle, needle, and cup areas to prevent paint from hardening. Check hoses and seals for wear and replace as needed. Store your sprayer in a clean, dry place away from sunlight.
Common mistakes and how to avoid them
Rushing setup or painting with a dirty spray pattern leads to uneven coats and sags. Overlooking ventilation causes fumes and moisture buildup. Neglecting to test spray results in surprise runs on the final wall. Always practice first, mask well, and maintain a consistent rhythm to reduce errors.
Tools & Materials
- HVLP spray gun(Low-pressure, high-volume spray gun recommended for walls)
- Air compressor or turbine system(Sufficient CFM to maintain steady spray)
- Paint and reducer/thinner(Use appropriate thinner per paint type)
- Viscosity cup(To measure paint viscosity and adjust thinning)
- Paint strainers(Strain paint before loading to avoid clogs)
- NIOSH-approved respirator(Protect lungs from fumes)
- Safety goggles(Protect eyes from overspray)
- Drop cloths and plastic sheeting(Protect floors and furniture)
- Painter's tape(Mask edges and trim)
- Stir sticks and paint can opener(Mix paint thoroughly)
- Ladder or step stool(For high walls and ceilings)
- Cleaning supplies (soap/water or solvent)(Cleanup after spraying depends on paint type)
Steps
Estimated time: Estimated total time: 3-6 hours
- 1
Prepare workspace and masking
Move furniture, cover floors, and apply masking to edges, outlets, and trim. Ventilate the area to keep fumes manageable. This reduces cleanup later and protects surfaces not meant to be painted.
Tip: Use drop cloths beyond the immediate area to capture drift. - 2
Choose and set up your sprayer
Install the nozzle and connect the air supply. Set initial pressure and spray pattern according to paint type and wall texture. Run a test spray on scrap material to dial in settings.
Tip: Start with a wide, even pattern and adjust to minimize overspray. - 3
Thin and mix the paint
Follow the manufacturer’s thinning guidance and add thinner gradually. Stir thoroughly and strain to remove lumps. Test spray on a scrap panel and adjust thinning if necessary.
Tip: Avoid over-thinning; it can cause runs and poor adhesion. - 4
Mask edges and trim
Mask edges along baseboards, ceilings, and trim before spraying. Use painter's tape to maintain crisp lines on nearby surfaces.
Tip: Apply a thin edge bead of tape for sharp lines. - 5
Apply the first light coat
Hold the sprayer at a consistent distance and move with smooth, overlapping passes. Begin around a corner and work across the wall in sections.
Tip: Keep a steady rhythm to avoid heavy spots. - 6
Apply the second coat
After the first coat dries to touch, apply a second coat for even color and sheen. Use the same technique and slightly fewer passes to reduce sags.
Tip: Check for thin spots and re-treat those areas. - 7
Final checks and touch-ups
Inspect walls for runs, sags, or missed spots. Do light touch-ups with a controlled pass along edges rather than broad strokes.
Tip: Use a small, controlled pass or brush for edge fixes. - 8
Cleanup and storage
Flush the gun with the correct solvent or water, disassemble, rinse, and dry components. Store the sprayer in a clean, dry place.
Tip: Clean immediately after use to prevent dried paint in nozzles. - 9
Safety wrap-up and ventilation
Ensure the area remains ventilated during drying. Dispose of waste according to local regulations and replace filters as needed.
Tip: Keep exit routes clear and avoid storing flammable materials nearby.
Your Questions Answered
Do I need to thin latex paint for spray guns?
Yes; most latex paints spray best when thinned according to the label. Start with a small amount of thinner and test spray on a scrap panel.
Yes, thin latex per the label and test spray to ensure atomization.
What type of spray gun is best for walls?
HVLP spray guns are commonly used for walls due to better control and lower overspray. They’re easier to manage on interior surfaces.
HVLP spray guns are typically best for interior walls.
How long between coats?
Drying times depend on temperature and humidity; most walls require 2-4 hours between coats. Always follow the paint label for guidance.
Most paints dry to touch in a few hours; check the label.
Can I spray indoors safely?
Yes, with proper ventilation, masking, and PPE. Use outside air when possible and ensure exhaust is directed away from living spaces.
Yes, with good ventilation and PPE.
Can I spray over textured walls?
Spraying can help smooth textures with proper technique, but you may need additional coats or edge work. Test on a small area first.
Spraying can smooth textures with proper technique, possibly needing more coats.
Watch Video
Quick Summary
- Plan workspace and masking before spraying.
- Thin paint properly and test spray first.
- Maintain a consistent distance and overlap for even coats.
- Ventilate and wear PPE for safety.
- Clean equipment promptly after spraying.