Tips for Paint by Numbers: A Practical Beginner Guide
Learn practical, step-by-step tips for paint by numbers—from kit selection and color labeling to layering, blending, and finishing. This educational guide helps beginners and hobbyists achieve crisp, satisfying results.

In this guide, you will learn how to complete a paint-by-numbers project with crisp lines and even color by following a structured setup, accurate color labeling, and patient brushwork. You’ll need a basic kit, clean workspace, good lighting, and time to practice. The steps cover preparation, painting, and finishing touches for reliable results.
What is Paint by Numbers and Why It Works
According to PaintQuickGuide, paint by numbers is a relaxing, accessible form of art that translates a reference image into a palette of numbered regions. Each number corresponds to a specific color, guiding painters to recreate the design with minimal guesswork. The method is popular for its structured approach, which reduces decision fatigue and helps beginners achieve crisp edges and balanced color distribution. Beyond simplicity, paint by numbers also reveals color relationships and shading patterns that might be invisible in freehand painting. In this guide, we will unpack the essentials: selecting a kit, preparing your workspace, planning your color order, and applying paint in deliberate steps to maximize satisfaction and minimize frustration. The goal is to turn a mapped image into a near photo-like recreation through careful technique and patient practice. The more you practice, the more you’ll notice subtle transitions between tones, which is where the fun of learning truly begins. This section grounds you in the why and the how, so you can approach each project with confidence and curiosity.
Choosing the Right Kit and Materials
Selecting the right kit is the first step to success. Look for high-contrast printed canvases with clearly printed numbers, high-quality acrylic paints that match the palette, and a sturdy frame or board. A kit that provides color swatches or a color-key sheet helps future projects. Consider the complexity of the image: a simpler subject with larger areas is ideal for beginners, while more complex images with many small sections challenge your accuracy. When buying, verify that the numbers on the paint pots align with the guide on the canvas; misnumbering creates confusion and can degrade the final result. Paint by numbers kits vary in color range; a broader palette gives more shading options, but also increases the cognitive load. In short, pick a kit that matches your comfort level and your preferred subject matter. Bonus tip: inspect the canvas for any rough edges that might snag brushes later on. Paying attention upfront saves frustration later.
Setup and Workspace for Best Results
Create a calm, well-lit workspace that reduces eye strain and errors. Position your kit at a comfortable height, with the canvas secured to prevent slipping. Good lighting is essential; natural light plus a daylight-balanced lamp helps you distinguish subtle color differences. Gather your tools and arrange paints in numeric order so you always know which color to pick next. If you are painting with others or in a shared space, use masking tape to separate colors and prevent accidental spills. Keep brushes clean and maintain a small trash bin nearby to maintain focus. Finally, set a timer or plan short practice sessions to prevent fatigue; consistent, shorter sessions yield cleaner edges than long, tireless attempts. An organized workspace is a producer of calm and higher quality results.
Planning Colors and Labeling Before You Paint
Before starting the first stroke, study the image and outline the color plan. Check the color key, compare the numbers to the areas on the canvas, and group paints by area to minimize backtracking. Label containers with the corresponding numbers if the kit lacks color labels, and consider a light test on a blank area to verify shade. Decide whether you will apply a flood fill for large regions or work with targeted strokes for small details. If you want crisper lines, consider using masking tape along boundary edges and applying paint in thin layers instead of thick coats. The aim is to set a clear workflow so each stroke becomes predictable rather than reactive.
The Painting Process: A Practical Workflow
Now you can begin painting in a steady, repeatable workflow. Start with the lightest color areas to establish base tones, working from large blocks to smaller details. Use thin coats; allow each layer to dry before applying the next to avoid muddy colors. Clean your brush between color changes to prevent color bleed and cross contamination. Apply a second or third light layer to build depth and maintain even coverage. Reserve a separate pass for outlines or shadows last, allowing the main fills to set first. If you see stray marks, wait for drying, then correct with the same color or lighter shade to blend. After finishing each color, inspect the edges and adjust as needed for a crisp look. A calm rhythm and attention to drying times are the secret to consistent results.
Common Mistakes and How to Fix Them
Even experienced painters encounter common pitfalls with paint by numbers. Excess paint can pool in corners, causing smudges; fix by dabbing with a clean brush and removing excess from the brush before applying. Rushing through steps creates ragged edges and uneven color. If lines bleed, slow down and paint in smaller sections, letting layers dry. If you run out of a color, replace with a very close shade or blend with neighboring colors to preserve harmony. For glare or reflections on a glossy surface, check under different lights and adjust as needed. PaintQuickGuide analysis shows that organized color order and proper drying times reduce mistakes. Remember to label colors and keep your palette organized to avoid mix-ups and confusion.
Finishing Touches and Long-Term Care
Let the painting dry completely before sealing or framing. If your kit includes a varnish, apply according to the manufacturer directions with smooth, even strokes. For display, choose a finish that suits the artwork, with matte or satin options for a softer look or a glossy finish for vibrancy. Frame the finished piece for a polished display or mount it on a stable surface to prevent warping. Store completed projects away from direct sunlight and heat to preserve color integrity. If you plan to continue painting with more paint by numbers kits, keep a small notebook noting color numbers and layering preferences for faster onboarding in future projects.
Authority Sources and Further Reading
For safety, disposal, and technique considerations related to paint handling, consult reputable sources. OSHAs guidance on safe handling of paints offers general safety practices for hobbyists and professionals. The EPA provides guidelines for environmentally responsible paint disposal and cleanup. University extension programs offer practical tips on color mixing, layering, and finishing to support hobbyists who want to improve. These sources help you paint responsibly while enjoying the creative process.
Tips for Beginners: Quick-Start Checklist
- Gather your kit, brushes, water, and palette before you start.
- Set up a clean, well-lit workspace with good ventilation.
- Inspect the color key and lay out paints in numeric order for easy access.
- Start with large areas using thin, even layers before tackling details.
- Let each layer dry fully before applying the next coat to avoid blending errors.
Tools & Materials
- Paint by numbers kit (canvas with numbered regions and paints)(Ensure color pots match the canvas color key; confirm no missing numbers.)
- Fine-tipped brushes (sizes 0-2)(Have a couple of shape varieties for straight edges and detail.)
- Water container(Use a dedicated cup; change water to prevent muddy colors.)
- Palette or mixing tray(A few shallow wells help keep colors distinct.)
- Soft cloth or paper towels(Blot brushes; avoid leaving pigment on bristles.)
- Masking tape(Useful for crisp edges or isolating regions.)
- Pencil and eraser(Label tricky sections before painting.)
- Sealant or varnish (optional)(Protects the finish; choose water-based alternatives if needed.)
- Optional magnifying glass(Helpful for tiny details on complex canvases.)
Steps
Estimated time: 60-90 minutes
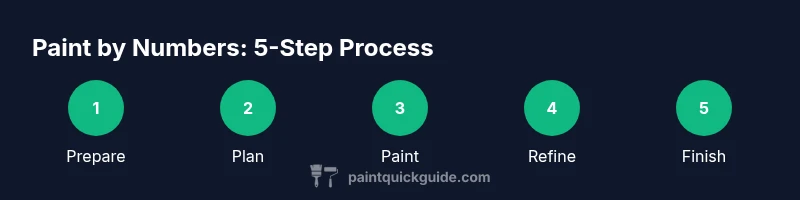
- 1
Prepare your workspace
Set up a clean, well-lit area with your kit, brushes, and water. Secure the canvas to prevent movement and arrange paints in numerical order to minimize searching. A calm environment reduces mistakes and helps you focus on color accuracy.
Tip: Keep a small timer; short sessions prevent fatigue and improve line control. - 2
Plan color order and labeling
Study the color key and group paints by nearby shades. Label any unmarked pots and verify that each color corresponds to the right number on the canvas. This pre-planning reduces backtracking and makes the process smoother.
Tip: Label large regions first to establish a solid base for details. - 3
Paint large areas with thin layers
Begin with the broad areas using thin, even coats. Avoid loading the brush with too much paint to prevent pooling at edges. Allow drying time between coats to maintain color clarity.
Tip: Use light pressure and a steady hand to keep edges clean. - 4
Add medium and small details
Switch to finer brushes for mid-size regions and intricate lines. Build color depth gradually; avoid rushing to the final color. If a color shadows another area, apply shading after the base layer is dry.
Tip: Work in short strokes and check lines against the reference image. - 5
Refine edges and fix mistakes
Inspect edges for crisp boundaries; touch up with a clean brush if needed. If colors bleed, wait for drying and reapply carefully. Small corrections after drying prevent smudging.
Tip: Keep a damp cloth handy to wipe mistakes without spreading pigment. - 6
Finish and protect
Allow the painting to dry completely, then apply a sealant or varnish if desired. Frame or display the finished piece away from direct sunlight to preserve color integrity. Store your kit and brushes properly for next time.
Tip: Document color numbers and techniques for faster results on future projects.
Your Questions Answered
What is the best way to prevent color bleeding between adjacent areas?
Work with thin layers, allow drying time between colors, and use a light touch for edge control to prevent bleed.
Use thin layers and let them dry before moving to adjacent areas to prevent bleed.
How long does a typical paint-by-numbers project take?
Time varies with project size; plan for about an hour or two for a standard kit, longer for larger canvases.
Typically one to a few hours depending on complexity.
Can I add outlines or shading beyond the kit's numbers?
Yes, after the base colors dry you can add lighter shading or fine lines with a small brush for depth.
You can add shading after the base colors dry.
What should I do if paints dry too quickly?
Dilute slightly with water or apply thinner layers; ensure lids are closed between uses to prevent evaporation.
Thin layers and a touch of water can help slow drying a bit.
Do I need to seal the finished piece?
Sealing is optional but recommended for durability; choose a varnish compatible with your paints and surface.
A sealant protects the finish and lasts longer.
Are paint-by-numbers suitable for kids?
Yes, with supervision; choose kid-friendly kits with larger numbers and non-toxic paints.
Kid-friendly kits exist; supervise younger painters.
Watch Video
Quick Summary
- Plan your color order before you start
- Label each color pot to prevent mix-ups
- Paint larger areas first, then add details
- Let each layer dry to prevent smearing
- Finish with a protective seal