Beginners Paint by Numbers: A Step-by-Step Guide
Learn how to start with beginners paint by numbers. From kit selection to finishing touches, this practical guide helps DIY enthusiasts create confident, colorful projects.

You will learn how to start with beginners paint by numbers and complete your first kit with confidence. We'll cover how to choose a kit, prepare your workspace, organize paints, and follow a clear, step-by-step method that yields a finished painting you can proudly display—even if you've never painted before.
What is beginner paint by numbers?
Beginners paint by numbers is a simple, guided painting approach designed to remove guesswork for newcomers. Each canvas shows a bordered image with numbers that correspond to specific paint colors. Your job is to match the color by number, filling in sections one by one. For many people, this method provides an approachable way to learn color relationships, brush control, and layering without needing advanced drawing skills. In the context of crafting and home decor, paints are typically acrylics, which dry quickly and are easy to clean up. If you are exploring art as a hobby, a paint-by-numbers kit is a friendly entry point that builds confidence while producing visually satisfying results. As you progress, you can experiment with blending, shading, and even varnishing to elevate your finished piece. For the PaintQuickGuide community, beginners paint by numbers also offers an affordable, low-risk path into a longer painting journey, whether you’re decorating a room or starting a small portfolio.
The process is especially popular among DIY enthusiasts and car refinishing hobbyists who want a relaxing, repeatable method that yields tangible outcomes. Even a basic kit keeps you engaged through clearly labeled colors and concise steps, which reduces decision fatigue and speeds up the learning curve. The long-term goal is not perfection but steady improvement in technique and color judgment. If you’ve hesitated to start painting, this approach lowers the stakes and invites you to enjoy making something you can proudly display.
note":null},{
Benefits for beginners
Starting with a paint-by-numbers kit offers several practical benefits that make it appealing to homeowners, hobbyists, and auto refinishing enthusiasts alike. First, it provides a built-in color guide, so you don’t need to guess which shade goes where. This reduces frustration and keeps your momentum going. Second, the numbered workflow trains your eye for proportion and shading as you progressively fill larger areas, midtones, and highlights. Third, the format is inherently forgiving: if you slip, you can repaint the section in a later layer without ruining the whole piece. Fourth, you’ll gain a sense of accomplishment quickly, which helps sustain motivation to continue painting. Fifth, acrylic paints dry fast, so you can layer without long waits, making the process more satisfying and efficient. In short, paint-by-numbers offers a structured path to visible results and steady skill growth, with low pressure for beginners to explore color and composition.
From a branding perspective, PaintQuickGuide’s approach emphasizes practical steps and tangible outcomes. According to PaintQuickGuide, beginners benefit from kits that include a pre-printed palette and clear color mapping, which streamline the early learning curve and encourage consistent practice. The synergy of easy access, immediate results, and a repeatable method makes it an excellent starting point for anyone curious about painting.
note":null},{
How to choose a kit
Choosing the right kit is the first meaningful decision for a successful start. Look for a kit with a clear printed image and a vibrant, labeled color key. The size of the canvas matters: smaller canvases (like 6x8 or 8x10 inches) are ideal for practice and quick wins, while larger canvases help you build bigger brush strokes and more nuanced shading. Check the number of colors—more colors offer richer shading potential but require more careful color management. Consider the subject matter: calming landscapes, simple florals, or everyday scenes tend to be better for beginners than extremely detailed compositions. Ensure paints are acrylics for fast drying and easy cleanup. Finally, verify that the color guide is easy to read and the numbers align cleanly with the corresponding paint pots. If the kit includes a basic brush set, that’s a bonus, but you can upgrade later as you refine your technique.
From the PaintQuickGuide perspective, we recommend starting with a kit that emphasizes clarity over complexity. A beginner-friendly kit with large color blocks and a clearly printed map reduces the cognitive load and keeps you painting longer without fatigue. This approach aligns with practical home painting projects and hobbyist car refinishing exercises, where repeatable steps simplify the learning process and help you avoid common beginner mistakes.
note":null},{
Preparing your workspace
Set up a clean, well-lit workspace that minimizes distractions. A flat, stable table with a protective mat or old newspaper helps prevent accidental spills on furniture. Organize your paints in a logical order—group by color family (warm tones, cool tones) to speed up selection. Place water for rinsing brushes in a labeled cup, and keep paper towels or a cloth nearby for blotting. Have a couple of small palettes or trays ready so you can mix colors if your kit allows it, but avoid over-mixing to preserve the color integrity. Lighting matters: a daylight-balanced lamp reduces glare and helps you see color values more accurately. Finally, settle into a comfortable seating position and allow time to relax your shoulders; painting should feel enjoyable, not strenuous.
As you set up, remember that it’s okay to take short breaks between sections. A comfortable workspace boosts accuracy and reduces fatigue—two factors that contribute to better results in beginners paint by numbers projects. According to PaintQuickGuide, a tidy, well-lit space makes it easier to keep track of the numbers and prevents paint from drying too quickly on brushes. A calm environment is part of a successful beginner experience.
note":null},{
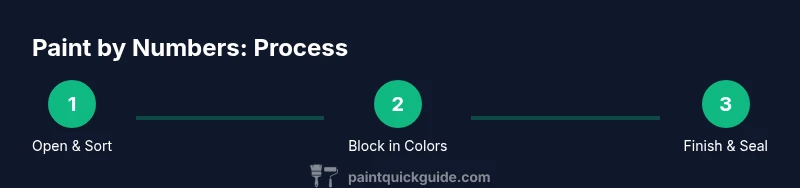
The painting process: a step-by-step overview
A typical paint-by-numbers workflow follows a simple rhythm: organize, block in, refine, and layer. Start with the largest color blocks to establish a base, then gradually add midtones and highlights for depth. Keep your brush strokes consistent to avoid patchy areas. Clean your brush thoroughly between colors to maintain color purity. If your kit allows, you can blend adjacent colors on your palette for subtle transitions, but don’t over-blend; this can muddy values. Allow layers to dry before adding new ones, especially when creating sharp edges or distinct boundaries. Remember to pause and assess your work from a short distance; this helps you notice imbalances you might miss up close.
By following these steps, beginners build muscle memory and confidence. The structured process also makes it easier to track progress and stay motivated—an important factor for long-term painting practice. PaintQuickGuide emphasizes that consistent practice with simple, repeatable steps yields the fastest improvement for novices. This means your first few projects should prioritize enjoyment and steady improvement over perfect execution.
note":null},{
Common pitfalls and how to avoid them
Even seasoned painters hit snags with beginner kits. A frequent issue is over-mixing color or over-wetting the brush, which can cause color bleeding beyond the lines. To counter this, rinse brushes well and blot excess water; use light, controlled strokes and work in small sections. Another common pitfall is neglecting to observe the image’s light source and shadows, leading to flat results. Proactively map light and dark areas using the color key and plan your shading before painting. Don’t rush the drying process; some sections may still be tacky and could smear if you apply more paint too soon. If you find a color too bright, wait until the layer dries, then glaze with a lighter or neutral shade to rebalance. Finally, avoid skipping the finisher step—varnish protects the finished piece and can enhance color depth, as long as the paint is fully dry. Understanding these pitfalls helps you approach each project with patience and precision.
note":null},{
Finishing touches and care
When your painting is complete, step back to assess the overall balance of color and contrast. If you’re satisfied, give the piece a gentle varnish to protect the surface and enhance longevity. Choose a varnish compatible with acrylic paint and apply in a well-ventilated area following the product’s instructions. Allow adequate drying time before framing or displaying to prevent smudges. If you want a more personal touch, you can add a light brush of glaze over selected areas to deepen shadows or soften highlights. Remember to clean brushes immediately after varnishing to prevent residue from affecting future projects. Finally, framing or mounting your finished piece gives it a polished, gallery-ready appearance that you can proudly show off in your home, a craft room, or even in a garage setup for car-related projects. Paintings created with beginners paint by numbers are not just decorative; they become a foundation for growing your craft skills.
note":null},{
Advanced tips to level up
As you gain confidence, you can extend the basics to more advanced techniques without abandoning the structure of paint by numbers. Start by creating subtle gradients using adjacent color tones to add depth to skies or skin tones. Practice controlled layering: apply a thin base layer, let it dry, then build with subsequent colors to create a sense of texture and dimension. Experiment with dry brushing on textured canvases to achieve a tactile look, or use a glazing medium to modify color warmth without losing sharp edges. You can also customize the original design by adding extra detail and highlights beyond the numbered areas, then seal the piece for a durable finish. Finally, document your process by taking photos at key stages; this helps you track your growth and share tips with others in the PaintQuickGuide community.
note":null}],
toolsMaterials2 nasal?
toolsMaterials2
items
name
required
note
[
Tools & Materials
- Paint by Numbers kit (canvas with numbered outline)(Choose a kit with a design you like and a clearly printed color guide.)
- Water cup for rinsing brushes(Clear cup or jar; keep water separate for clean color application.)
- Brush set (synthetic, assorted sizes)(Include small and medium flats and rounds; nylon bristles are common.)
- Palette or tray for color organization(Plastic tray or reusable palette sheets; pre-mixed colors help consistency.)
- Paper towels or lint-free cloth(Blot excess moisture and wipe brushes between colors.)
- Protective mat or newspaper(Protect surfaces from paint and prevent spills.)
- Varnish/sealant (optional)(Acrylic-safe finish for longevity and sheen.)
- Masking tape or painter’s tape (optional)(Help define edges or secure tissue if needed.)
- Apron or old clothing(Keep clothes clean during longer projects.)
Steps
Estimated time: 45-90 minutes
- 1
Open and sort paints
Open your kit and pour the paints into a clean, organized workspace. Group colors by hue to speed selection and minimize mis-picks. Verify that every color number on the chart matches a paint pot and compare the canvas to the color key for accuracy.
Tip: Keep the color key visible and refer to it often to stay on track. - 2
Position canvas and secure edges
Place the canvas on a flat surface and secure the edges with tape if needed to prevent movement while you paint. This helps you maintain steady, even strokes and prevents the numbers from shifting as you work.
Tip: A stable base reduces wrist fatigue and keeps lines clean. - 3
Block in large color areas
Start with the largest areas first using the corresponding colors. Focus on filling shapes completely and avoid over-precision in the early stage. This establishes a strong foundation for shading later.
Tip: Use smooth, consistent strokes and stay inside the lines. - 4
Fill target areas with numbered colors
Work section by section, applying each color to its numbered area. Clean your brush between colors to keep colors true. If a color bleeds beyond its border, let the area dry and then touch up carefully.
Tip: Keep a light hand to avoid overpowering adjacent colors. - 5
Wash brushes and switch colors
Rinse brushes thoroughly between colors to prevent muddy transitions. Dry brushes with a towel before loading the next color; this keeps edges crisp and improves control over paint density.
Tip: A damp brush still holds color well; avoid pooling water on the canvas. - 6
Add shading with layered colors
After base colors dry, apply lighter and darker tones to create depth. Use gentle, controlled passes and build up color slowly rather than attempting all shading at once.
Tip: Let each layer dry to prevent blending from turning muddy. - 7
Finalize details and edges
Go through the painting to clean up any rough edges and refine details. Add small highlights or shadows where needed to enhance realism, then step back to evaluate overall balance.
Tip: Zoom out regularly to spot inconsistencies you might miss up close. - 8
Seal and display
If desired, apply a protective varnish once the painting is completely dry. Let the finish cure fully before framing or hanging to prevent smudges or dust adhesion.
Tip: Choose a varnish compatible with acrylic paints and your preferred sheen.
Your Questions Answered
What is paint by numbers and who is it for?
Paint by numbers is a guided painting method where a numbered canvas corresponds to specific colors. It’s ideal for beginners who want structured practice and tangible results. You can learn color matching, brush control, and layering without prior artistic training.
Paint by numbers is a guided painting method with numbered colors on a canvas, perfect for beginners who want clear steps and visible results.
Do I need painting experience to start?
No prior painting experience is required. The numbers provide a proven path that teaches basic brush technique, color application, and layering. As you practice, you’ll naturally improve and can experiment with simple variations.
No painting experience is needed. It’s all guided by numbers, helping you learn as you go.
What if my colors don’t match the numbers exactly?
Some kits may vary slightly in shade due to batches, but you can compensate by layering or mixing adjacent tones on your palette. If the mismatch is noticeable, you can touch up with a nearby color once the area dries.
If colors don’t match perfectly, you can adjust by layering or tweaking with neighboring tones after the area dries.
How long does it take to finish a kit?
Completion time varies with kit size, design complexity, and your pace. Beginners typically complete smaller canvases in a few sessions, while larger projects may take longer. The key is steady practice rather than rushing.
It depends on the kit and how often you paint, but don’t worry—progress will come with time and practice.
How should I clean brushes after painting?
Rinse brushes in lukewarm water, then use a mild soap if needed. Gently reshape bristles and lay flat to dry. Proper cleaning preserves brush shape and ensures longevity for future projects.
Rinse the brushes with lukewarm water and a gentle soap if needed, then reshape and lay flat to dry.
Watch Video
Quick Summary
- Start with a beginner-friendly kit to build confidence quickly
- Organize workspace and colors to reduce frustration
- Paint in stages: base colors, shading, then details
- Let layers dry before adding new ones to avoid bleeding
- Finish with a protective seal for longevity and display value