Sketch Painting Techniques: A Practical Guide for DIYers
Learn sketch painting—a hybrid of drawing and painting. This detailed guide covers materials, step-by-step workflow, tips, and finishing methods to help DIY enthusiasts create expressive, textured artworks.

Sketch painting combines drawing and painting into a single expressive process. It starts with a confident sketch, then adds painterly washes or color glazes to build depth and texture. This guide covers planning, materials, a practical workflow, and finishing tips to help you create cohesive, dynamic pieces. By following these steps, you’ll blend line, value, and color effectively.
What is sketch painting?
Sketch painting is a hybrid approach that blends the immediacy and precision of drawing with the atmosphere and color of painting. It emphasizes expressive line work, tonal balance, and layered color to create a piece that feels spontaneous yet cohesive. Rather than striving for photo-realism, sketch painting celebrates gesture, texture, and the dialogue between graphite lines and pigment washes. According to PaintQuickGuide, the method thrives on a strong initial sketch that guides subsequent color decisions, allowing the artist to push contrasts and atmosphere without getting bogged down in perfect rendering. This approach is accessible to beginners yet rewarding for experienced painters who want a looser, more tactile result. The balance between line and paint is what gives sketch paintings their distinctive energy, and practicing regularly helps you read value, edges, and color relationships more intuitively.
Core techniques that define sketch painting
Sketch painting relies on several interlinked techniques. First, establish a confident line language: bold contour where it matters and lighter, gestural marks elsewhere to imply form without overworking the surface. Next, map values early using a quick grayscale study or tonal plan so color decisions respect light and shadow. Layering is deliberate: start with light washes or diluted washes to block in color, then gradually build depth with glazes or more saturated tones. Don’t fear letting some areas stay translucent—the transparency adds atmosphere. You’ll often move back to lines after color begins to settle, reinforcing structure without losing looseness. Practice mark-making with varied strokes—short flicks, long sweeps, and stippling—to create texture that reads as skin, foliage, or fabric. Finally, maintain color harmony by limiting your palette and testing swatches on a separate paper area.
Materials and setup for sketch painting
Choosing the right tools matters as much as the technique. Start with acid-free paper suitable for washes to prevent warping. A basic set of graphite pencils (HB for lines and 2B for shading) complements a kneaded eraser for soft lifts. For color, select watercolor or gouache if you want a transparent, pigment-rich look, or light acrylics if you prefer fast-drying layers. Keep a small palette, clean water, and a rag or paper towels at hand. Have a variety of brushes (rounds for detail, flats for washes) and a spray bottle to control moisture levels. Tape edges to prevent warp, and keep a fixative handy if you intend to preserve the final piece. PaintQuickGuide suggests testing color swatches on scrap paper before committing to your piece to avoid surprises.
Planning your composition before you start
A successful sketch painting begins with planning. Do quick thumbnail studies to explore composition, focal point, and movement before touching your final surface. Decide on a limited color scheme early to maintain harmony, and sketch a light guide on your paper to map values and rhythm. Consider how edges shift between your line work and the painted areas—soft transitions often read as atmosphere, while crisp edges pull attention. A thumbnail routine helps you compare multiple ideas quickly and select the most compelling solution. Once you have a plan, transfer a clean, simplified outline to your final surface and allow room for painterly decisions as you proceed.
Common mistakes and how to avoid them
Common pitfalls include overworking the paper, which can cause wrinkling and muddy color. Another frequent error is too-heavy line work that competes with color, making the piece feel static. Inadequate value planning leads to flat results, so always establish a tonal ladder early. Don’t rush washes; allow each layer to dry to prevent bleeding. Inconsistent paper texture can grab pigment unpredictably, so test your surface first. Finally, skip glazing or layering—this deprives the piece of depth. To avoid these, work in stages, keep notes or swatches, and give your layers time to dry before advancing.
Finishing, preserving, and presenting sketch paintings
Finishing touches include refining edges and heights of contrast, then allowing the piece to rest before final sealing or framing. If you used a water-based medium, a light spray of fixative can stabilize graphite and delicate pigments, but test first to avoid blotting. When presenting, consider a mat that isolates the painting from the glass, preserving color integrity and preventing condensation. For long-term care, keep paintings away from direct sun and high humidity, and store flat or upright with proper supports. Digital scans or high-quality photographs help preserve the image when the original faces risk of fading.
Tools & Materials
- Acid-free drawing or watercolor paper (140–300 gsm)(Choose weight based on desired absorption and layering tolerance)
- Graphite pencils (HB and 2B)(HB for initial line work, 2B for shading and softer edges)
- Kneaded eraser(For gentle lifting without tearing the paper)
- Watercolor paints or gouache (or acrylics for faster drying)(Select pigments with good lightfastness)
- Brushes (rounds 2–6 and flat 6–12)(Synthetic or natural bristles; include a fine detail brush)
- Palette or mixing tray(For controlled washes and color testing)
- Water jar and paper towels(Keep brushes clean and blot excess moisture)
- Masking tape(Helpful for clean edges and white margins)
- Fixative spray (optional)(Use only after testing on scrap)
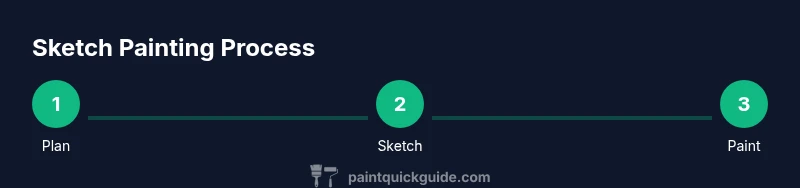
Steps
Estimated time: 90-150 minutes
- 1
Prepare your workspace and materials
Set up a clean, well-lit area with all tools within reach. Tape the edges of your paper to a board if needed. This step reduces movement during painting and helps control moisture.
Tip: Organize swatches and test areas before applying color to the final surface. - 2
Make a light thumbnail plan
Create a few quick thumbnails to decide composition, focal point, and value range. Choose a restrained palette to maintain harmony and avoid overcomplication.
Tip: Set a time limit to encourage decisive choices and avoid overthinking. - 3
Lay in pale washes or underpainting
Apply very light washes to establish color blocks and basic shapes. Keep the layers thin to preserve the white of the paper for highlights.
Tip: Work from broad shapes to details, letting large areas establish balance. - 4
Develop form with value studies
Deepen values with slightly stronger tones to model form. Use graphite or a light paint wash to compare value against your initial sketch.
Tip: Cross-check with a grayscale view to ensure good contrast. - 5
Refine edges and color layers
Strengthen key edges with more pigment or a fine brush; soften other edges to suggest distance. Add texture using dry brush or light stippling where appropriate.
Tip: Avoid over-saturation on small areas; keep a balance between line and paint. - 6
Evaluate, adjust, and finalize
Step back to assess composition, value, and color harmony. Make targeted adjustments and apply a final glaze if needed. Allow the piece to dry completely before framing.
Tip: Take a photo of your work at multiple stages to track changes.
Your Questions Answered
What is sketch painting and how is it different from pure sketching or painting?
Sketch painting blends drawing with painting, using initial line work followed by washes or color glazes. It emphasizes spontaneity and texture rather than photorealism, creating a cohesive piece through the dialogue of line and pigment.
Sketch painting blends drawing with painting for expressive results that balance line work and color.
What materials do I need to start sketch painting?
Begin with acid-free paper, graphite pencils, a kneaded eraser, and a basic set of paints (watercolor or gouache). Add brushes, a palette, water, and some tape to keep whites clean.
You need paper, graphite, erasers, paints, brushes, and a palette to start.
Should I use watercolor, gouache, or acrylics for sketch painting?
Watercolor or gouache works well for transparent layers and rapid drying. Acrylics can be used for faster builds but may feel less airy. Choose based on desired speed, translucency, and handling.
Watercolor or gouache for transparency; acrylics if you want faster layers.
How can I prevent smudging when adding paint over a graphite sketch?
Work from light to dark and seal the initial graphite with a light, non-wearing layer of fixative, or apply the paint before excessive graphite pressure. Avoid heavy finger smudging on the surface.
Work light to dark, and consider a light fixative to prevent smudging.
What are effective ways to improve tonal values in a sketch painting?
Plan a grayscale map or value study first. Build values gradually with thin washes, then refine with stronger glazes in key areas to create depth and contrast.
Map values first, then build depth with gradual washes and glazes.
How should I finish and preserve a sketch painting?
Let the piece dry completely, then seal with a compatible fixative if appropriate. Frame with a non-glare glass to protect from dust, light, and humidity.
Let it dry, fix when needed, and frame with protection.
Watch Video
Quick Summary
- Plan composition with quick thumbnails.
- Balance line work and paint to keep energy.
- Build depth through layered washes and glazing.
- Protect whites and manage edges for clarity.