Drawing in Paint Brush: Expressive Brush Techniques
A practical guide to drawing in a paint brush, covering control, stroke variety, texture, and maintenance for acrylic, watercolor, and oil. Learn setup, holding, layering, and tricks to elevate your brushwork.

By the end of this guide you will learn to execute deliberate, expressive marks using a paint brush. You’ll cover brush grip, stroke shapes, pressure control, and layering to build form. Tools and workspace setup are minimal but essential, and you’ll gain practical steps you can apply to acrylic, latex, or oil paints in any project. drawing in paint brush becomes more intuitive with practice.
What drawing in paint brush means
Drawing in paint brush is the practice of using a loaded brush to form lines, shapes, and textures on a surface. It blends line work, value, and texture to mimic pencil or ink while exploiting the paint's unique properties. The goal is control: brush pressure, angle, stroke length, and cadence determine whether a mark reads as a crisp line, a soft edge, or a rough texture. In this guide we explore drawing in paint brush across acrylics, latex, and oil, with practical steps to move from hesitant marks to expressive lines. As you practice, your ability to render form, light, and texture will improve. Drawing in paint brush also invites experimentation with brush shapes and surface textures, expanding your toolkit beyond flat color blocks. According to PaintQuickGuide, solid brush drawing comes from consistent practice and deliberate control.
Why brush drawing matters for learners and hobbyists
For beginners, drawing in paint brush offers an immediate sense of momentum: a quick mark can reveal form and mood before color decisions are made. For experienced painters, brush drawing is about refining edge control, contour fluency, and texture. The same stroke repeated with variation can imply light, distance, and material—metal, wood, fabric—without changing tools. Practicing brush drawing helps you translate ideas from sketch to paint, letting you lay down confident lines and then layer color with intention. PaintQuickGuide Analysis, 2026 emphasizes that regular, focused practice yields clearer edges, smoother transitions, and more expressive textures.
Essential setup for drawing in paint brush
A clean, organized workspace reduces friction when you’re learning to draw in paint brush. Arrange brushes by shape and size, pre-moisten brushes if using watercolor, and set up a mixing tray with basic primaries. Keep a dedicated water cup or solvent for your medium, plus rags for dabbing and correcting. Use a palette knife for mixing thick colors if needed. Consistency in lighting helps your eye judge value and edge, which is crucial to effective brush drawing. This setup makes it easier to focus on brush technique rather than hunting for tools. The goal is a calm, predictable environment that supports deliberate brush work and solid drawing in paint brush practice.
Holding and posture: improving control when drawing in paint brush
Your grip and posture influence accuracy as much as your brush strokes. Stand or sit with a relaxed shoulder and a stable forearm, letting your wrist do the fine work rather than your whole arm. Hold the brush about a third of the way from the ferrule for precision, and switch grips for different effects: a firmer grip for deliberate lines, a looser hold for fluid curves. When drawing in paint brush, small shifts in pressure and angle create variety in line weight. Practice short, controlled repetitions to build muscle memory, and remember that comfort breeds steadiness in your marks.
Core brush strokes for drawing in paint brush
Mastering a handful of core strokes unlocks most brush drawing tasks. Basic lines: a steady, short stroke for edges; a longer, continuous stroke for contours. Circular and curved marks convey volume; use light pressure for thin lines and heavier pressure for thicker ones. For texture, try broken strokes and stippling to simulate grain or pores. A frequent challenge in drawing in paint brush is maintaining consistency as you change color or brush size. Practice a sequence of lines, curves, and textures on scrap paper to build a flexible repertoire that translates to your paintings. This foundation is essential for expressive brush drawing.
Layering, shading, and texture with the brush
Layering is the marketable skill in drawing in paint brush: start with light values and build toward darker ones. Allow each layer to dry only when appropriate for your medium to avoid muddying edges. Use dry brush technique for rough textures, and a slightly loaded brush for soft transitions. Build texture by varying stroke direction and pressure, letting some brush marks stay dominant while others recede. Blending should feel deliberate, not rushed; the brush distance to surface and the velocity of your stroke matter. Practicing these steps will yield more convincing shading and tactile textures in your brush drawings. Remember to check your scale and edge quality while you layer.
Surface choice and paint type for optimal drawing in paint brush
Surface matters as much as brush technique when drawing in paint brush. Heavier acrylics on primed canvas or panels work well for strong edges, while watercolors respond to damp surfaces that allow soft blending. Oil paints hold longer and offer rich blending, but require different solvents and drying times. In all cases, choose brushes with appropriate stiffness for your medium and clean them between color changes. When experimenting with drawing in paint brush, adjust surface grain and texture to suit the stroke you want, whether it’s a crisp line, a feathered edge, or a rough texture that suggests weathered wood or stone.
Troubleshooting common problems in drawing in paint brush
Common issues include muddy edges, blobbed lines, and uneven textures. If edges turn muddy, wipe the brush clean, lighten the color, and re-establish the edge with a fresh stroke. For blobs, load the brush with less paint and maintain a stable angle as you guide the stroke. Texture gaps can be filled with light, quick passes rather than long, heavy strokes. In this guide to drawing in paint brush, you’ll learn to identify your problem points early by comparing strokes on scrap tests before applying them to your final piece. With patience, you’ll gain consistent results and more confident brush marks.
Brush care, cleanup and workspace hygiene for drawing in paint brush
Healthy brush care unlocks long-term success in drawing in paint brush. Rinse brushes thoroughly between color changes and after finishing a session, then gently reshape bristles while damp. Dry brushes with bristles facing downward to preserve their points, and store them in a way that avoids bending or crushing. Protect your surfaces with a mat or newspaper, and bag brushes for transport to prevent bristle damage. Regular maintenance includes deep cleaning natural hair brushes and conditioning synthetic ones. Keeping tools in good shape ensures your brushwork remains expressive and precise every time you pick up a brush for drawing in paint brush.
Quick practice drill to build skill in drawing in paint brush
Set aside 15 minutes for a focused drill: warm up with 20 short strokes (thin, medium, and thick) on scrap paper. Then rotate through three small exercises: a straight line, a smooth curve, and a texture mark (dot or dash). Conclude by testing a single controlled mark on a new surface, paying attention to edge sharpness and value. This repeated, timed practice builds the habit of deliberate brush drawing. The more you repeat the drill, the more natural drawing in paint brush will feel, and you’ll notice improvements in both line quality and texture control.
Tools & Materials
- Studio brushes (various shapes: round, flat, filbert, synthetic and natural bristles)(Assorted sizes 0-2 for detail; 6-12 for washes; choose bristle types based on medium)
- Paints(A basic set of acrylics, latex, or oils with primary colors plus a few earth tones)
- Water cups and solvent container(One cup for rinsing, one for clean water; label clearly)
- Palette or mixing tray(Plastic, ceramic, or silicone palettes work best)
- Rags or paper towels(For blotting and quick corrections)
- Protective mat or drop cloth(Protects surface from spills and stains)
- Masking tape or painter’s tape(Helpful for clean edges and drying barriers)
Steps
Estimated time: 25-40 minutes
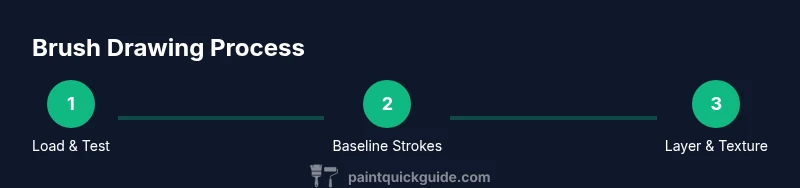
- 1
Gather materials and set up
Collect brushes and paints, arrange by shape and size, and prepare your workspace with good lighting. Ensure you have a dedicated water cup, a mixing tray, and wipes handy. Establish a comfortable stance or seating position to support precise brush control.
Tip: Label containers and keep a small scrap pad for quick tests. - 2
Load brush and test stroke
Dip brush lightly into paint and remove excess on the edge of the cup or palette. Test a short stroke on scrap paper to confirm line weight and edge quality before applying to your piece. Adjust paint load as needed for the effect you want.
Tip: Start with a dry brush for crisp lines, then add paint if you need more depth. - 3
Create baseline marks
Begin with simple lines and curves to map the composition. Use light pressure to draft shapes, then refine with heavier pressure for emphasis where needed. Keep strokes controlled and deliberate rather than rushed.
Tip: Keep your wrist loose; let your arm move small, intentional motions. - 4
Develop form with varied strokes
Introduce variations in stroke length, direction, and angle to suggest form and texture. Alternate between edge-focused lines and soft, blended fills to create depth. Avoid repeating the same stroke in identical fashion to maintain vitality.
Tip: Experiment with brush angles: flatter for broad shapes, tilted for rounded edges. - 5
Layer and refine
Apply additional layers to build value and texture. Allow lighter layers to show through if needed, and keep a lighter hand over areas that should feel airy. Use lighter and darker tones to sculpt dimensional form through brush drawing.
Tip: Let layers dry when necessary to prevent mud and smearing. - 6
Clean up and preserve tools
Rinse brushes thoroughly, reshape bristles, and lay them flat or hang to dry. Wipe down your workspace and store materials to prevent bristle damage. Regular maintenance ensures your brushes stay responsive for future drawing in paint brush practice.
Tip: Never leave brushes soaking; it damages bristles.
Your Questions Answered
What is drawing in paint brush?
Drawing in paint brush means using brush marks to create lines, edges, and textures. It emphasizes stroke control and texture over graphite or ink precision.
Brush drawing uses brush marks to create lines and texture, focusing on control and texture.
What brushes are best for drawing in paint brush?
For drawing in paint brush, start with a round for fine lines, a flat for broad fills, and a filbert for soft curves. Synthetic brushes are versatile across acrylics and watercolors, while natural bristles excel with oils.
Round for detail, flat for general shapes, filbert for curves; choose based on your medium.
Can you draw clean lines with a brush?
Yes. Load lightly, maintain a steady wrist, and keep the brush nearly vertical for crisp edges. Practice with scrap marks to tune your line quality before applying to a painting.
Yes—steady wrist, light load, and a mostly vertical brush give clean lines.
How do I choose surfaces for brush drawing?
Choose surfaces that suit your medium: primed canvas or panels for acrylics, smooth paper for watercolors, and primed panels or prepared surfaces for oils. Surface texture will influence edge sharpness and texture density.
Match the surface to your paint—texture affects edges and texture.
What are common mistakes and fixes?
Common mistakes include muddy edges and overloading the brush. Fixes are to test stamps on scrap, wipe excess color, and layer with intent. Good practice means identifying and addressing issues early.
Mud, overload, and messy edges are fixable with tests and layering.
How should I clean my brushes after drawing in paint brush?
Rinse thoroughly with water or solvent, reshape bristles, and lay flat or hang to dry. Deep-clean natural hair brushes occasionally with a mild soap to keep bristles responsive.
Rinse, reshape, and dry properly to keep brushes responsive.
Watch Video
Quick Summary
- Practice brush control daily
- Match brush shape to your stroke goal
- Load paint sparingly for precision
- Layer gradually to build depth
- Maintain brushes to preserve performance