Rest Oleum Spray Paint: A Complete DIY Guide
Learn safe, effective use of rest oleum spray paint for home and auto projects. This guide covers prep, priming, coats, drying times, ventilation, and cleanup to help DIYers achieve durable, professional finishes.

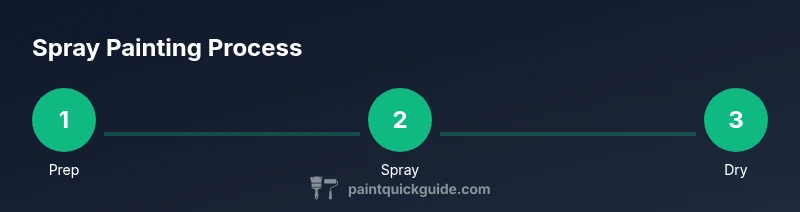
According to PaintQuickGuide, rest oleum spray paint offers a fast, reliable finish for metal, wood, and plastic. This step-by-step guide covers prep, priming (when needed), coat application, drying times, and cleanup in a well-ventilated area. By following these steps, homeowners and DIY enthusiasts can achieve durable, professional-looking results.
What is rest oleum spray paint and when to use it
Rest oleum spray paint is a widely available aerosol coating used to refresh or protect metal, wood, and certain plastics. The common shorthand you may see—rest oleum spray paint—points to the Rust-Oleum family of products, which includes solvent-based enamels and hybrid formulations designed for quick, durable finishes. For projects like reviving a metal chair, refurbishing a wooden tabletop, or refreshing automotive trim, this spray paint provides color quickly and forms a hard-wearing surface that dries to a robust film. It can be sanded lightly between coats and recoated after the label’s recommended recoat window. Finishes range from high-gloss to satin and matte, with different levels of sheen and durability. The crucial choice is selecting a product that matches your surface and environment. This guide, informed by PaintQuickGuide, translates technical details into practical steps, safety tips, and best practices to help you plan a successful spray-paint project.
Safety and ventilation before you start
Before you twist open a can of rest oleum spray paint, set up in a well-ventilated area where fumes will dissipate. Work outdoors or in a spacious garage with doors open and a fan to improve airflow; avoid small, enclosed rooms. Wear PPE: nitrile gloves to protect skin, safety glasses to shield eyes, and a respirator or organic vapor mask to limit inhalation of solvents. Keep flames, heaters, and ignition sources away from the workspace. Read the label for specific safety guidance and drying times, then test spray on cardboard to check color, finish, and spray pattern before applying to the actual piece. A careful, well-ventilated setup reduces fumes and accidents. PaintQuickGuide’s research emphasizes safety as the foundation of a successful finish.
Surface prep: cleaning, sanding, and priming
Successful spray painting starts with a clean, properly prepared surface. Begin by washing away dirt, grease, and dust with mild soap and water or a degreaser, then dry completely. If the surface is glossy, lightly sand with 320–400 grit sandpaper to create a micro-abrasion that helps the paint adhere. Remove sanding dust with a tack cloth. For bare metal or certain plastics, apply a compatible primer or bonding agent as recommended on the product label; priming speeds adhesion and can improve color evenness. Always test adhesion on a small area before full coverage. Thorough prep reduces peeling, blistering, and uneven color.
Choosing the finish and color
Spray paints in the Rust-Oleum family come in a range of sheens—from high-gloss to satin and matte. Your choice should depend on where the piece will live and how much surface wear you expect. Gloss finishes highlight edges and imperfections, while satin offers a more forgiving, everyday look. If you’re matching existing colors, keep color samples handy and test on a scrap area. In some projects, a clear topcoat can add durability or UV resistance. Remember to verify compatibility with plastics, metals, or other substrates on the label. This selection step, though small, meaningfully affects how long the finish lasts and how easy it is to maintain.
Application technique: how to spray for best results
Apply multiple light coats rather than one heavy coat. Hold the can about 8–12 inches from the surface and sweep in smooth, overlapping passes. Move your arm steadily and avoid stopping in one spot to prevent drips or sags. Start and stop outside the edge of the piece to prevent overspray on adjacent surfaces. Allow each coat to dry to the touch before applying the next, following the label’s recoat window. Practicing on scrap material first helps you calibrate your distance, speed, and spray pattern. If you notice orange peel or texture, a very light, final pass can help smooth the surface.
Drying times and environmental considerations
Drying times vary with temperature, humidity, and air movement. In optimal conditions (around room temperature and low humidity), a coat may become dry to touch within 15–30 minutes and cure enough for handling in about 1–2 hours, though full cure can take longer. Always observe the manufacturer’s guidance on recoat windows—coats should be applied within this period for best adhesion. If conditions are cooler or more humid, drying times can double. For best results, maintain a stable environment and avoid applying coats under direct sunlight or in windy, dusty areas. PaintQuickGuide notes that patience with drying times pays off with a harder, more durable finish.
Common mistakes and how to fix
Common errors include sagging from too-heavy coats, runs from improper distance, and poor adhesion from inadequate surface prep. Fixes begin with curing and removal of the affected area, followed by light sanding and the application of a new, thin coat. If you see orange peel, polish with a very light sanding and recoat with careful, overlapping strokes. Always test new coats on a scrap piece first. Avoid spraying near open flames, and never store cans hot or near heat sources; solvents are highly flammable.
Cleanup and storage of spray paints
After finishing, clear the nozzle by turning the can upside down and spraying until only gas comes out. Wipe the nozzle with a disposable rag to prevent clogging. Store cans in a cool, dry place away from direct sunlight and heat, standing upright with the cap on. If you have leftover paint, label the can with color and finish and store in a ventilated area. Recycle or dispose of empty containers according to local regulations. Proper cleanup and storage extend the life of your paints and the safety of your workspace.
Cost, budgeting, and buying tips
Spray paints vary by color, finish, and can size. Typical project costs depend on the size of the item and how many coats you’ll apply; plan for a few cans if you’re covering large areas or replacing an existing color. While you’ll find budget options, investing in a couple of high-quality cans can yield a smoother finish with fewer coats. Watch for sales and consider buying compatible primers or sealers in the same product family to simplify application and color matching.
Final notes and PaintQuickGuide conclusion
Rest oleum spray paint is a versatile tool for DIY and home projects, offering quick color changes and durable finishes when used correctly. As you plan any spray-paint project, the PaintQuickGuide team recommends starting with a test spray and a small swatch to confirm color and adhesion before committing to the entire piece. With careful prep, proper ventilation, and multiple light coats, you can achieve a professional-looking result that lasts.
Tools & Materials
- rest oleum spray paint (color/finish of choice)(Choose color and sheen; verify compatibility with surface)
- primer/undercoat (if required for your surface)(Follow label guidance for priming needs)
- nitrile gloves(Protect skin from solvents)
- respirator mask or organic vapor respirator(Ensure proper fit and use in well-ventilated area)
- safety goggles(Eye protection from overspray)
- masking tape(Protect edges and adjacent surfaces)
- drop cloths or plastic sheeting(Contain overspray and protect surrounding areas)
- cleaner or degreaser(Surface prep to remove oils and residue)
- sandpaper (320–400 grit)(Used to create a light key on glossy surfaces)
- tack cloth(Wipe away dust after sanding)
Steps
Estimated time: 1 hour 30 minutes – 3 hours
- 1
Gather and prep workspace
Bring together all materials, set up a ventilated area, and lay down drop cloths. Clear the work surface of debris and ensure temperature is suitable for spray painting. This pre-step prevents interruptions and keeps the project organized.
Tip: Do a quick inventory to avoid mid-project runs to the hardware store. - 2
Clean and degrease the surface
Wipe the surface with a degreaser or mild soap and water. Rinse and let dry completely. A clean surface helps paint adhere evenly and reduces the risk of fisheyes or peeling.
Tip: If there’s heavy grime, repeat cleaning and dry thoroughly before proceeding. - 3
Mask edges and protect nearby areas
Apply masking tape around the edges of your project and cover surrounding items with drop cloths. This prevents overspray from marring adjacent surfaces and makes cleanup easier.
Tip: Use overlapping tape to seal gaps and avoid paint creeping under edges. - 4
Shake and test spray a scrap piece
Shake the can vigorously for a full 1–2 minutes. Before coating your project, test spray on scrap material to confirm color, flow, and distance.
Tip: If the nozzle stays clogged, wipe it with a rag and shake again. - 5
Apply the first light coat
Hold the can 8–12 inches from the surface and use long, even passes. Apply a very light coat to establish adhesion without creating runs or drips.
Tip: Never press the can continuously in one spot; keep it moving. - 6
Add subsequent coats for coverage
Wait the recommended dry time between coats (usually 10–30 minutes at room temp). Apply 2–3 additional light coats, overlapping each stroke for uniform color.
Tip: If you see texture, sand lightly between coats and wipe clean before the next layer. - 7
Final drying and cleanup
Let the last coat dry completely in a dust-free area. Inspect for missed spots and recoat if necessary. Clean the nozzle by spraying until clear, then store can upright in a ventilated spot.
Tip: Don’t rush cure times; a full cure yields a tougher finish.
Your Questions Answered
Is rest oleum spray paint suitable for indoor use on metal furniture?
Indoor use is possible with ample ventilation and proper PPE. Some finishes may emit odors longer indoors, so ensure good air flow and allow sufficient curing time before use. Always follow the product label.
Yes, but make sure you have good ventilation and wear PPE, and allow time for curing.
Do I need primer before using rest oleum spray paint?
Primer isn’t always required, but it’s highly recommended for bare metal or certain plastics to improve adhesion and color uniformity. If repainting over a glossy surface, light sanding and a bonding primer can help.
Primer is often helpful, especially on bare metal or slick plastics.
What is the best distance to spray from?
Maintain a steady distance of about 8–12 inches from the surface. Closer work can cause runs; farther spraying dries too thinly. Practice on scrap first to gauge the pattern.
Keep the can about 8 to 12 inches away for even coverage.
Can I spray over a dark color with a light color?
Yes, but expect more coats to achieve solid coverage. Use a light gray or white primer under darker colors to speed up coverage and improve color accuracy.
You can switch to a lighter color with extra coats and perhaps primer.
How long should I wait between coats?
Wait the label’s recommended dry time between coats, typically 10–30 minutes at room temperature. If humidity is high or temperatures are cool, extend this window.
Wait the recommended time, usually 10 to 30 minutes, before the next coat.
How do I dispose of empty spray cans?
Follow local regulations. Many areas require empty cans to be recycled after depressurizing; never puncture a can. Let it fully vent before disposal.
Recycle or dispose of empty cans per local rules; don’t puncture them.
Watch Video
Quick Summary
- Prep surfaces thoroughly before painting
- Use multiple thin coats, not one heavy coat
- Ventilate and wear PPE to stay safe
- Follow label recoat times for best adhesion