Paint Rust-Oleum: A Practical DIY Guide for Home & Auto
Learn how to choose, prep, apply, and finish with Rust-Oleum paints for interior, exterior, and auto projects. Practical tips, tools, and safety insights from PaintQuickGuide.

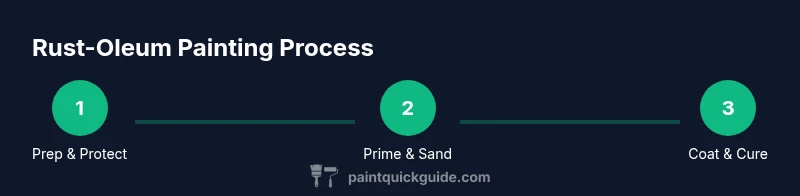
Learn how to paint with Rust-Oleum: choose the right product, prep surfaces, apply even coats, and cure properly for durable results. This guide covers interior, exterior, and automotive uses, with safety and cleanup tips. Based on PaintQuickGuide testing, following the steps yields professional-looking finishes with minimal drips. Whether you're refreshing furniture or metalwork, this how-to keeps it simple.
Why Rust-Oleum stands out for home and auto projects
Rust-Oleum has built a long-standing reputation for durable coatings that work on a variety of surfaces—from metal and wood to concrete and plastic. When you need a finish that resists moisture, corrosion, or abrasion, many Rust-Oleum products are designed to form a protective film that lasts longer than basic paints. For homeowners and auto refinishing enthusiasts, the appeal is broad color choices, convenient formats (brush-on, roll-on, spray), and a consistent application experience. In this guide, we’ll explore how to paint rust oleum with a practical, step-by-step approach that minimizes drips and promotes even coverage. According to PaintQuickGuide, picking the right formulation—whether water-based for interiors or oil-based for metal surfaces—can dramatically affect adhesion and drying behavior. The broader lesson is simple: start with a clear surface, a compatible primer, and thin, even coats. This approach helps you achieve durable results while keeping cleanup manageable and costs predictable.
Preparing surfaces for Rust-Oleum paint
Surface prep is the single most important factor in a long-lasting finish. Dust, grease, and old flaky coatings will sabotage adhesion, leading to peeling or uneven color. Start by cleaning the area with a mild detergent solution, then rinse and dry thoroughly. If you’re painting glossy or smooth surfaces, a light sanding (220–320 grit) creates micro-abrasions that improve grip. For aluminum, galvanized metal, or plastics, use a compatible primer to enhance bonding. Protect surrounding areas with drop cloths or painter’s tape and ensure proper ventilation. Wear a mask and safety glasses to minimize inhalation of fumes, especially when using solvent-based formulas. In this phase, aim for a clean, dry, and slightly textured surface to accept the coating evenly. The preparation steps outlined here are part of the reason “paint rust oleum” projects turn out smoother and more durable over time. Pro tip: work in moderate temperatures and avoid applying in direct sun or on surfaces that are too hot, which can cause premature drying and brush marks.
Selecting the right Rust-Oleum product for your project
Not all Rust-Oleum products are created equal. Interior walls, metal appliances, outdoor railings, and automotive parts each benefit from a specific formulation. For walls, water-based enamels provide low odor and easy clean-up, while for metal or wood applications you might prefer an oil-based enamel or rust-inhibiting primer. If you’re refinishing a car or metal hardware, spray formats can offer even coverage on complex contours, but brush-on variants allow more control on tight corners. Consider the level of gloss you want (matte, satin, or gloss) and the sheens that suit your space. Always check the label for surface compatibility, drying times, and recoat windows. Paint rust oleum products differ in drying behavior and cure times; reading the label helps you time your coats properly and avoid runs. A practical approach is to match the product to the substrate and to the environment (indoor vs outdoor). PaintQuickGuide’s testing shows that compatibility and technique drive results as much as product choice. Remember to use the right primer where necessary to ensure flawless adhesion and long-term performance.
Surface-specific guidance: interior, exterior, and automotive
Interior surfaces like drywall, plywood, or trim respond well to water-based Rust-Oleum paints, particularly when combined with a compatible primer. For exterior surfaces such as deck railings or siding, choose weather-resistant formulations and plan for multiple thin coats. Automotive projects require products designed for durability and solvent resistance; spray paints designed for automotive use often yield smoother finishes on curved panels. Always read the label to verify substrate compatibility and recommended curing conditions. In humid climates, allow extra drying time between coats and avoid applying too thick a single coat, which can trap solvents and lead to hazing. In all cases, the goal is to achieve a uniform film that resists wear and environmental exposure. This approach aligns with PaintQuickGuide’s guidelines for achieving consistent color and finish across different substrates while maintaining a practical workflow.
Application techniques and tool choices
Your technique shapes the final look almost as much as the product itself. For larger flat areas, use a high-quality roller with a short nap and apply in steady, overlapping strokes to avoid lap lines. For doors, trim, or tight spots, a brush with synthetic filaments provides better control. When using spray formats, hold the nozzle at a consistent distance and sweep across the target area in smooth, even passes. Between coats, maintain proper ventilation and avoid re-coating too soon; waiting for the prior coat to reach the recommended dry time yields better adhesion and finish. If you’re using multiple products, label each coat and keep a consistent sequence to minimize color drift. The combination of correct product choice and proper tool technique is essential for a professional result that stands up to daily use.
Drying, curing, and recoating timing
Drying and curing times vary by product type, temperature, and humidity. A typical water-based finish dries to the touch within a few hours, but full cure may take longer. Oil-based finishes generally require more time between coats due to solvent evaporation. Always refer to the label for the exact window before applying a second coat. Keep the area well-ventilated during drying, and avoid heavy handling or cleaning of the painted surface until it has cured. If you notice dust or debris settling on a fresh coat, wait for the surface to dry, then gently sand and recoat for a smoother result. This patience pays off with fewer imperfections and a more durable final appearance. PaintRustOleum projects benefit from a consistent routine and a respect for the product’s recoat guidelines to achieve lasting results.
Maintenance, cleanup, and storage tips
Cleaning up after painting is straightforward if you use the right solvents and tools. Water-based formulas clean up with soap and water; oil-based products require mineral spirits or a dedicated solvent. Always wipe brushes and rollers clean promptly to preserve their shape for future use. Store cans with lids tightly sealed and label them with the date and project name for future touch-ups. If you encounter adhesion issues, a light scuff with sandpaper and a fresh coat can restore the surface’s look, but avoid sanding through the new finish. With proper maintenance, a Rust-Oleum job can continue to look good for years.
Quick takeaway: why prep and patience matter
Preparation and proper drying are the keys to a durable finish when you paint rust oleum products. The right primer, smooth surface, thin coats, and correct drying times prevent common issues like drips, orange peel, or premature wear. Following systematic steps ensures a professional result that stays looking good longer, whether you’re painting walls, outdoor furniture, or automotive parts.
Tools & Materials
- Rust-Oleum product (appropriate for the project)(Choose water-based for interiors; oil-based for metal/wood; spray vs brush-on depends on surface geometry.)
- Safety gear(Respirator mask, safety glasses, gloves)
- Drop cloths and painter's tape(Protect floors and adjacent areas)
- Primer compatible with Rust-Oleum(Use on glossy or challenging substrates)
- Sandpaper (220-320 grit)(For deglossing and feathering edges)
- Cleaner/degreaser(Grease and residue removal before painting)
- Paint tray or spray equipment(Select based on format (brush/roller vs spray))
- Stir sticks and disposable rags(Mix paints thoroughly and wipe spills)
- Ventilation aid(Open windows or use a fan for indoor projects)
- Solvent or water for cleanup(Follow product guidelines for cleanup)
Steps
Estimated time: 3-6 hours
- 1
Prepare workspace and protect surroundings
Set up a clean, ventilated area. Move furniture, lay drop cloths, and tape off edges. Inspect the surface and identify any areas needing repair before you begin.
Tip: Place a strip of tape along any edge you don’t want painted to prevent accidental drips. - 2
Clean and degrease the surface
Wipe the surface with a mild detergent solution or degreaser, then rinse and dry completely. Remove any old paint that’s flaking to ensure good adhesion.
Tip: Avoid leaving water or cleaner residue that could interfere with adhesion. - 3
Lightly sand to create a key
Sand glossy finishes with 220–320 grit until dull. Clean away dust with a tack cloth before priming.
Tip: Focus on edges and corners where paint often pulls away. - 4
Prime if needed
Apply a compatible primer on bare wood, metal, or glossy surfaces. Allow primer to dry per label instructions before painting.
Tip: Primer improves adhesion and can reduce the number of coats needed. - 5
Stir paint and load tools
Stir thoroughly to ensure uniform color and consistency. Load your brush or roller and remove excess paint to avoid drips.
Tip: Do not shake the can; it traps air and creates bubbles. - 6
Apply the first coat evenly
Use long, smooth strokes with consistent pressure. Overlap strokes to maintain a uniform film and avoid runs.
Tip: Thin coats dry faster and reduce drips; multiple light coats outperform one thick coat. - 7
Dry, recoat, and finish
Let the first coat dry to the touch, then apply a second coat if needed. Inspect for uneven spots and sand lightly between coats if required.
Tip: Don’t rush the curing process; patience yields a better finish.
Your Questions Answered
What is the best Rust-Oleum product for interior walls?
For interior walls, a low-odor water-based enamel or satin finish is typically recommended. Always check the label for surface compatibility and drying times. Consider a compatible primer for glossy or repaired surfaces to improve adhesion.
For interior walls, start with a water-based enamel or satin finish and use a compatible primer if the surface is glossy or repaired.
Can Rust-Oleum be used on metal, wood, and plastic?
Yes—Rust-Oleum offers products designed for metal, wood, and some plastics. Always verify the product’s label for substrate compatibility and follow the recommended preparation steps.
Yes, but always check the label to confirm compatibility with metal, wood, or plastic before painting.
Do I need a primer before Rust-Oleum paint?
Primers are recommended when bonding is uncertain, when painting glossy finishes, or when covering stains. A compatible primer improves adhesion and can reduce the number of coats required.
Primer helps with adhesion, especially on glossy surfaces or stains.
How long does Rust-Oleum take to dry?
Drying times depend on the product and conditions. Most water-based finishes are dry to the touch within hours, but full cure may take longer. Always follow the label for accurate guidance.
Drying times vary; follow the label for exact guidance.
Is indoor use safe with proper ventilation?
Yes, with adequate ventilation and proper PPE. Use water-based formulas when possible indoors to minimize fumes, and avoid using solvent-rich products in small, enclosed spaces without airflow.
Yes, but ventilate well and wear PPE indoors.
Watch Video
Quick Summary
- Inspect surface and protect surrounding areas
- Choose the right Rust-Oleum product for your substrate
- Prepare surfaces thoroughly for best adhesion
- Apply multiple thin coats with proper drying in between