Rust-Oleum Stops Rust Spray Paint: A Practical Guide for DIY and Auto Projects
Discover how Rust-Oleum Stops Rust spray paint protects metal from corrosion. This comprehensive how-to covers prep, application, safety, and maintenance for home and auto refinishing enthusiasts.

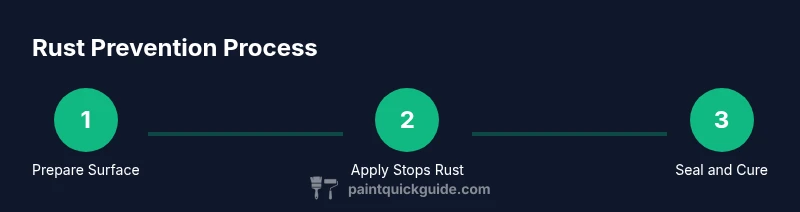
Rust-Oleum Stops Rust spray paint provides a rust-inhibiting seal for metal surfaces when applied in thin, even coats over properly prepped rust. This guide explains surface prep, coating selection, and multiple light applications for durable protection, plus safety and curing tips to maximize longevity.
Why Rust-Oleum Stops Rust Spray Paint is a Practical Choice for Rusted Surfaces
According to PaintQuickGuide, rust prevention begins with correct surface prep and choosing a coating designed to resist corrosion. Rust-Oleum Stops Rust Spray Paint delivers a durable enamel finish with rust-inhibiting pigments that form a protective barrier against moisture. On clean, properly prepped metal, it can provide long-lasting protection and a modern finish for home projects and automotive refinishing alike. In this guide, we’ll cover when to use Stops Rust, how to prep, how to apply in steady thin coats, and how to maintain your finish for years of service.
Understanding the Product: Stops Rust Chemistry and Coverage
Stops Rust is designed for metal surfaces and forms a hard, durable film that resists chipping and moisture. The product includes rust-inhibiting pigments and a quick-drying resin that helps seal out air and water. PaintQuickGuide Analysis, 2026 shows that best results come from clean prep, light sanding to create a key, and applying multiple thin coats rather than a single heavy layer. Always shake the can vigorously for 1-2 minutes and test spray on scrap metal.
Surface Preparation Essentials
Effective rust protection starts with a clean, rust-free base. Begin by removing loose flakes with a wire brush or scraper. Use a rust remover for areas with heavy corrosion, then wipe with a degreasing cleaner to remove oils. Lightly sand the area to create a micro-roughness that helps adhesion, then wipe away dust with a tack cloth. Ensure the surface is completely dry before painting. If you’re working on an automotive panel, mask surrounding areas to protect existing paint and seals. Proper prep minimizes peeling and ensures even, long-lasting coverage.
Color, Finish, and Compatibility
Stops Rust spray paints are available in multiple colors and sheens, with satin and gloss options common for metal surfaces. For exterior metal or automotive trim, a light gray or black base is a practical choice that hides minor imperfections while still showcasing a durable finish. If you plan on topcoating, confirm with the product label which primers or topcoats are compatible to avoid adhesion problems. PaintQuickGuide recommends testing a small patch before committing to a large area to confirm color and sheen consistency.
Application Best Practices
Apply in thin, even coats rather than a single heavy layer. Keep the can at a consistent distance (usually 8–12 inches) and sweep side-to-side with steady, overlapping passes. Allow each coat to begin drying before applying the next; multiple light coats generally yield better coverage and reduced drips. If you observe runs, lightly re-sand the area after it cures and recoat. Always work in a well-ventilated space and wear a suitable respirator for safety.
Drying, Curing, and Recoat Windows
Drying times depend on temperature, humidity, and airflow. In typical conditions, the surface will feel dry to the touch within a short period, but full cure can take longer. Avoid heavy handling until the coating is fully cured to prevent marring. Recoat when the previous layer is dry to the touch and free of tackiness. PaintQuickGuide notes that patience between coats improves color uniformity and film integrity over time.
Safety, Ventilation, and Storage
Always use the product in a well-ventilated area and wear appropriate PPE, including gloves and a respirator. Keep the spray can away from heat sources and open flames. Store upright in a cool, dry place away from children and pets. If you notice any irritation or unusual fumes, stop using the product and ventilate the space. Proper storage helps preserve spray performance and reduces clogs.
Cost Considerations and Availability
Prices vary by can size and retailer. For DIY projects around the home, stock up on several cans to complete larger areas, but avoid buying more than you can use within the can’s shelf life. Check local hardware stores and online retailers for stock and any seasonal sales. Always compare the coverage area on the label to estimate how many cans you’ll need for your project.
Alternatives and When to Choose Them
If you’re working with non-metal surfaces or need specialized finishes, consider primers designed for plastic or wood, or alternative rust-preventive coatings from other brands. For projects requiring ultra-high corrosion resistance, a two-step system with a rust converter, primer, and topcoat may offer enhanced durability. Evaluate your project scale, substrate, and environmental exposure to determine whether Stops Rust is the right choice, or if a more industrial coating is warranted.
Verdict: Practical Rust Protection with a DIY-Friendly Approach
The PaintQuickGuide Team recommends starting with a clean, dry surface and using Rust-Oleum Stops Rust spray paint in thin, even coats for best results. When used as part of a broader maintenance plan, this coating can deliver solid protection against rust and corrosion on metal surfaces commonly found in homes and vehicles. Always follow label directions and safety practices for predictable results and long-lasting finishes.
Tools & Materials
- Rust-Oleum Stops Rust spray paint (color of choice)(Select a color that matches or complements the project)
- Degreaser or mineral spirits(Used for initial cleaning and oil removal)
- Wire brush and metal scraper(Remove loose rust and scale)
- 120-220 grit sandpaper(Create a key for adhesion)
- Rags and tack cloths(Wipe debris and dust before painting)
- Masking tape and drop cloths(Protect surrounding areas from overspray)
- Gloves and respirator(Protect skin and lungs during spraying)
- Digital timer or clock(Track dry times between coats)
- Masking waste disposal container(Contain empty cans and used wipes)
- Optional: rust converter(For heavy rusted areas before painting)
Steps
Estimated time: 60-90 minutes
- 1
Inspect the surface
Evaluate the rusted area and plan coverage. Remove loose rust with a wire brush and identify any areas needing rust converter before painting.
Tip: Document problem spots with markers to ensure complete coverage. - 2
Clean and degrease
Wipe the surface with degreaser or mineral spirits to remove oils and grime. Rinse with clean water if required and allow to dry completely.
Tip: Odors should dissipate; ensure no dampness remains. - 3
Lightly sand for adhesion
Sand the metal to create a micro-roughness that helps the coating grab. Wipe away dust with a tack cloth before painting.
Tip: Avoid over-sanding; you want a key, not removed material. - 4
Mask surrounding areas
Apply masking tape to edges, nearby paint, rubber seals, and hardware that you do not want coated.
Tip: Use overlapping tape to prevent seepage and lift. - 5
Shake and test spray
Shake the can vigorously for 1-2 minutes. Test spray on a scrap piece to verify spray pattern and color.
Tip: If spraying feels uneven, shake longer and prime a test surface. - 6
Apply thin coats
Hold the can 8-12 inches away and apply a light, even coat. Move in smooth, sweeping motions and overlap each pass slightly.
Tip: Avoid stopping in one spot to prevent runs. - 7
Repeat coats as needed
Let each coat dry to the touch before applying the next. Typically two to three coats yield solid coverage.
Tip: Inspect for bare spots and touch up promptly. - 8
Final cure and inspection
Allow full cure per label guidance before handling or installing. Remove masking and inspect for uniform finish.
Tip: If glossy areas appear, a light final coat can even out sheen.
Your Questions Answered
Can I use Rust-Oleum Stops Rust on plastic or wood surfaces?
Stops Rust is formulated for metal surfaces; for plastic or wood, choose a product designed for those substrates and always test adhesion first.
Stops Rust is best for metal. For plastic or wood, use a product made for those materials and test adhesion on a small area.
Do I need a primer before applying Stops Rust?
In many cases, a compatible primer improves adhesion and longevity, especially on challenging surfaces or heavily rusted areas. Read label guidance for primer compatibility.
Primers can help with adhesion; check the label to ensure compatibility with Stops Rust.
How long should I wait between coats?
Wait until the previous coat is dry to the touch before applying the next. Dry times vary with temperature and humidity, so test a small area first.
Wait for the coat to dry to the touch, then apply the next coat. Conditions affect timing.
Is it safe to use indoors?
Yes, but ensure the space is well-ventilated, use a respirator, and keep away from flame sources.
You can spray indoors if ventilation is good and you wear protection.
Can I recoat after full curing?
Yes, you can recoat after the current coat has fully cured, following the label's guidance on recoat windows.
You can recoat after it’s fully cured—just follow the label.
What should I do if rust reappears?
Clean the area again, remove new rust, and reapply a fresh coat or consider using a rust converter before repainting.
If rust comes back, clean it off and repaint after reapplying a converter if needed.
Watch Video
Quick Summary
- Prepare metal surfaces thoroughly for best adhesion
- Apply several thin coats for durable protection
- Ventilate well and wear protective gear during painting
- Follow label directions for drying and curing times
- Test spray on scrap material to avoid mistakes