Paint Number Kit: A Practical DIY Guide for Numbers
Learn to choose, prep, and apply a paint number kit for durable house or car numbers. Step-by-step guidance, cost ranges, and safety tips for DIY projects.

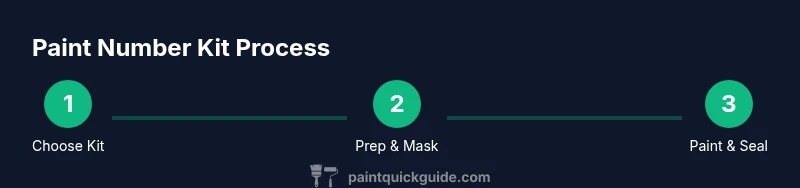
This guide shows you how to choose, prep, and apply a paint number kit for durable, legible numbers on homes or cars. You’ll learn how to select the right kit for your surface, mask the area, apply multiple coats with proper drying times, and finish with protective sealant.
What is a paint number kit and why use it?
A paint number kit is a ready-made system designed to help you apply numerals to a variety of surfaces with consistent size, spacing, and finish. Typical components include a stencil or vinyl template, one or more paint colors (often enamel or acrylic), an applicator, and a protective topcoat. Using a kit simplifies alignment and reduces the risk of crooked digits, especially for outdoor projects. The kit makes it easier for DIYers to achieve professional-looking results without specialized tools.
According to PaintQuickGuide, selecting a kit that matches your surface type and climate improves durability and readability, particularly on exterior surfaces exposed to sun and rain. When you start, confirm the kit contains a reliable stencil or template and a topcoat compatible with your substrate. This reduces common errors like bleeding, misalignment, or chipping over time. By choosing a kit designed for numbers rather than generic art projects, you’ll achieve sharper, more consistent digits on any wall, mailbox, or vehicle panel.
The basics of a paint number kit
A typical paint number kit provides the basic elements needed to render numbers clearly and consistently. The stencil or template guides precise alignment; the paint enables color and sheen; and the finish seal protects against wear. For homeowners and auto enthusiasts, a quality kit reduces rework and saves time compared with improvising templates and paints from separate purchases. Always check that the template size corresponds to your planned number height and spacing, and verify that the paint is suitable for outdoor exposure if your project is outside.
Planning for surfaces and climate
Surface compatibility matters: metal, wood, plastic, and concrete each respond differently to paints and sealants. A high-adhesion enamel is often preferred for metal and outdoor use, while acrylics work well on smooth substrates. Some kits include primers or pre-sealing steps; if not, plan to apply a compatible primer to improve adhesion and color fidelity. In climates with high humidity or strong UV, select a UV-stable topcoat and allow longer curing times between coats. PaintQuickGuide emphasizes testing a small patch first to confirm color match and finish before committing to the full project.
Tools & Materials
- Paint number kit (stencil/vinyl template, paints, topcoat)(Ensure color options match the intended surface and provide a durable finish)
- Masking tape(Use painter's tape, 1 inch wide or wider, for clean edges)
- Masking film or drop cloth(Protect surrounding areas from overspray and drips)
- Isopropyl alcohol (70%+) or surface cleaner(For degreasing and prepping the surface before painting)
- Microfiber cloths(Dust removal and wipe-downs; avoid lint that can stick to wet paint)
- Fine-grit sandpaper (220–400 grit)(Smooth rough surfaces and enhance adhesion of primer/paint)
- Gloves and safety eyewear(Protect hands and eyes from chemicals and splashes)
- Paint trays or palettes(Organize colors and keep paints clean)
- Rubbing alcohol or solvent(For spot-cleaning mistakes after drying)
- Ruler or measuring tape(Accurate spacing and alignment of numbers)
Steps
Estimated time: 2-3 hours (plus drying time between coats)
- 1
Choose the kit
Review the kit components and confirm the template height and spacing suits your target surface. Check the paint type for outdoor or indoor use and ensure the topcoat provides the needed durability and UV resistance.
Tip: If possible, buy a kit with a pre-muffed or built-in edge to help alignment. - 2
Prepare the workspace
Clear the area, cover nearby surfaces, and clean the target area with isopropyl alcohol. Let the surface dry completely before starting.
Tip: Lay out tools in a logical order so you don’t hunt for them mid-project. - 3
Mask and protect
Apply masking tape along the edges and place the stencil or template accurately. Use masking film for large surfaces to catch overspray.
Tip: Double-check alignment with a temporary light pencil mark or removable tape guide. - 4
Apply base coat or background
If your numbers sit on a background color, apply a thin base coat and allow it to dry per the product’s recommendations before adding numbers.
Tip: Thin coats dry faster and reduce runs; more coats may be necessary for solid coverage. - 5
Paint the numbers
Carefully fill in the lined areas within the stencil. Use light, even strokes and avoid heavy coats that could bleed.
Tip: Keep the template in place while painting and remove rosin tape slowly to prevent pull-off. - 6
Let it dry and recoat
Allow the first coat to dry completely, then apply additional coats for depth and even color. Check for any gaps and touch up as needed.
Tip: Timing between coats depends on humidity and temperature; if in doubt, wait longer rather than rushing. - 7
Seal and cure
Apply a compatible clear topcoat once the color coats are fully dry. Allow ample curing time before exposure to weather or handling.
Tip: A UV-rated topcoat will extend life in sunny exposures.
Your Questions Answered
Can I use a paint number kit on metal, wood, and plastic surfaces?
Yes, many kits are designed for multiple surfaces, but check the paint type and primer needs for each material. A primer may be required for metal or difficult plastics to improve adhesion.
Most kits work on metal, wood, and plastic surfaces, but you may need a primer for metal or certain plastics to boost adhesion.
How long does it take to dry between coats?
Drying times vary with temperature and humidity. Plan for at least 15-60 minutes between coats, and longer in cooler or wetter conditions.
Drying depends on conditions, but expect 15 to 60 minutes between coats unless the product specifies longer.
Do I need a primer before applying the kit?
A primer is often beneficial for bare metal or non-porous plastics. If your kit includes a guideline or primer, follow that; otherwise choose a compatible primer.
Primer helps with adhesion and color fidelity on challenging surfaces, so consider using one when needed.
Is the finish weather-resistant for outdoor use?
Choose a kit with UV-stable pigments and a durable topcoat for outdoor use. Outdoor results are improved by proper surface prep and multiple thin coats.
Outdoor use needs UV protection and a strong topcoat; follow the product’s weather ratings.
Can I change the color after application if I’m not satisfied?
You can repaint, but you’ll need to remove or cover the existing digits and reapply with proper masking. Consider testing color options before finalizing.
Yes, but you’ll need to redo masking and possibly remove the old paint, then re-coat with the new color.
Watch Video
Quick Summary
- Choose a kit matched to surface and climate.
- Prep thoroughly for clean, durable results.
- Apply multiple thin coats with proper drying times.
- Seal after painting to protect against wear.
- Test on a scrap area before full application.