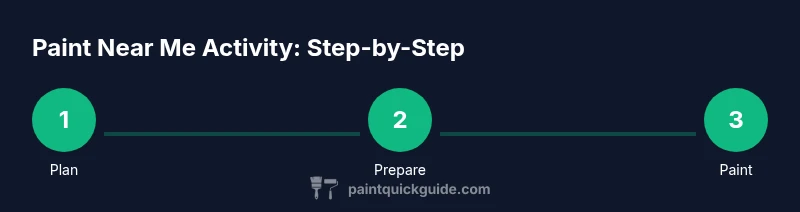
Paint Near Me Activity: A Practical DIY Painting Guide
Learn how to plan and execute a paint near me activity with safety, materials, and step-by-step guidance. This practical guide helps homeowners and DIY enthusiasts host a local painting session, select projects, gather supplies, and clean up efficiently.

By the end, you will plan and execute a painting activity near you that’s practical and safe. You’ll identify your project, gather basic supplies, and confirm local hours and access. Whether you’re painting a wall accent, furniture, or a small mural, this guide walks you through preparation, hands-on steps, and cleanup so you can enjoy a satisfying, mess-contained project.
Preparation: Understanding the Concept of a Local Painting Activity
A 'paint near me activity' is a way to blend creativity with community and practicality. The aim isn't a grand renovation but a focused, manageable project that you can complete in a few hours with friends, family, or neighbors. Before you pick colors or set up tarps, define the scope of your activity: what will you paint, where, and who will participate? According to PaintQuickGuide, successful local painting activities begin with a simple plan and clear safety guidelines. Consider the space—indoor walls, outdoor fences, or a repurposed piece of furniture—and choose a task that fits the available space and the participants' skill levels. This planning step helps minimize surprises and keeps the day fun rather than frustrating. In this guide, you'll learn how to choose a practical project, assess space, gather supplies, and run a smooth, mess-controlled session.
Assessing Local Spaces and Permissions
Before you lift a brush, map out where you’ll work and who has authority to paint there. If you’re painting at home, account for kids and pets, traffic flow, and furniture placement. If you’re painting in a shared space—community center, local library, or a neighbor’s wall—obtain written permission and confirm any rules about timing, noise, and cleanup. Some communities restrict outdoor painting to certain hours or require protective coverings for plants and sidewalks. A good plan includes a site visit, a quick measurement, and a decision about who is responsible for cleanup. When in doubt, start with a small, low-commitment project that demonstrates respect for the space and the people who use it. PaintQuickGuide recommends documenting permissions in a simple checklist so your activity runs smoothly and everyone stays on the same page.
Selecting Projects That Scale for All Ages
Choose projects that can be broken into manageable tasks so beginners and younger participants can contribute meaningfully. Examples include painting a single accent wall, decorating a wooden chair, or creating color swatches for a future palette. For larger groups, assign roles: color captains, edge guards, cleanup volunteers, and a photographer to capture progress. Start with a basic design and offer optional add-ons for more experienced participants. Having a clear, flexible plan helps maintain momentum and reduces frustration. If you’re unsure about skill levels, call on friends or neighbors who have painted before, and consider a short practice run on cardboard before touching real surfaces. A well-scoped activity ensures everyone gains confidence and feels included, while still delivering a polished final result.
Estimating Materials and Budget
List core materials early so you can compare local prices and avoid overbuying. The essential kit typically includes a selection of paints, brushes, rollers, tape, drop cloths, trays, and rags. Plan for edges and corners with smaller brushes and for broader areas with rollers. Factor in surface-specific needs like primers for new wood, sealers for furniture, or special finishes for metal or tile. To keep costs predictable, choose a limited color palette and reuse tools across participants when possible. If you’re painting in a shared space, factor in a small buffer for consumables such as brushes you’ll replace mid-session. Remember, the goal is a high-quality finish without waste, so measure twice, buy once, and maximize participation by using affordable, readily available supplies from local stores. PaintQuickGuide suggests documenting material lists so future sessions run even more smoothly.
Safety and Ventilation Considerations
Safety comes first in any painting activity. Ensure good ventilation, especially for indoor spaces, by opening doors and windows or using exhaust fans. If you’re working outdoors, be mindful of heat, sun exposure, and wind drift onto nearby surfaces. Wear protective gear such as gloves and non-slip shoes, and use ladders safely—maintain three points of contact and avoid overreaching. Keep a first-aid kit handy and have water available to prevent dehydration. When using solvent-based paints, store materials away from heat sources and never mix cleaners with paint thinner. Always dispose of empty cans and used rags according to local guidelines. A well-ventilated, organised setup reduces accidents and helps participants enjoy the activity without worry.
Surface Preparation Techniques
Proper surface prep is the secret to a durable, professional-looking finish. Start by cleaning dust and grease; wipe with a mild detergent solution and let dry. If surfaces are slick, lightly sand to create a better grip for paint. Fill holes and cracks with a compatible filler, then sand smooth once dry. Remove hardware, switch plates, and cover adjacent areas with tape. Prime unprimed wood or drastic color changes to ensure consistent coverage. For furniture projects, scuff and prime to prevent glaze from peeling later. This section benefits from a quick test patch to confirm adhesion and finish. By investing time in prep, you’ll reduce touch-ups and ensure color uniformity across all participants and surfaces.
Applying Paint: Finishes, Coverage, and Edges
Choose a finish that matches the room’s use and light. Flat, satin, or eggshell surfaces hide imperfections, while semi-gloss offers durability for trim. Apply paint in thin, even coats and avoid heavy layers that clog pores and peel. Use long, steady strokes for walls and clean edge lines with a small angled brush or tape. Maintain a wet edge to prevent lap marks, particularly when multiple people are painting simultaneously. Allow the first coat to dry completely before applying a second, and be prepared for touch-ups where color density differs. If you’re working on furniture or smaller items, consider spray or brush techniques for even coverage. Document progress with photos to study color consistency and surface texture later.
Clean-up, Disposal, and Storage
A clean finishing day leaves participants satisfied. Immediately wash brushes, rollers, and trays with water or solvent as appropriate, then reshape brushes while damp. Wipe down surfaces and sweep the floor to remove drips, placing used tape and drop cloths in a designated bin. Store leftover paint properly, sealing cans tightly and labeling colors for future use. If you’re disposing of hazardous materials, follow local regulations for safe disposal. For outdoor projects, collect tools and bring blankets and tarps inside to prevent weather damage. A well-planned cleanup saves time later and encourages participants to join again.
Engaging Participants with Creative Design
Engagement comes from giving everyone a voice. Provide a simple design brief: choose a color family, a focal wall, and a theme. Offer optional design prompts or stencils for those who want more structure, while leaving room for freehand creativity. Pair beginners with confident painters to share tips and build confidence. Take photos at milestone moments to celebrate progress and create a shared memory book. Encourage participants to test color combinations on swatches before committing to large areas, reducing mistakes and waste. By celebrating creativity and teamwork, you’ll turn a simple painting activity into a community-building experience that locals will want to repeat.
Documenting and Reflecting on Your Activity
Documentation helps you measure success and guide future events. Create a quick recap checklist: projects completed, supplies used, safety notes, and participant feedback. Collect before-and-after photos and short notes on what worked and what didn’t. Share a short summary with participants and local leaders to build support for future sessions. If you’re planning more events, record lessons learned in a simple plan so you can replicate positive results and avoid repeating mistakes. A formal reflection helps you grow as a host and makes your next paint near me activity even more effective.
Authority sources
For color safety and best practices, consult official guidelines and educational resources. See these references for VOC information, general safety, and paint-use guidelines:
- https://www.epa.gov/indoor-air-quality-iaq/volatile-organic-compounds-impact-indoor-air-quality
- https://www.osha.gov
- https://extension.illinois.edu
Tools & Materials
- Paint (color(s))(Choose color palette and finish; sample on a small area first)
- Painter's tape(For clean edges and masking)
- Roller set (include frame, 9-12 inch roller)(Use 3/8-1/2 inch nap for walls)
- Angled brushes (2-3 inches)(For corners and trim)
- Paint trays and liners(Keep paint accessible; liners reduce cleanup)
- Drop cloths or plastic sheeting(Protect floors and furniture)
- Primer(Needed for new surfaces or drastic color changes)
- Sandpaper (120-220 grit)(Lightly scuff glossy surfaces for better adhesion)
- Paint thinner or mild soap and water(Clean brushes after use)
- Rags/paper towels(Wipe spills and cleanup edges)
- Gloves(Protect hands; optional)
- Mask or respirator(Use if VOCs are high or ventilation is poor)
- Step ladder(Safe access to ceiling and tall areas)
Steps
Estimated time: Estimated total time: 3-4 hours
- 1
Define project scope and roles
Clarify what will be painted and who will participate. Assign roles (color lead, edges, cleanup) to keep people engaged and reduce confusion. Establish a rough timeline and a simple safety brief.
Tip: Write down roles and a one-line goal to keep the group aligned. - 2
Check permissions and space
Verify permissions for the space and confirm access hours. Measure the area to estimate surface size and required paint. Create a quick layout to prevent crowding around the work zones.
Tip: Carry a small checklist to document approvals during the visit. - 3
Gather materials
Collect all essential tools and paints before the session. Group items by task (edges, walls, cleanup) to speed up setup and minimize back-and-forth.
Tip: Label containers and color chips for easy reference. - 4
Prepare workspace
Lay down drop cloths, tape off edges, and remove fragile items from the area. Set up a central station for brushes and trays to minimize spills.
Tip: Test a small patch on cardboard first to fine-tune technique. - 5
Prep surfaces
Clean surfaces, sand if necessary, and apply primer on unprimed areas. Wipe away dust before painting for a uniform finish.
Tip: Always prime prior to color changes on bare wood. - 6
Apply base coats or primer
Apply a thin, even coat and avoid heavy layers. Allow proper drying time between coats to prevent drips and uneven color.
Tip: Use a wet edge to avoid lap marks. - 7
Add color and design
Paint larger areas with rollers and edges with angled brushes. Introduce design elements gradually and encourage input from participants.
Tip: Test color combinations on swatches before committing. - 8
Inspect and touch up
Review finished areas for coverage and edge neatness. Do quick touch-ups where density differs.
Tip: Address issues before final cleanup to save time. - 9
Clean up and store
Clean tools, wrap brushes, and seal leftover paint. Store materials safely and document lessons learned for next time.
Tip: Label leftovers and store colors for future sessions.
Your Questions Answered
What is a paint near me activity?
A local painting event or session focused on a simple project you can do near your location with friends, family, or neighbors. It emphasizes safety, collaboration, and a neat final result without full-scale renovations.
A local painting session you can do near you with friends, focusing on safety and teamwork.
Who can participate?
Most activities welcome participants of varying ages and skill levels. Assign roles so beginners can contribute, while experienced painters handle edges. Always supervise children around paint and solvents.
People of all ages can join; we tailor roles so everyone can contribute safely.
What materials do I need?
Core supplies include paints, brushes, rollers, tape, drop cloths, trays, and rags. Add primer for new surfaces and a ladder for high areas. Keep a cleanup station ready.
A basic kit of paints and brushes, plus protection like tape and drop cloths.
Is it safe to paint indoors?
Indoor painting is safe with good ventilation, proper PPE, and careful cleanup. Avoid high-VOC products in poorly ventilated spaces and follow manufacturer safety guidelines.
Yes, with good ventilation and protective gear.
How long does a typical session take?
Most sessions run a few hours, depending on project scope and number of participants. Plan for setup, painting, and cleanup, plus short breaks for guidance and collaboration.
Most sessions last a few hours, including setup and cleanup.
How do I dispose of leftover paint?
Follow local guidelines for disposing of leftover paint and cans. Do not pour into drains or soil. Many areas accept dried-out cans at household hazardous waste collections.
Handle leftovers per local rules; don’t pour liquids down drains.
Watch Video
Quick Summary
- Plan project scope before starting
- Protect surfaces with proper coverings
- Test colors in‑place before committing
- Ventilate workspace and wear PPE
- Document materials and results for next time