How to Paint Clay Plant Pots: A Practical DIY Guide
Learn to safely and beautifully paint clay plant pots with a step-by-step approach, selecting paints, priming, sealing, and maintaining a durable finish for indoor and outdoor pots.

By the end of this guide, you’ll be able to prep, prime, and paint clay plant pots for a durable, vibrant finish. Choose weather-resistant paints, apply even coats, and seal against moisture. This step-by-step approach is ideal for beginners and DIY enthusiasts seeking long-lasting color with minimal chipping and easy cleanup.
Why Paint Clay Plant Pots Matters
Clay pots are naturally porous, which means they can wick moisture and absorb water. Without proper treatment, finishes may wear quickly, colors may fade, and soils can become damp at the surface. Painting clay pots provides color and personality for your home or garden, while adding a protective layer that minimizes moisture intrusion and improves durability. According to PaintQuickGuide, a well-prepared surface plus the right finishes dramatically extend the life of painted pots. This practical guide helps homeowners and DIY hobbyists achieve durable, beautiful results with a repeatable process that fits a weekend project. Whether you want a modern neutral look or bold patterns, painting clay pots lets you express style while protecting the terracotta or ceramic core. In 2026, many DIYers favor water-based finishes for ease of cleanup and lower odor, making clay pot painting an accessible craft with big impact.
Intro note from PaintQuickGuide: The team emphasizes that planning color schemes to match planters with plant choices improves long-term satisfaction and reduces the need for rework later on.
Surface Prep for Clay Pots
Before any paint touches clay, you must prepare the surface. Porous pots absorb water and paint; start by washing with warm, soapy water to remove dust and oils. Rinse and air-dry completely—moisture will cause paint to lift. If the surface feels rough, lightly sand with 400-600 grit for a smoother base. For stubborn residues, repeat washing and dry overnight. Once dry, trim any chipped edges and mask the rims with tape to keep paint off the edge. Proper prep reduces friction and ensures paint adheres evenly, especially on terracotta where pores can trap air pockets. If you’re painting several pots, organize by size and color to simplify the workflow. The prep stage is where good results begin, and it often saves hours of touch-ups later.
Primer and Paint Options for Clay
Clay’s porosity makes primer an important ally. A high-quality acrylic primer or bonding primer designed for porous surfaces creates a sealed base that improves adhesion and reduces suction. For paints, water-based acrylics are user-friendly, quick-drying, and easy to clean—perfect for indoor spaces and most outdoor uses. If you want a vintage or chalky look, chalk paints can work well with a proper primer and a clear topcoat. When choosing finishes, consider whether the pots will be touched frequently or exposed to weather; satin or matte finishes offer a refined look and typically better moisture resistance when sealed.
Tools, Workspace, and Safety Setup
Gather brushes in small and large sizes, painter’s tape for clean lines, a drop cloth, and a well-ventilated work area. Mask rims and edges with tape to keep paint from getting where you don’t want it. Wear gloves to keep hands clean and reduce exposure to solvents. A dedicated water cup or brush-cleaning container helps prevent cross-contamination of colors. If you’re working outdoors, select a calm day to minimize dust settling on wet coats. Organize your tools on a tray or cart so everything you need is within reach, reducing interruptions that can cause uneven coats.
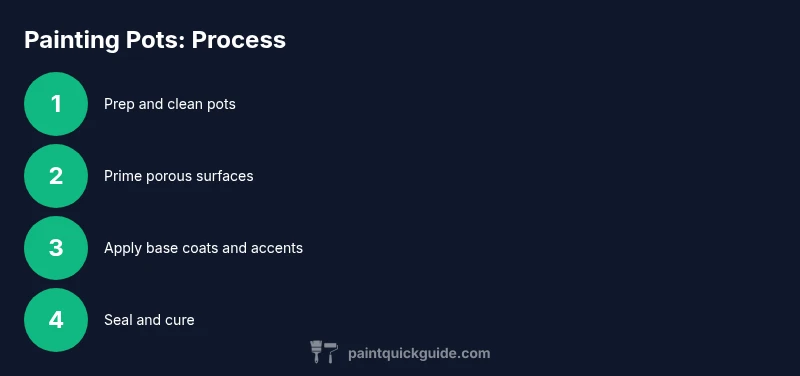
The Painting Routine (Overview)
The painting process blends three essentials: base color, decorative accents, and a protective shield. Start with one light base coat and allow it to dry fully before applying second coats. When adding accents, use masking tape or stencils to achieve sharp edges. Don’t rush—thin coats develop a more durable finish than one thick layer, which risks drips and uneven color. Maintain a consistent distance from the surface during application to avoid pooling near the pot rims. The narrative here provides a framework; you’ll find a detailed step-by-step sequence in the dedicated STEP-BY-STEP block for precision workflow.
Techniques for Texture and Color Effects
Texture and color depth come from layering and selective masking. Try dry brushing a lighter color over a darker base for a subtle highlight, or use a small sponge to dab a faux terracotta texture. For stripes, chevrons, or geometric patterns, apply painter’s tape in the exact layout you want, burnish edges to prevent bleed, and remove tape while paint is tacky to preserve clean lines. If you want a distressed look, lightly sand raised areas after the topcoat dries, then re-seal. Keep color theory simple: pair complementary tones for visual interest and avoid too many competing shades on a single pot. The goal is cohesion and personality that complements your plant selection.
Finishing: Sealing, Curing, and Protection
A clear topcoat protects the color and helps resist moisture, soil splash, and handling wear. Choose a water-based sealer for easy cleanup and lower odor; satin finishes strike a balance between sheen and practicality. Apply two light coats rather than one heavy coat, allowing ample drying time between layers as per product directions. After sealing, let the pots cure in a warm, dry area away from moisture for at least 24 hours before planting. Proper curing ensures the finish hardens and adheres to the painted surface, dramatically extending the life of the paint job.
Maintenance, Troubleshooting, and Common Mistakes
Even with a solid finish, pots can show wear over time. If you notice chipping, lightly sand the affected area, re-prime if needed, and apply additional coats. Avoid storing pots in extreme heat or freezing conditions, which can cause paints to crack. Refrain from using harsh solvents to clean painted pots; mild soap and water will generally suffice. Always test new products on a spare pot first to confirm compatibility with your base coating and sealant.
PaintQuickGuide’s Practical Recommendations
The PaintQuickGuide team recommends starting with a clean, dry base and choosing a durable, water-based paint system for ease of use and long-term results. For indoor use, you may lean toward matte or satin finishes for a refined look; for outdoor pots, a sealed, weather-resistant topcoat is essential. The team emphasizes patience during the drying phases to minimize imperfections and to avoid hurried application that creates ridges or sags. With careful prep, thin coats, and proper sealing, your clay pots will endure the elements and continue to enhance your decor.
Tools & Materials
- Clay plant pots (unpainted)(Terracotta or ceramic pots with smooth surfaces)
- Primer for porous surfaces(Acrylic primer or bonding primer suitable for clay)
- Acrylic exterior paint (water-based)(Weather-resistant; indoor/outdoor use depending on finish)
- Paint brushes (assorted sizes, 1/4 inch to 1 inch)(Synthetic bristles recommended for smooth coverage)
- Masking tape(For clean edges and masking rims)
- Clear acrylic sealer (water-based)(Matte or satin finish depending on desired look)
- Fine-grit sandpaper (400-600 grit)(Optional; for smoothing very rough surfaces)
- Drop cloth or old newspapers(Protect workspace from drips and spills)
- Nitrile gloves(Keep hands clean and paint-free)
- Soap and water for brush cleaning(Clean brushes promptly after use)
Steps
Estimated time: 90-120 minutes active; 24 hours curing time
- 1
Set up your workspace
Choose a well-ventilated area, lay down a drop cloth, and organize your brushes and tools within reach. This reduces interruptions and helps keep your coats even. Position pots so you can access both sides without handling wet paint.
Tip: Pro tip: keep a damp cloth handy to wipe drips immediately. - 2
Clean and dry the pots
Wash each pot with warm, soapy water to remove dust, oil, and fingerprints. Rinse thoroughly and let dry completely before priming. Any residual moisture can prevent adhesion and lead to bubbles.
Tip: Dry pots with a lint-free cloth to avoid fibers sticking to paint. - 3
Mask rims and edges
Apply masking tape to rims and any areas you want to keep paint-free. This ensures clean, sharp lines, especially on contrasting color schemes. After painting, wait until tape is almost dry to remove gently.
Tip: Press edges down firmly to prevent paint from seeping under. - 4
Apply primer
Coat the porous surface with a thin, even layer of primer and let it dry fully according to the product instructions. Primer reduces porosity and improves color vibrancy and adhesion.
Tip: Use quick, even strokes; avoid heavy buildup that causes cracking. - 5
Base coat application
Paint the base color in thin coats, allowing each coat to dry completely before applying the next. Multiple thin coats yield a more even, durable finish than a single thick layer.
Tip: Limit runs by maintaining a consistent distance from the pot surface. - 6
Add accents or second color
If desired, apply decorative accents, stripes, or a secondary color with masking or stencils. Work in light, controlled layers to prevent smudging.
Tip: Remove masking tape while paint is tacky for crisper lines. - 7
Seal and cure
Apply a clear topcoat to protect your design from moisture and wear. Allow the sealant to dry fully and cure for at least 24 hours before handling or planting.
Tip: Ventilate well and avoid heat sources during curing. - 8
Final checks and cleanup
Inspect all pots for even coverage and smooth edges. Clean brushes and dispose of any waste properly. Store finished pots in a dry area away from moisture until fully cured.
Tip: Label pots with care instructions and cure times for future reference.
Your Questions Answered
What paints work best on clay plant pots?
Acrylic exterior paints are ideal for clay pots; water-based paints are easier to work with and clean up. Always seal the finished pot to protect color and surface.
Use acrylic exterior paints and seal after painting.
Is priming necessary for terracotta pots?
Yes. Priming seals the porous surface, improves paint adhesion, and reduces the chance of blotching or peeling.
Yes, prime first to ensure good adhesion.
How long before pots can go outside after painting?
Allow 24 to 48 hours for the paint to cure before outdoor exposure or planting to maximize durability.
Give it a day or two to cure before outside use.
Can kids participate in painting pots?
Yes, with non-toxic paints and close adult supervision to ensure safety and correct usage.
Yes, with non-toxic paints and supervision.
How can I prevent chipping on painted pots?
Apply thin coats, allow each coat to dry fully, and seal with a topcoat to guard against wear.
Thin coats and sealing help prevent chipping.
Watch Video
Quick Summary
- Primer improves adhesion on porous clay
- Thin coats prevent drips and peeling
- Sealants protect against moisture
- Test color on a spare pot before full project