Paint a Bike: A Practical Step-by-Step Guide
Learn how to paint a bike at home with a durable, professional-looking finish. This comprehensive guide covers planning, surface prep, materials, application techniques, curing, and maintenance for DIY enthusiasts and homeowners.

By following this guide, you will learn how to paint a bike from start to finish: disassemble and prep the frame, select compatible primers and paints, apply color and a protective clear coat, and properly cure and maintain the finish. You’ll need ventilation, masking supplies, and basic hand tools. This process emphasizes safety and surface preparation for durable results.
Why Painting a Bike Is Worth Doing
A fresh paint job can extend the life of a bike frame by protecting it from rust and corrosion, while giving you a chance to customize color and finish to match your style. For DIY enthusiasts, painting your bike is a satisfying project that teaches adhesion theory, surface prep, color selection, and finishing techniques. According to PaintQuickGuide, the most durable bike finishes start with proper prep, high-adhesion primers, and a well-sealed clear coat. The PaintQuickGuide team found that homeowners who plan the project, use proper ventilation, and test compatibility between paints and primers enjoy longer-lasting results with smoother finishes. Whether you ride daily or collect vintage frames, a thoughtful approach to color, sheen, and durability makes your bike stand out while preserving structural integrity. This guide keeps practical steps clear so you can achieve a lasting, show-worthy finish on your ride.
Planning Your Bike Painting Project
Before touching a single spray can or brush, map out color, finish, and budget. Decide on a color palette that complements your bike's shape and components, and choose a finish (matte, satin, or glossy) that hides minor scratches. Consider whether you will paint the entire frame or just panels, and plan for decals or custom graphics. Create a simple test panel to trial color and adhesion. Check compatibility of primers, paints, and clear coats with the metal you’ll paint (steel, aluminum, or titanium). Finally, make a schedule that includes prep, painting sessions, drying, and curing time. PaintQuickGuide emphasizes that a well-planned approach reduces rework and yields a more uniform finish. Gather masking supplies, a clean workspace, and adequate ventilation to begin.
Surface Prep: Cleaning, Sanding, and Masking
Surface prep is the foundation of a durable bike paint job. Start by thoroughly cleaning the frame with degreasing detergent to remove oils, waxes, and road grime. Rinse and dry completely, then inspect for nicks and rust. Lightly scuff the surface with fine-grit sandpaper to promote primer adhesion, then wipe away dust with a tack cloth. Mask off areas you do not want painted, including bearings and components that can be removed. If you are repainting only a section, cover the rest of the frame with painter’s tape and masking film. Proper prep improves adhesion, minimizes orange peel, and helps your color lay down evenly.
Choosing the Right Materials: Primers, Paints, Clear Coats
Select a primer rated for metal and compatible with your chosen topcoat. For most bikes, a corrosion-resistant primer provides the best base. Choose a base color that matches your design, then select a clear coat to protect the finish from UV light and wear. If you plan to ride in wet or salty conditions, consider products with chemical resistance and moisture barriers. For spray painting, consider a HVLP spray gun or aerosol cans, depending on your experience and workspace size. Always check the manufacturer’s recommendations for dry and cure times, recoat windows, and layering. The right combination of primer, base, and clear will deliver a durable, glossy finish with long-term color stability.
Application Techniques: Brushing, Rolling, and Spraying
Spraying often yields the smoothest finish, but brushing and rolling can work on small parts or tight curves. Apply primer in light, even coats and allow proper flash-off time between passes. Build the color in thin layers to avoid runs and sags, then finish with a clear coat in thin coats. If using a spray gun, maintain a steady distance from the surface and move in steady, overlapping passes. For abrasives, light sanding between coats helps achieve gloss and adhesion. Always test on a scrap panel first to gauge spray pattern and color density. See accompanying diagrams for recommended patterns and step sequences to minimize uneven film buildup.
Authoritative Sources
Here are credible references for safety, environmental, and technique considerations:
- OSHA: https://www.osha.gov
- EPA: https://www.epa.gov
- University Extension Resources: https://extension.illinois.edu
Maintenance and Long-Term Care
After the final clear coat has cured, clean the bike with mild soap and water, avoiding harsh solvents that could degrade the finish. Store the bike out of direct sunlight to minimize UV yellowing and check bolts and headset alignment periodically for safety. Use a soft microfiber cloth to wipe away dust and avoid rubbing hard edges that could scratch the surface. With proper care, your paint job will maintain color depth and gloss for years, and you’ll be able to refresh or tweak color later with minimal prep work.
Tools & Materials
- Nitrile gloves(Multiple pairs; chemical resistance for solvents)
- Respirator with organic vapor cartridges(Ensure a proper fit; replace cartridges as needed)
- Masking tape(Low-tack for easy removal; width varies by area masked)
- Masking film or drop cloth(Protects floors and non-painted surfaces)
- Degreasing detergent or bike-specific cleaner(Removes oils and waxes before prep)
- Fine-grit sandpaper (320-400 grit)(Scuffs for primer adhesion)
- Tack cloth(Lint-free dust removal after sanding)
- Paint spray gun or aerosol cans(HVLP recommended for even coverage)
- Metal primer suitable for bikes(Choose corrosion-resistant and compatibility with topcoat)
- Bike-safe base coat paint (color of choice)(Light, even color layers)
- Clear coat (UV-resistant)(Protection against sunlight and wear)
- Paint thinner/cleaner(For cleaning tools and thinning if allowed by product)
- Screwdrivers and hex keys(For frame disassembly and reassembly)
- Ventilation fan or open-air setup(Maintain good airflow during painting)
Steps
Estimated time: Several hours for prep and application, plus full curing time
- 1
Disassemble and secure the frame
Carefully remove wheels, components, and accessories to expose the frame. Label parts and lay them out in an organized way so reassembly is straightforward. Secure the bike on a stand or in a stable setup to minimize movement during painting.
Tip: Use labeled bags for small parts; a clear workspace reduces mistakes. - 2
Mask off areas to remain unpainted
Apply masking tape to seams, threads, and components that should not be painted. Use masking film for larger areas and ensure edges are firmly pressed to avoid bleed-through. Double-check misaligned parts to prevent accidental masking gaps.
Tip: Weave tape slightly over edges to reduce lifted edges later. - 3
Clean, degrease, and prep the surface
Wash the frame with a degreasing cleaner to remove oil and wax. Rinse thoroughly and dry completely. Lightly scuff the surface with fine sandpaper to improve adhesion, then wipe with a tack cloth to remove dust.
Tip: Don’t skip tack wiping; dust traps under paint and causes texture issues. - 4
Apply the metal primer
Spray or brush a thin, even coat of primer designed for metal surfaces. Allow adequate flash-off between passes; avoid pooling. Lightly sand the primer after it dries for a smooth base.
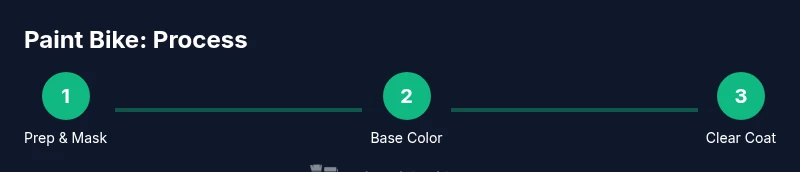
Tip: Keep a consistent distance from the surface to avoid runs. - 5
Apply the base color in thin layers
Apply the first color coat evenly in long, smooth passes. Allow drying time between coats and apply additional thin coats to reach full coverage without drips. Assess color depth on a scrap panel if possible.
Tip: Thin coats reduce orange-peel and improve color clarity. - 6
Seal with a clear coat
Mist or spray a clear protective layer over the color, using multiple light coats. Let each layer level and dry before applying the next. A proper clear coat adds UV resistance and durability.
Tip: Avoid applying the final coat too thickly to prevent cracking. - 7
Reassemble and inspect
Once the finish is fully cured, reinstall all components and check alignment. Inspect the surface for dust, runs, or orange peel and address with light polishing if necessary. Document any touch-ups for future protection.
Tip: Keep curing space free of dust during the final stage. - 8
Final care and maintenance
Wash with mild soap and water regularly; avoid harsh solvents. Store out of direct sun and protect from harsh weather. Periodically inspect for chips and perform minor touch-ups to extend life.
Tip: Use a soft cloth for cleaning to avoid micro-scratches.
Your Questions Answered
What type of paint is best for a bike frame?
Most hobbyists choose automotive-grade paints or dedicated bike paints (urethane-based systems) for durability and flexibility on metal frames. Follow the manufacturer’s recommendations for primers and clear coats to ensure compatibility.
Use automotive or bike-specific paints for durability and flexibility, following product instructions for primers and clear coats.
Can I paint over existing decals or logos?
Yes, you can paint over decals, but the results depend on adhesion and visibility after painting. If you want decals to show, remove or mask them carefully. For a clean design, plan decals before painting and seal with a clear coat.
You can paint over decals, but plan in advance if you want decals visible after painting.
Do I need a spray booth or special ventilation?
While a full spray booth isn't required, paint outdoors or in a well-ventilated space with a mask or respirator. A fan or open window helps reduce fumes and dust in the workspace.
Good ventilation is essential; use a mask and work in a well-ventilated area.
How long does it take to complete a bike paint job?
A typical project spans prep, color application, and clear coating over several days, with additional curing time. Allow for steps to dry between coats and for full cure before riding.
It usually takes several days including curing time; plan for pauses between coats.
Is powder coating a better option than painting a bike frame?
Powder coating is very durable but requires specialized equipment and processes. For DIY projects, traditional liquid paint with a clear coat is more accessible and easier to touch up.
Powder coating is durable, but typically requires professionals; DIY painting is more practical for most riders.
Can I re-spray the bike later if I want to change color?
Yes, you can repaint a bike frame after proper surface prep and cleaning. Each repaint adds steps, so plan for additional prep and potential color-matching challenges.
Yes, you can repaint later with good preparation and the right products.
Watch Video
Quick Summary
- Plan color, finish, and timing before starting.
- Prep surfaces meticulously for durable adhesion.
- Choose compatible primers and topcoats for a lasting finish.
- Ventilate and protect yourself with proper PPE.
- Follow curing guidance to maximize durability and gloss.