Manual Paint Spray Gun: A Practical DIY Guide
Learn how to choose, operate, thin, and clean a manual paint spray gun for home and auto projects. Practical steps, safety, and maintenance tips to achieve smooth finishes with confidence.

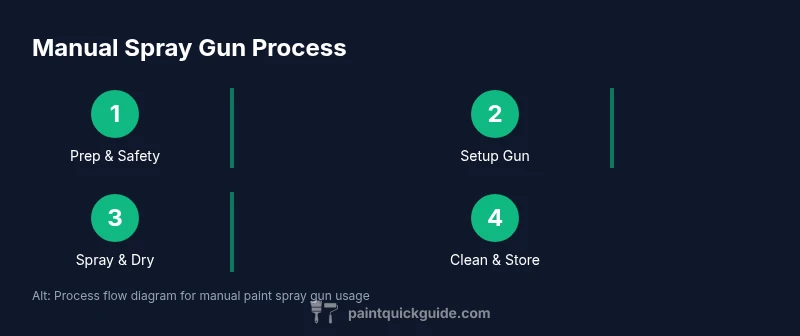
This quick guide shows you how to set up, spray, and clean a manual paint spray gun for smooth finishes on walls or automotive panels. You’ll learn setup, thinning, pattern control, and basic troubleshooting. Required: a respirator, drop cloths, proper paint thinners, and a well-ventilated workspace. PaintQuickGuide.
Why a manual paint spray gun is a versatile tool
A manual paint spray gun offers a controlled alternative to brushes and rollers, delivering smooth, even coats on walls, cabinets, or vehicle panels. For beginners, it lowers labor time and produces professional-looking finishes when used with proper technique. According to PaintQuickGuide, mastering setup, thinning discipline, and consistent passes reduces waste and improves results. In this guide, we focus on how to get reliable results with a standard hand-held unit, without diving into high-pressure industrial systems. Whether you’re refreshing kitchen cabinets or preparing a car hood, a manual spray gun gives you versatility, a compact footprint, and the option to adjust spray patterns for corners, edges, and broad surfaces. The key is practice, patience, and a clear prep plan.
How a manual spray gun creates a finish
A manual paint spray gun atomizes paint by forcing it through a small nozzle while pushing air with a compressor. The size of the nozzle and the air-to-fluid balance determine the pattern, droplet size, and how evenly the coating lays down. When you pull the trigger, paint flows into the air stream and breaks into fine droplets that form a uniform film. Proper thinning and consistent motion help avoid runs and orange peel. Different configurations exist for walls, cabinets, and automotive panels, but the core principle remains: steady motion, correct distance, and clean air.
Safety first: PPE, ventilation, and environmental setup
Safety is non-negotiable when using any spray equipment. Always wear a NIOSH-approved respirator, eye protection, and chemical-resistant gloves. Work in a well-ventilated space with a door or window to exhaust fumes and avoid lingering vapors. Use drop cloths to protect floors and surrounding surfaces, and cover furniture or fixtures not intended for finish. Keep a fire extinguisher nearby and store solvents away from heat sources. If spraying in a garage, ensure the area is weather-sealed to prevent dust intrusion and moisture from compromising your finish.
Workspace preparation and masking for clean lines
Preparation begins with masking tape and edge guards to protect trim, outlets, and adjacent surfaces. Lay down high-quality drop cloths and secure their edges to minimize movement. Remove or protect hardware and soften edges with painter’s tape for crisp lines. Clean the surface thoroughly to remove dust, oils, and residues, then wipe with a tack cloth to ensure the coating adheres evenly. A well-prepped surface reduces the risk of sags, texture, and uneven color.
Picking the right nozzle and preparing the gun
Choose a nozzle size appropriate for your coating type and desired finish. Start with a mid-range tip for primers and enamels, then test on scrap material to dial in pattern and spray rate. Assemble the gun according to the manufacturer’s instructions, ensuring the nozzle, needle, and fluid tip are clean and free of glaze. Strain the paint to remove particulates, and fill the cup with the prepared mixture. A clean, properly assembled gun yields smoother finishes and reduces clogging during application.
Paint selection, thinning, and compatibility
Select a paint compatible with your gun and nozzle. Water-based finishes require different thinning than solvent-based coatings, so always follow the manufacturer’s guidelines. Thin gradually and test spray on a sacrificial piece to observe flow and drying characteristics. Too-thin paint can cause dry spray and poor adhesion, while over-thinning leads to runs. Maintain a consistent viscosity by stirring regularly and keeping paint within the recommended temperature range for best results.
Setup the compressor and gun for testing
Connect the air hose and regulator, then establish a comfortable starting pressure. Never exceed the gun’s rated pressure, and set a low initial trigger pull to test spray on a scrap surface. Observe pattern, atomization, and color build-up; adjust needle and fluid flow as needed. If you notice flutter, inconsistent spray, or sputtering, pause and inspect filters, hoses, and fittings for leaks or blockages.
Spraying technique: patterns, distance, speed, and coats
Maintain a steady wrist motion and keep the spray perpendicular to the surface. Start off the edge and sweep across with overlapping passes to avoid gaps. Hold the gun at a comfortable distance—closer for detailed edges, farther for large flat areas—and maintain a consistent speed to control film thickness. Apply light coats and allow adequate dry time between passes to prevent runs and sags. Finish with a light, even mist to seal the coat.
Cleaning, maintenance, and long-term care
After spraying, flush the system with the appropriate solvent and clean the nozzle, needle, and fluid passages thoroughly. Disassemble the gun according to the manual, dry all parts completely, and lightly lubricate moving components if recommended by the manufacturer. Store the gun with the nozzle cap in place to protect internal passages and prevent dust buildup. Regular maintenance extends life and ensures consistent spray performance.
Troubleshooting common issues
Common problems include orange peel, runs, and spitting. Orange peel usually indicates too-thin paint, incorrect distance, or insufficient agitation; adjust thinning and test spray. Runs come from too much paint or dragging the gun; reduce paint flow and keep passes short. Spitting can result from dried paint on the nozzle or dirty air supply—clean components and strain paint before use. Keep a log of spray settings to reproduce the best results.
Budgeting and choosing a manual spray gun
Manual paint spray guns range from entry-level units to pro-grade tools. Consider the project size, paint type, and your tolerance for maintenance when budgeting. A higher-quality gun often features easier disassembly, refined atomization, and better nozzle wear resistance, delivering longer-term value. Balance upfront cost with expected use and planned projects to choose a tool that fits your needs.
Quick-start checklist and next steps
- Confirm you have a suitable air supply and safety gear
- Mask surfaces and prep the workspace
- Select the correct nozzle and prepare the paint
- Test spray on scrap and adjust pattern
- Apply controlled coats with drying intervals
- Clean, dry, and store the gun properly
- Review results and refine technique for next project
Tools & Materials
- Manual paint spray gun(Essential tool to perform spraying tasks)
- Air compressor with adequate CFM(Must match gun's requirements; check label)
- Pressure regulator(Maintain consistent pressure during spraying)
- Air hose with fittings(Prefer quick-connect and proper length)
- Paint thinner/retarder(For thinning and cleaning depending on paint)
- Strainer or filter(Strain paint before filling cup)
- Mixing cups and stir sticks(For mixing and testing)
- Drop cloths and painter's tape(Protect surfaces and edges)
- Respirator or mask (NIOSH-approved)(Protect from fumes and overspray)
- Safety glasses(Eye protection)
- Cleaning solvent(Flush and clean components after use)
- Old rags or shop towels(Drying and cleanup)
- Replacement nozzles/needles(Optional spare parts)
- Lubricant for moving parts(Light lubrication if recommended)
Steps
Estimated time: 60-90 minutes
- 1
Inspect gear and assemble
Check gun, nozzle, and needle for wear or damage. Clean all parts and assemble per the manual. Ensure seals are intact and fittings snug to prevent leaks.
Tip: Inspect before each use and replace worn parts to avoid defects in spray. - 2
Set up compressor and line
Connect the air hose, attach a regulator, and set a baseline pressure. Ensure hoses are clear of kinks and the workspace is well-ventilated.
Tip: Keep regulator at a comfortable, steady setting to avoid spray fluctuations. - 3
Thin and strain the paint
Stir thoroughly and strain the paint through a filter into the cup. Add thinning agent gradually according to the paint type and test spray on scrap.
Tip: Avoid over-thinning; start conservative and test spray. - 4
Fill cup and perform a test spray
Place the cup on the gun, prime the line, and perform a test spray on a sacrificial piece. Observe pattern, atomization, and coverage.
Tip: If pattern is irregular, check nozzle fit and air settings before continuing. - 5
Mask area and prep surface
Apply masking tape and edge guards where needed. Prepare the surface with a clean wipe and tack cloth to remove dust.
Tip: A clean surface is essential for consistent adhesion and finish. - 6
Apply first mist coat
Start off-surface and move onto the area with light, even passes. Overlap each stroke slightly to build a uniform base coat.
Tip: Thin coats dry faster and reduce risk of sags. - 7
Build final coats
Apply subsequent coats in the same manner, allowing proper dry time between passes. Observe for wet edges and even color. Stop when the coat has uniform gloss.
Tip: Avoid applying thick coats; multiple thin coats yield superior results. - 8
Clean and store
Flush with solvent, disassemble, and clean the nozzle and passages. Dry thoroughly and store components in a dust-free area.
Tip: Regular cleaning prevents clogs and extends tool life.
Your Questions Answered
What is a manual paint spray gun and what is it best used for?
A manual paint spray gun atomizes paint with a controlled air stream, delivering smooth coats on walls, furniture, cabinetry, and auto panels. It’s ideal for projects requiring an even finish and faster coverage than brushes.
A manual spray gun atomizes paint for smooth, even coats on walls, furniture, and more. It’s faster than brushes and ideal for even finishes.
What materials can I spray with a manual gun?
Use compatible primers, enamels, lacquers, and topcoats as specified by the paint manufacturer. Ensure thinning and compatibility are appropriate for the coating type you choose.
You can spray primers, enamels, lacquers, and topcoats that are compatible with your gun and thinning guidelines.
How close should I hold the gun to the surface?
Keep a consistent distance that you’ve tested on scrap—usually a few inches for small areas and slightly farther for flat surfaces. Moving too close can cause runs, while too far reduces coverage.
Keep a tested, consistent distance. Too close causes runs; too far reduces coverage.
How can I prevent orange peel and runs?
Thin the paint properly, maintain steady movement, and apply several light coats rather than one heavy one. Allow appropriate dry times between passes and verify pattern consistency.
Thin properly, move steadily, and use several light coats with proper dry times.
Is cleanup time long after spraying?
Yes, thorough cleaning is essential to prevent clogs and corrosion. Flush with the recommended solvent, disassemble partially, and dry every part before storage.
Cleanup is lengthy but essential; flush, disassemble, dry, and store properly.
Can I use a manual spray gun for car refinishing at home?
Yes, you can, but it requires careful surface prep, the right coatings, and appropriate ventilation. For best results, follow product guidelines and consider project-specific setup.
You can, with proper prep, coatings, and ventilation. Follow product guidelines closely.
Watch Video
Quick Summary
- Prepare the workspace and mask edges for clean lines.
- Test spray on scrap before committing to the project.
- Apply multiple thin coats rather than a single thick layer.
- Clean promptly to extend gun life and preserve spray quality.
- Maintain consistent air and fluid settings for repeatable results.