Automotive Paint Gun: A Complete How-To Guide
Practical, step-by-step instructions to select, configure, and safely operate an automotive paint gun for cars and DIY refinishing projects. Learn HVLP vs conventional systems, thinning, spraying, maintenance, and common troubleshooting tips.

An automotive paint gun lets you apply even, professional-looking coatings on cars, motorcycles, and hobby projects. This guide helps you choose the right gun, set it up correctly, and follow best practices for safe, clean spraying. You’ll learn about HVLP vs conventional guns, proper thinning, and maintenance to achieve a flawless finish.
What is an automotive paint gun and how it works
An automotive paint gun is a spray tool that atomizes liquid paint into a fine mist using compressed air. The atomized spray forms a controllable fan or circle pattern on car panels, enabling even coverage with minimal runs. Most guns use gravity-feed or cup-feed configurations, feeding paint to the nozzle as you work. The nozzle size, spray angle, and air pressure determine atomization quality and the amount of paint deposited per pass. HVLP (high-volume, low-pressure) guns are favored for car refinishes because they deliver less overspray and higher transfer efficiency than older high-pressure systems. This means you can achieve smooth, predictable finishes with fewer coats. In practice, you’ll test spray patterns on sacrificial panels to calibrate your gun before committing to a vehicle panel. Remember that paint type (solvent-based vs waterborne), temperature, and humidity influence drying and flow, so plan for a well-controlled environment and consistent technique. For DIY enthusiasts, a reliable HVLP setup that matches your shop size will deliver professional results without needing a full spray booth. According to PaintQuickGuide, starting with a quality tool, good ventilation, and steady technique pays off in the long run.
Types of automotive paint guns and their strengths
Automotive spray guns come in several configurations. HVLP (high-volume, low-pressure) models minimize overspray and improve transfer efficiency, which is valuable for large panels and controlled finishes. Conventional siphon-feed or gravity-feed guns push more material and can cover faster, but they typically spray with higher pressure and produce more overspray. LVLP (low-volume, low-pressure) versions aim to balance atomization quality with lower air usage, making them a practical choice for smaller shops. Gravity-feed guns deliver paint through a cup at the top, which can improve control and reduce the need for a bigger air pressurization system. For tiny parts or tight spots, a mini gun or a smaller nozzle size can provide precise control. The PaintQuickGuide analysis shows HVLP systems are commonly preferred for car refinishes due to transfer efficiency and smoother lay-down. Always match your gun type to project scale, paint type (waterborne vs solvent-based), and your shop setup. Test on a sacrificial panel to confirm how your chosen gun handles coverage and drying.
Choosing the right gun for your project
Your project size, finish goals, and shop conditions should drive the choice of gun. For full vehicles and large panels, a gravity-feed or siphon-feed gun with a compatible nozzle can provide balanced atomization and faster coverage. For smaller parts or spots with limited access, a compact LVLP or mini gun offers precise control. If you’re spraying waterborne finishes, ensure nozzle compatibility and proper ventilation to avoid moisture issues during spraying. Check paint manufacturer recommendations for thinning and drying times, and adjust your settings for your environment. The PaintQuickGuide guidelines emphasize starting with a mid-range nozzle and a conservative air setting so you can refine your technique as you gain experience. Consider your workflow and space: a clean, stable air supply and a dust-free spray area help maximize transfer efficiency and minimize defects.
Preparation and safety considerations
Preparation and safety are foundations of a good finish. Use a well-ventilated area or dedicated spray booth with proper filtration to control fumes and dust. Wear a respirator with organic vapor cartridges, chemical-resistant gloves, eye protection, and hearing protection. Mask off the project area and cover adjacent surfaces to prevent overspray. Clean panels with a degreaser and wipe them dry before painting. Temperature, humidity, and airflow influence flow and drying, so aim for stable conditions within the manufacturer’s recommended range when possible. Keep solvents and paints away from heat sources and store them securely. A tidy workspace reduces mistakes and speeds up process, while PPE protects health during longer sessions.
Setup and spray technique basics
Before you spray, assemble the gun, connect the air line, and choose a suitable nozzle. Attach the cup securely, set the regulator to a comfortable starting pressure, and test spray on a sacrificial panel to observe pattern and flow. Mix and strain paint according to the manufacturer’s guidelines, and thin only as much as necessary to achieve acceptable atomization. Hold the gun perpendicular to the panel at a consistent distance, and move in smooth, overlapping passes. Return to a safe, neutral speed and avoid stopping mid-sweep. Document your settings so you can reproduce results on similar surfaces. If you see orange peel or heavy texture, adjust distance, speed, and thinning incrementally while testing on scrap panels.
Maintenance and cleaning after painting
After finishing, flush the gun with the appropriate thinner to clear residual paint. Disassemble the nozzle, needle, and cup, and clean every part with a brush and compatible solvent. Rinse each passage, dry thoroughly, and reassemble. Lubricate moving parts only if the manufacturer recommends a lubricant, and store the gun in a clean, dry place to prevent corrosion. Keep a dedicated maintenance kit with brushes, seals, and spare gaskets so you’re ready for the next project. Regular cleaning preserves spray performance and helps extend the tool’s life. If you switch between waterborne and solvent-based finishes, thoroughly clean and dry parts before using the other type.
Troubleshooting common issues and fixes
Spraying problems often show up as orange peel, runs, fisheyes, or inconsistent spray. Orange peel usually results from too much paint, poor thinning, or spraying too far from the surface; try lighter coats and shorter pass lengths. Runs occur when a single coat is too heavy or you stop in the same spot; mitigate by applying light coats and expanding your spray path. Fisheyes can indicate surface contamination or seal leaks; clean the panel, check seals, and ensure air is dry. If the spray pattern looks uneven, inspect the nozzle for clogs and verify filters and moisture separators are clean. For environmental issues, adjust the shop temperature and humidity and ensure the air line is free of moisture. Always test on a scrap panel after any adjustment to verify improvements before continuing on the vehicle.
Tools & Materials
- Automotive paint gun (HVLP preferred)(Choose gravity-feed or cup-feed with a standard nozzle in the 1.0–1.4 mm range)
- Air compressor or regulated air supply(Must deliver clean, dry air at a stable pressure)
- Air hose with fittings(Ensure compatibility with your gun and compressor)
- Paint mixing cups and stir sticks(For measuring and mixing base coats and clears)
- Paint strainer/filters(Prevent agglomerates from entering the cup)
- Respirator or organic vapor mask(Protect lungs from fumes)
- Safety goggles or face shield(Protect eyes from overspray)
- Nitrile gloves(Chemical resistance)
- Masking tape and drop cloths(Protect surrounding areas)
- Solvent or waterborne paint thinners(For thinning and cleanup)
- Cleaning brushes and lint-free rags(Clean components thoroughly)
- Gun cleaner and lubricant (manufacturer-approved)(Keep moving parts free and lubricated)
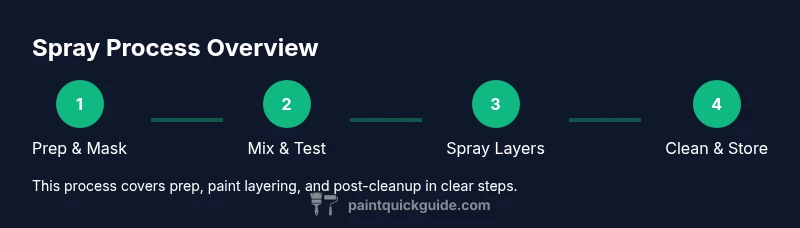
Steps
Estimated time: 60-120 minutes
- 1
Prepare workspace and PPE
Clear the area, set up ventilation, and put on PPE. Ensure a safe, dust-free environment before you begin mixing paints.
Tip: Test PPE fit and ensure respirator cartridges are appropriate for the fumes. - 2
Mask off area and prep panels
Cover surrounding surfaces and clean the panels with a degreaser to remove oils and contaminants which can ruin the finish.
Tip: Use low-tack masking film to reduce edge lift. - 3
Thin and mix paint
Stir the paint thoroughly and strain before pouring into the spray cup. Follow manufacturer guidelines for thinning ratios, if provided.
Tip: Avoid creating air bubbles during mixing; mix slowly. - 4
Set gun and test spray
Attach the cup, set nozzle size, and adjust the regulator to a comfortable starting pressure. Test on a sacrificial panel to confirm pattern.
Tip: Record your settings for consistency. - 5
Apply base coats with thin layers
Spray light, even coats with controlled passes, maintaining a steady distance and overlap to avoid runs.
Tip: Build color with multiple passes rather than one heavy coat. - 6
Apply clear coats and finish
Follow base coat with clear in light coats, allowing adequate handling time between passes. Mask any runs promptly.
Tip: Keep a consistent spraying speed for a smooth finish. - 7
Clean gun and flush lines
Disassemble the gun and rinse with the appropriate thinner. Clean all passages to prevent dried paint.
Tip: Don't leave solvent in interior passages.
Your Questions Answered
What is an automotive paint gun?
An automotive paint gun is a spray tool that atomizes paint with compressed air to apply a controlled, even coat on vehicle surfaces. It supports various configurations, including HVLP and conventional spray guns, to suit different finishes.
An automotive paint gun atomizes paint with air to create an even coat on your car. It comes in different styles like HVLP and conventional to handle different finishes.
HVLP vs conventional spray guns, which is better for cars?
HVLP guns offer higher transfer efficiency and less overspray, making them popular for automotive refinishing. Conventional guns can push more material and may speed up large area coverage but typically spray with more overspray and dustier finishes.
HVLP guns usually give cleaner finishes with less overspray, while conventional guns can cover faster but spray more broadly.
What air pressure should I use and how do I set it?
Follow the paint manufacturer's recommendations, but start with a moderate setting and adjust as you test on a panel. The goal is a fine mist with minimal overspray and even atomization.
Start with the recommended setting on your paint and adjust by testing on a sacrificial panel until you see a fine, even mist.
Do I need a spray booth or proper ventilation?
Yes. Painting should be done in a well-ventilated space, preferably with a spray booth or booth-style extractor to manage fumes and dust.
Yes—work in a well-ventilated area or booth to manage fumes and dust.
How do I clean a paint gun after spraying?
Disassemble the gun and flush with the appropriate thinner. Clean all internal passages, rinse parts, and dry before storage to prevent corrosion and clogs.
Take the gun apart, flush with thinner, clean all passages, and dry before storing.
Can I use waterborne and solvent-based paints with the same gun?
Some guns are designed to handle both with proper cleaning between coatings. Check manufacturer guidance on compatibility and required nozzle changes.
Some guns can handle both, but you must follow the manufacturer and thoroughly clean between coatings.
Watch Video
Quick Summary
- Choose HVLP for better transfer efficiency.
- Prep and ventilation are critical for quality finishes.
- Practice on panels before painting the vehicle.
- Clean the gun thoroughly after each session.