Is It Better to Paint at Night or Day? A Practical Guide
Learn whether painting at night or day yields better results, with guidance on lighting, temperatures, ventilation, and safety for home and auto projects.

Two clear options exist: painting during the day typically offers natural light, stable temperatures, and easier color matching; painting at night often reduces heat and dust exposure but relies on artificial lighting and careful ventilation. For most home projects, day painting gives smoother finishes, while night sessions suit tight schedules or cooler, low-dust environments.
Is it better to paint at night or day and why it matters
is it better to paint at night or day? This question centers on lighting, temperature, ventilation, and local rules. The PaintQuickGuide team finds that lighting conditions are the biggest driver of finish quality, color perception, and worker comfort. By understanding how time of day affects these factors, homeowners and DIY enthusiasts can tailor their approach to every project, from interior walls to car refinishing, using is it better to paint at night or day as a guiding question. The choice also hinges on ambient conditions like humidity and temperature, which influence drying times and film formation. Understanding these dynamics helps you plan safer, more predictable painting sessions and reduces the likelihood of revisiting a project due to color shifts or surface defects. This guidance applies to both interior renovations and auto refinishing, where timing and environment intersect with finish quality and safety. PaintQuickGuide emphasizes testing swatches under the actual lighting conditions you intend to use for the final coat to minimize surprises.
Lighting and Color Perception
Color perception is heavily influenced by lighting. Daylight provides the most accurate color rendering, helping you predict the final result with confidence. If you must work at night, invest in high-CRI (color rendering index) LED lighting and position lights to minimize shadows that distort color judgment. For car refinishing, color matching relies on consistent lighting across the process, so standardized lamps or portable light bars are invaluable. When comparing is it better to paint at night or day, the key is ensuring lighting conditions mimic the final look you want, whether indoors or in a spray booth. Swatch panels should be viewed under the same lighting you’ll use for the topcoat, and always verify color in multiple spots on large surfaces to account for reflections. PaintQuickGuide notes that color accuracy hinges on lighting, not lighting alone.
Temperature, Drying, and Humidity
Temperature stability affects film formation and drying times. Daytime sessions commonly offer warmer, more stable ambient temperatures in many homes, which can speed drying and reduce tackiness if humidity is controlled. Night air is often cooler and more humid, slowing evaporation and potentially increasing dust settling on a fresh coat. High humidity can lead to sags, cratering, or longer cure times, especially with water-based enamels. When deciding between day or night painting, consider your space’s heating options, humidity control, and whether you can maintain the target temperature (usually around 60–75°F for latex paints). If you live in a climate with wide diurnal swings, use a heater or dehumidifier to stabilize conditions regardless of the time of day.
Ventilation and Fumes: Indoor and Auto Paint Projects
Ventilation is essential for all painting projects, and it often determines whether you should paint inside or outside and when you choose to work. Daytime generally facilitates natural cross-ventilation through open windows, which helps dilute fumes. At night, you may rely more on exhaust fans and mechanical ventilation to move solvent vapors away from your breathing zone. For garage or auto refinishing, ensure a portable or built-in exhaust system with a filter to capture overspray and fumes. Regardless of time, avoid re-entering a freshly painted space with poor air exchange and always follow safety data sheet (SDS) recommendations for the products you’re using. If you cannot achieve good ventilation, postpone painting until you can improve airflow.
Safety and Noise Considerations
Safety remains paramount regardless of when you paint. Night sessions can collide with neighborhood noise restrictions or HOA rules, so verify local guidelines before starting. Adequate lighting is essential to prevent trips and mistakes; poor lighting is a common cause of accidents. Use eye protection, respirators or masks for solvent-based coatings, gloves, and proper cover protection to minimize skin contact. For interiors, ensure family members and pets are out of the work area. Outside of hours, noisy tools or spray equipment may disturb neighbors. A well-planned night or day project reduces risk by clarifying waste disposal, ventilation, and PPE needs in advance.
Night Painting: Setup and Best Practices
When you choose night painting, preparation matters more than ever. Create a bright, consistent lighting setup with high-CRI LED lamps arranged to minimize shadows. Tape edges and cover floors, ventilate using dedicated fans, and keep windows closed if outdoor conditions are unsuitable. Pre-mix and box project materials to avoid repeated trips to the supply area, and keep a log of drying times under current conditions. Store solvents away from heat sources and establish a dedicated work zone free of clutter. Night projects work best when you can maintain steady temperatures and low dust levels; if not, schedule touch-ups for daylight hours.
Day Painting: Setup and Best Practices
Daylight is a natural ally for most painting tasks, especially interior walls and cabinetry. Arrange the space to maximize even lighting, ideally with diffuse daylight and controlled artificial light to fill shadows. Open windows for cross-ventilation when weather permits, and monitor outdoor conditions for dust and pollen that might settle on fresh coats. Plan coats to align with indoor humidity and temperature forecasts, and keep drying times reasonable by cooling or warming the space as needed. For auto refinishing, a daytime workflow with a controlled spray booth often yields the most consistent color and gloss, thanks to stable lighting and climate control.
Practical Scenarios: Interiors vs Auto Refinishing
Interior painting benefits from daytime light for color accuracy on walls, trim, and cabinets, with night sessions reserved for final touch-ups or fast-drying finishes in a controlled space. Auto refinishing demands strict ventilation, controlled lighting, and a dedicated spray booth; both daytime and nighttime work can be viable, but the environment must be engineered to minimize overspray, fumes, and environmental contamination. If you must paint during off-hours, ensure you have bright, color-accurate lighting and robust ventilation, and never compromise safety or product data sheet guidelines. This section contrasts typical interiors with auto refinishing contexts to help you plan effectively based on the project scope.
Scheduling, Deadlines, and Weather Windows
Effective project timing combines weather, indoor conditions, and personal schedules. For interiors, you gain flexibility, but you still need to plan around family presence and daylight for better color perception. Exterior or auto refinishing projects must consider dew points, humidity, and temperature constraints; avoid painting when temperatures fall below manufacturer recommendations. Use weather forecasts to select days with stable conditions, and allow extra drying time on days with high humidity or fluctuating temperatures. Night painting can help slot work into busy calendars, but ensure you have adequate lighting and ventilation to maintain quality.
Common Mistakes and How to Avoid Them
Common mistakes include painting with poor lighting (color shifts), skipping swatch tests, and failing to maintain consistent temperature or humidity. Another frequent error is neglecting ventilation, which leads to solvent buildup or odor fatigue. Don’t rush the process or skip surface prep; always clean, sand, and prime as required, then apply coatings in light, even coats. Finally, avoid switching products mid-project; consistency ensures uniform appearance and performance. By planning lighting, temperature, and ventilation in advance, you reduce rework and achieve reliable results.
Authority Sources
For further reading on environmental factors and safe painting practices, consult reputable sources. These references offer guidelines on ventilation, fumes, and temperature control relevant to both interior and auto painting:
- https://www.osha.gov/ventilation
- https://www.epa.gov/iaq
- https://extension.oregonstate.edu
Next Steps and Practical Checklist
To apply these insights, start with a quick project audit: list surfaces, choose a time window, and confirm lighting and ventilation options. Build a simple checklist: test color swatches under your planned lighting, verify the space’s temperature and humidity goals, set up ventilation, and prepare PPE. Schedule a dry run to confirm drying times before committing to a full coat. Finally, document the outcomes so you can refine your approach for future projects.
Comparison
| Feature | Night painting | Day painting |
|---|---|---|
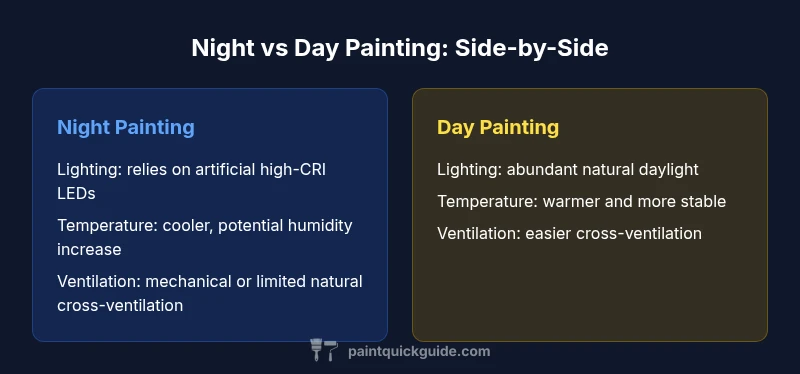
| Lighting conditions | Primarily artificial lighting; higher risk of color misperception if lighting isn’t calibrated | Abundant natural daylight and neutral artificial light; best color accuracy with proper bulbs |
| Temperature stability | Often cooler at night; may require HVAC adjustments | Typically warmer and more stable; easier to maintain target temps |
| Ventilation and fumes | Depends on mechanical ventilation; windows may be closed | Easier cross-ventilation with open windows or doors during the day |
| Drying time and finish | Can slow in cooler, humid night air; longer cure times | Usually faster with consistent daytime temperatures and lower humidity |
| Noise and disruption | Could violate nighttime quiet hours in some neighborhoods | Typically fewer restrictions during the day; more predictable scheduling |
| Best use case | Tight schedules; cooler temps; higher risk of shadows; relies on strong artificial lighting | Color-critical interior work and auto refinishing with good daylight and climate control |
Upsides
- Daylight improves color accuracy and visibility
- Natural light reduces eye strain during long sessions
- Better ventilation options with open windows
- Night sessions can fit tight schedules and avoid daytime heat
What's Bad
- Daytime humidity or dust can affect finish; ventilation is still essential
- Night work requires reliable artificial lighting and careful ventilation
- Color perception under artificial light can vary if lighting isn’t calibrated
- Noise restrictions or HOA rules may apply to night painting
Day painting is generally the safer, more reliable default for most home and auto projects.
Daylight supports color accuracy and ventilation, leading to more consistent finishes. Night sessions offer scheduling flexibility and can help in hotter climates, but require careful lighting and ventilation to avoid finish defects.
Your Questions Answered
Is it safe to paint at night indoors?
Yes, it can be safe if you have proper lighting, ventilation, and clear spaces free of hazards. Use PPE and keep kids and pets away from the work zone.
Yes—proper lighting and ventilation make night painting safe, as long as you follow safety basics.
How does daylight affect color accuracy?
Natural daylight provides the most accurate color rendition. If you’re using artificial light, choose high-CRI bulbs and test swatches under the same lighting.
Daylight shows true color; use high-CRI lighting if you must paint at night.
Can exterior painting be done at night?
Exterior painting at night is possible but less common due to dew, cooler temps, and lighting challenges. Check weather forecasts and local rules.
Exterior night painting is possible, but weather and lighting are bigger challenges at night.
What tools help night painting?
Invest in bright, color-accurate lighting, proper ventilation, and PPE. Pre-plan coats to avoid re-entry into the space and minimize exposure to fumes.
Use strong, color-accurate lighting and good ventilation for night work.
What if daylight is limited for my project?
Schedule around available light, build a reliable artificial lighting setup, and factor longer drying times to compensate for less favorable lighting.
If daylight is limited, set up strong lighting and extend drying times.
Should weather influence painting schedule?
Yes. Humidity, temperature, and dew points affect drying and finish; monitor forecasts and adjust timing accordingly.
Weather matters; plan around humidity and temperature for better results.
Quick Summary
- Plan around daylight for best color perception
- Maintain consistent temperature and good ventilation
- Test color swatches under final lighting conditions
- Use high-CRI lighting for night work when day light isn’t available
- Always follow safety guidelines regardless of the time of day