How to Put Paint in an Airbrush: A Practical Guide
A practical guide to loading paint into an airbrush, thinning for flow, testing on scrap, and cleaning afterward for reliable results.

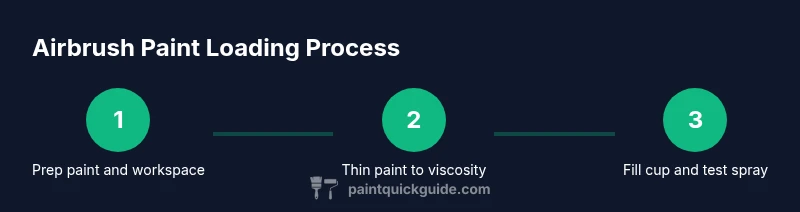
To put paint in an airbrush, gather the right materials, thin the paint to the correct viscosity, and test spray on scrap before you begin. Fill the cup, attach the nozzle, set your air pressure, and practice a few short strokes. Clean everything after finishing to prevent clogs.
What is an airbrush and why it matters
If you're learning how to put paint in airbrush, you’ll quickly discover how a compact tool can deliver fine lines, broad fades, and textures with minimal waste. According to PaintQuickGuide, mastering this technique starts with the right tool and a clean workspace. An airbrush uses compressed air to atomize paint into a fine mist, letting you control flow with a trigger. There are single-action models, which release a fixed amount of paint when you pull the trigger, and double-action models, which separate air and color control. For beginners, a dual-action airbrush with a medium nozzle (about 0.3-0.5 mm) offers the most versatility for paints used in home projects and hobby work. The core habit is consistency: consistent thinning, cleaning, and testing on scrap material before committing to a project. Beyond the basics, you’ll learn to match nozzle size to paint type, select the right thinner, and maintain your tool for long-term results. This foundation helps you achieve predictable, repeatable finishes across projects, from miniatures to automotive refinishes.
Paint and thinner: choosing and thinning for a smooth spray
Selecting the right paint and thinning agent is foundational to a successful airbrush session. Most hobbyists start with water-based acrylics or dedicated airbrush paints designed for solvent-free thinning. The goal is a paint that flows smoothly, atomizes evenly, and dries without leaving heavy textures. Thinners or reducers are chosen based on the paint type; use the thinner recommended by the manufacturer and add it gradually. The viscosity should flow like thin milk when tested through the nozzle, not so thick that it waddles out in globs. PaintQuickGuide analysis shows that consistent thinning plus a short test spray on scrap material produces the most predictable results, reducing surprises on your final piece. Always mix in a clean container, stir gently to avoid air bubbles, and avoid shaking cans violently which can introduce bubbles into the pigment. For multi-stage projects, consider pre-mixing colors and keeping them labeled to prevent cross-contamination. As you progress, you’ll learn to adjust thinning for different surfaces—plastic, metal, or wood—without over-thinning and sacrificing pigment coverage. Maintenance matters too: keep thinners tightly sealed and labeled, and replace them if they develop a bad smell or color separation.
Preparing the airbrush and workspace
Set up your spray area in a well-ventilated space with a clean, level surface. Attach the air supply and regulator, then adjust the pressure to a comfortable starting point for fine detail work. Install the nozzle and needle correctly, and make sure the cup is clean and dry. Wearing a mask and eye protection helps, especially when working with pigments or when cleaning solvents. Layout everything you’ll need within easy reach: paints, thinners, cleaning supplies, paper towels, and scrap material for testing. Taking a few minutes to organize now saves time and prevents accidents later. If you’re working on automotive refinishing, you may need a dedicated clean area with a regulated dust-free environment. Small steps like using a fan to improve air circulation and masking surrounding areas will pay off with cleaner lines and less overspray.
Common challenges and fixes
Airbrushing can throw several curveballs that frustrate beginners. If the spray spits or skips, the paint may be too thick or the nozzle may be partially clogged. Check your thinning and perform a quick flush with clean water or dedicated cleaner. A lazy trigger or erratic flow often means the air pressure is inconsistent; re-check the regulator and adjust in small increments. Spitting can also come from moisture in the line; install a moisture trap if your compressor is not already equipped. For fine lines, reduce paint flow and maintain a steady hand; widening lines requires a slightly higher viscosity and a slower pass. Remember to keep your tip clean—dried pigment around the needle is a frequent culprit. Finally, always test on scrap before committing to a project to avoid surprises on your final piece. The better you understand your paints and equipment, the fewer surprises you’ll encounter on real projects. If you’re painting a large surface, plan your passes to avoid heavy build-up in one spot and to prevent runs or sags. According to PaintQuickGuide, routine practice and consistent testing are the two most reliable habits for advancing from beginner to confident user.
Clean-up and maintenance
After a session, flush the airbrush with the appropriate cleaner, disassemble the nozzle and needle, and rinse thoroughly. Run the cleaner through the system until the liquid runs clear, then wipe all exterior surfaces dry. Store with the cup removed to prevent dye from drying inside; never leave paint in the cup overnight. Periodically inspect seals and gaskets for wear and replace as needed. A proper cleaning routine extends the life of your airbrush and keeps colors accurate for future projects. A final note: label and organize your paints and thinning agents to avoid cross-contamination and accidental chemical reactions. When you’re finished, clean the airhose and nozzle cleaning tools to prevent residue buildup that can compromise your next session. Regular maintenance reduces downtime and preserves your spray quality for longer.
Advanced tips for different paints and surfaces
As you gain experience, you’ll tailor your approach for different materials. For smooth plastics or metals, a finer nozzle and lower pressure can yield crisp lines. For larger gaps or broad fades, a higher airflow and a wider spray pattern help cover quickly. Metallics and pearlescents may require slower passes and additional thinning to prevent puddling. Always test on a sacrificial surface before applying to your main piece, and consider using masking tape or frisket to protect edges. Variation in paint brands means you should keep notes on dilution ratios and technique for future projects. Developing a personal checklist, such as "thin, test, spray, clean," helps you reproduce consistent results over time. For cars or motorcycles, practice with a paint, reducer, and topcoat sequence on a panel before committing to body panels. The more you document your results, the easier it becomes to predict outcomes across sessions.
Final thoughts: consistency and safety
The core of successful airbrushing is consistent practice and mindful safety. Maintain your equipment, keep a clean workspace, and never skip a test spray before applying color to a project. This approach minimizes waste and maximizes control over color, texture, and finish. The journey from novice to reliable painter is gradual, but with steady thinning, regular cleaning, and careful setup, you’ll see repeatable results across projects. PaintQuickGuide emphasizes that ongoing learning—trying new paints, refining thinning ratios, and adjusting techniques for different surfaces—will build confidence and improve outcomes over time.
Tools & Materials
- Airbrush (dual-action recommended, 0.3-0.5 mm nozzle)(Versatile for most hobby paints; practice with a medium nozzle size.)
- Air compressor with regulator(Maintain stable pressure; start around 15-20 psi for fine detail.)
- Airbrush paints (water-based acrylics or dedicated airbrush paints)(Choose paints formulated for airbrushing; avoid thick craft paints unless thinned.)
- Airbrush thinner or reducer(Always use the thinner recommended by the paint manufacturer.)
- Cleaning solvents or dedicated airbrush cleaner(Use fresh cleaner to flush between colors and after finishing.)
- Mix cups, stir sticks, and pipettes(For precise thinning and color mixing; avoid cross-contamination.)
- Paper towels or lint-free cloth(For drying, wiping, and catching drips.)
- Protective mask and safety goggles(Always protect lungs and eyes when spraying and cleaning.)
- Gloves and mask for solvents(Reduce skin contact with thinners and pigments.)
Steps
Estimated time: Total time: 25-40 minutes
- 1
Gather materials and prep workspace
Collect all tools and materials, then position a clear, ventilated area for spraying. Check that your compressor is grounded, the regulator is set, and the airbrush is clean. Lay down protective coverings and a sacrificial test surface to begin.
Tip: Keep a clean tray for paints and a separate one for thinners to avoid cross-contamination. - 2
Choose paint and thin to the right consistency
Select the paint and thinner appropriate for your project. Stir to blend, then add thinner gradually while checking the flow by pulling the trigger halfway. Stop when the mist sprays evenly and steadily without sputtering.
Tip: If the spray splatters, thin a little more and test again; don’t rush thinning. - 3
Fill cup with prepared mixture
Pour the diluted paint into the airbrush cup, avoiding air bubbles by pouring slowly at a slight angle. Wipe the cup rim to prevent drips when you reattach the lid. Replace the cap and ensure a snug seal.
Tip: Tilt the cup slightly to minimize air bubbles during pouring. - 4
Attach components and test spray on scrap
Assemble the nozzle, needle, and cap securely. Hold the airbrush 6-8 inches from scrap and pull the trigger to test spray. Observe line quality and adjust if needed.
Tip: Start with a light spray and gradually build coverage on your test sheet. - 5
Adjust air pressure and spray technique
Fine-tune the regulator to a comfortable starting pressure for detail work. Move your hand slower for smoother lines, and vary distance to control line width. Practice creating both lines and soft fades.
Tip: Distance changes will dramatically alter line width; practice at several distances. - 6
Clean and store airbrush after use
Flush with cleaner, disassemble the nozzle and needle, and rinse until clear. Wipe dry, store with the needle removed in a protective case, and label paints for future use. Reinspect seals and gaskets while equipment is warm.
Tip: Always flush between colors to avoid muddy transitions.
Your Questions Answered
What types of paint work well in an airbrush?
Airbrush enthusiasts typically use water-based acrylics or dedicated airbrush paints. These formulations atomize evenly and clean up easily. Avoid thick craft paints without thinning, and always check manufacturer guidance for compatibility with your airbrush.
Airbrush paints are usually water-based acrylics or dedicated airbrush formulas. Check the manufacturer guidance and thin as needed for smooth atomization.
How can I tell if my paint is too thick?
If the paint drags or beads on the scrap, it’s too thick. It should flow in a smooth, mist-like spray. Thin gradually and test again until the spray is even.
If it drags or beads, it’s too thick; thin a little and test again.
Can I use household thinners with airbrush paints?
Some household thinners can be incompatible with airbrush paints and may clog or react with pigments. Always use thinners recommended by the paint manufacturer and avoid mixing brands unless specified.
Use the thinner recommended by the paint maker; avoid mixing brands unless told it’s safe.
How often should I clean the airbrush?
Clean the airbrush after each session and flush between colors. A thorough end-of-day clean prevents pigment buildup and keeps spray quality consistent over time.
Clean after every session and flush between colors to keep performance steady.
Is it safe to spray indoors?
Spraying indoors is possible with proper ventilation, a filtered setup, and respiratory protection. Use a spray tent or open windows, and minimize exposure to fumes and pigments.
Yes, with good ventilation and proper protection; use a spray tent if possible.
Do I need to purge between colors?
Purging between colors helps prevent color bleed and cross-contamination. A quick flush with thinner or color-neutral cleaning solution keeps colors distinct.
Yes, purge between colors to keep them clean and distinct.
Watch Video
Quick Summary
- Thin paint to a smooth viscosity before spraying.
- Test spray on scrap to preview results.
- Clean the airbrush thoroughly after each use.
- Follow safety guidelines for ventilation and PPE.
- Document dilution ratios for repeatable finishes.