Handheld Paint Sprayer Guide: DIY Painting Tips
Learn how to choose, set up, and safely use a handheld paint sprayer for walls, cabinets, and cars. This comprehensive how-to covers prep, thinning, masking, technique, and cleanup for homeowners and DIY enthusiasts.

With a handheld paint sprayer, you’ll achieve fast, even coverage on walls, cabinets, or car panels. This guide shows you how to choose the right sprayer, set it up correctly, thin paints when needed, mask your work area, and clean safely. Follow these steps to improve quality and reduce mess on DIY projects.
What is a handheld paint sprayer and when should you use one
A handheld paint sprayer is a portable device that atomizes paint into a fine mist, allowing broad or targeted coverage with minimal brush strokes. They excel on flat or curved surfaces where roller marks would show, such as walls, cabinets, furniture, and even automotive panels. For DIY homeowners and hobbyists, a handheld sprayer can dramatically reduce application time while producing a smoother, uniform finish. The key to success is understanding the limits: some paints require thinning, some surfaces need careful masking, and not every project benefits from spraying. As you begin, consider the surface texture, desired sheen, and the room’s ventilation. Remember that a sprayer forgives less-than-perfect masking, so plan your masking and containment carefully. The PaintQuickGuide team notes that the right sprayer, paired with proper technique, delivers professional-looking results with less effort than traditional methods.
In this guide you’ll learn how to pick a model that fits your project, prepare the workspace, adjust paint viscosity, spray technique, and post-project cleanup. This approach is designed for homeowners and DIY enthusiasts who want reliable results without hiring a pro.
How to choose the right handheld paint sprayer
Selecting the best handheld spray system starts with understanding your project scope and materials. Consider spray pattern (round versus fan), nozzle options, and pressure controls. For most interior walls and cabinetry, a sprayer with adjustable flow and a mid-range nozzle will provide balanced coverage without blasting paint everywhere. If you’re planning automotive refinishing or hard-wearing finishes, you may want a model with higher reliability, better filtration, and easy-clean components. Check for features like a bleeder valve to relieve pressure, a reusable filter, and simple disassembly for cleaning. Compatibility with multiple paints (latex, acrylics, stains) expands your tool’s usefulness. Finally, estimate total cost of ownership, including replacement parts, filters, and cleaning supplies. A quality handheld sprayer is an investment that saves time and yields smoother finishes when you practice proper technique.
Workspace setup and masking essentials
Before you begin spraying, prepare the area to protect floors, furniture, and fixtures. Use drop cloths or plastic sheeting, seal off adjacent rooms with painter’s tape, and cover electrical outlets to prevent accidental spatter. Adequate ventilation is critical, so open doors and windows or run a fan to create cross-breeze airflow. Mask edges, trim, and built-ins with precise tape lines, plus masking paper for wide areas. Keep a dedicated waste bin for rags and disposable filters. A well-prepared workspace reduces cleanup time and helps you maintain consistent spray distance and speed during application. PaintQuickGuide emphasizes that masking is as important as technique for achieving crisp edges and a clean final result.
Paint preparation: thinning, viscosity, and compatibility
Many paints require thinning to achieve a smooth spray pattern and to prevent spraying droplets from drying mid-air. Follow the manufacturer’s recommendations for thinning ratios, and always test spray on a scrap board or cardboard. Use a paint strainer to remove clumps or dried bits that might clog the nozzle. For water-based latex, you’ll typically add a small amount of water and mix thoroughly; for oil-based or enamel paints, use the recommended thinner and maintain proper ventilation. If your sprayer has a viscosity cup or a test jar, use it to verify the liquid’s consistency before spraying. A consistent viscosity helps achieve an even mist and reduces tip clogging, resulting in fewer runs and orange-peel texture.
Sprayer setup and calibration tips
Assemble the sprayer according to the user manual, ensuring all seals are tight and the nozzle is installed correctly. Prime the system if required and set the regulator to a comfortable starting pressure. Run a short test spray on scrap material to observe the pattern, adjusting distance (usually 6–12 inches from the surface) and speed to avoid runs. When calibrating, start with light passes and gradually increase pressure or speed as the paint flows smoothly. Keep the sprayer at a steady angle and avoid sweeping too quickly, which can cause heavy coats along the edges. Have a dedicated cleanup bottle ready to flush water or solvent through the lines to keep the internal passages clear between sessions.
Spraying technique for best results
Consistency is the heart of professional-looking results with a handheld sprayer. Move your arm in even, overlapping passes, maintaining a constant distance from the surface. Begin spraying off the object and release the trigger as you pass the edge to avoid heavy rims. Use smooth, continuous motions rather than stopping and starting, which creates lines or sags. For flat surfaces, use a “cross-hatch” approach: light forward passes followed by a light side-to-side pass to even out coverage. If you notice orange-peel texture, slightly adjust distance, speed, or spray pattern and re-test on scrap. Dry-time will vary by paint type, temperature, and humidity, so plan for adequate curing before applying a second coat.
Surface prep, priming, and edge continuity
Some surfaces benefit from a primer layer to improve adhesion and brightness, especially on new wood, metal, or bright colors. Apply primer with the same technique, then allow it to dry according to the product guidelines. When spraying edges or corners, use a smaller nozzle to achieve sharper lines and avoid overspray. Hard-to-reach areas may require a nozzle extension or a different technique (such as masking before spraying). If you need to fix imperfections, lightly sand between coats, wipe away dust, and keep the surface clean before the next pass. The goal is a uniform base that helps coatings adhere and cure evenly.
Cleaning, maintenance, and long-term care
After finishing, flush the sprayer with the appropriate solvent or water to clear the lines, then disassemble and rinse all components. Clean or replace filters and nozzles to prevent clogs. Wipe down the exterior and lubricate moving parts as recommended by the manufacturer. Dry all parts completely before reassembly to prevent rust or corrosion. Store the sprayer in a dry, cool place away from dust. Regular maintenance reduces downtime and extends the life of the tool, preserving performance for future projects.
Troubleshooting common issues and quick fixes
If you see sputtering, check for dried paint in the nozzle or filter; clean or replace as needed. If spray is inconsistent, verify that thinning is correct and the material flows freely. A jammed trigger can be caused by debris; disassemble safely, clean, and reassemble. Spits or runs may indicate hold-time issues; slow down your motion and maintain a steady distance. If the sprayer leaks, inspect seals and gaskets for wear and replace as necessary. Consult the user manual for model-specific guidance and ensure the power source is stable and compatible with the sprayer.
Cost considerations, value, and maintenance cadence
A handheld paint sprayer can save substantial time, especially on larger projects, compared to brushes or rollers. When evaluating value, consider maintenance costs, replacement parts, and the availability of compatible paints. Investing in a model with easy disassembly, reliable filters, and accessible replacement parts reduces long-term costs by minimizing downtime and improving consistency. Regular cleaning and proper storage extend the tool’s life and keep performance high across multiple projects.
Tools & Materials
- Handheld paint sprayer(Choose a model with adjustable pressure and a bleed valve)
- Paint compatible with sprayer(Latex, acrylic, or enamel paint; thin as needed)
- Paint strainers/filters(Use fine mesh to prevent clogs)
- Drop cloths/plastic sheeting(Protect floors and furniture)
- Masking tape and masking film/paper(Create clean edges and protect surfaces)
- PPE: respirator, goggles, gloves(Ensure proper ventilation and eye protection)
- Rags and a bucket for cleanup(Keep cleanup materials handy)
- Stir sticks and a clean mixing container(Keep paint well mixed and free of lumps)
- Waste disposal bag or container(Safe disposal of used rags and filters)
- Water or compatible cleaner/solvent(Flush lines after use (water for latex))
- Masking accessories for corners(Nail-length corner shields or edge tape)
Steps
Estimated time: 2-6 hours
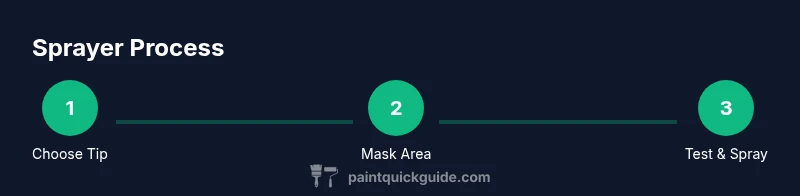
- 1
Assess project and select nozzle
Evaluate the surface type and required finish. Choose a nozzle that matches the spray pattern you need, and prepare the sprayer with a clean, tight install. Refer to Diagram A for nozzle guidance and positioning.
Tip: Best practice: start with the smallest practical nozzle for tight edges, then switch to a larger pattern for broad areas. - 2
Mask and protect the area
Lay down drop cloths and cover nearby fixtures. Apply masking tape precisely along edges and corners to prevent overspray. Double-check that outlets and vents are protected before you begin.
Tip: Use a test spray on a scrap panel to confirm masking effectiveness before coating the actual surface. - 3
Prepare the paint
Stir the paint thoroughly and strain it to remove lumps. If thinning is recommended, add small amounts gradually and re-stir until the viscosity looks even. Test spray on scrap to confirm flow and coverage.
Tip: Keep the can or bucket closed when not actively loading the sprayer to reduce skin formation. - 4
Assemble and prime the sprayer
Install the nozzle and seals carefully. Prime the sprayer or perform a short flush if required by your model. Ensure consistent feed so air bubbles don’t disrupt spray quality.
Tip: Lock the wand and confirm the guard is in place to avoid accidental sprays on your hands. - 5
Test spray and adjust
Spray a few test passes on scrap material at the same distance you’ll use on the project. Adjust distance, speed, and pressure to achieve even misting with minimal runs. Make small, incremental changes.
Tip: Keep a steady rhythm and avoid stopping in the middle of a pass, which creates streaks. - 6
Begin coating with light passes
Apply a light, even first coat in multiple, overlapping passes. Maintain a consistent distance and angle; avoid blasting one area for too long. Let the first coat set according to the paint’s curing time before applying a second coat.
Tip: If you see heavy spots, back away slightly and lighten your passes to even out the coat. - 7
Second coat and edge handling
Apply a second coat in the opposite direction to minimize lift and ensure even coverage. Revisit edges and tight corners with a controlled motion to prevent lap marks.
Tip: Don’t rush; higher quality results come from uniform passes rather than speed. - 8
Cleanup immediately after use
Disassemble the sprayer, rinse parts with the appropriate cleaner (water for latex, solvent for oil-based paints), and dry thoroughly before storage. Reassemble once dry and store in a clean, dry place.
Tip: Flush the lines until the solvent or water runs clear to prevent pigment buildup. - 9
Maintenance and storage
Inspect seals and hoses for wear; replace any damaged parts. Store with a full charge or dry battery if cordless, and keep the nozzle protected. Regular maintenance reduces clogging and extends tool life.
Tip: Keep spare filters on hand and schedule periodic checks with the manufacturer guidelines. - 10
Troubleshooting quick fixes
If you experience sputtering or pulsating spray, check for clogs, verify thinning accuracy, and ensure proper air or fluid supply. Re-test on a scrap piece after each adjustment to confirm improved consistency.
Tip: Document the problem and the fix so future projects go faster.
Your Questions Answered
What is a handheld paint sprayer and what are its best uses?
A handheld paint sprayer atomizes paint into a fine mist for fast, even coverage on walls, cabinets, and automotive panels. It excels on large flat areas and curved surfaces where brushes leave marks. For best results, choose the right nozzle, maintain proper distance, and mask surrounding areas.
A handheld sprayer atomizes paint into a fine mist for fast, even coverage on walls, cabinets, and cars. It works best on large flat surfaces with the right nozzle and masking.
Can I spray latex paint with a handheld sprayer?
Yes, latex paint is commonly sprayed with handheld sprayers. You may need thinning per manufacturer guidelines and a suitable nozzle for the desired pattern. Always test on scrap first to dial in distance, speed, and pressure.
Yes, you can spray latex paint. Thin as recommended and test on scrap before finishing your project.
Do I need to thin paint before spraying?
Many latex and acrylic paints require thinning for a smooth spray. Follow the product’s guidelines and test spray on scrap. If the paint is too thick, it can clog the nozzle or create texture irregularities.
Usually you should thin paints according to the manufacturer’s directions and test first.
How do I clean a handheld paint sprayer after use?
Disassemble per the manual, rinse with the appropriate solvent or water, and run clear solvent or water through the lines. Dry all parts completely before reassembly and storage.
Disassemble, rinse with the right solvent, dry all parts, and store safely.
What safety gear should I wear when using a handheld sprayer?
Wear a respirator or appropriate mask, safety goggles, and gloves. Ensure good ventilation in the workspace and keep bystanders away during operation.
Wear a respirator, goggles, and gloves, and ensure good ventilation.
What surfaces are best suited for handheld spraying?
Smooth, flat, non-porous surfaces typically yield the best results. Porous or heavily grooved textures may require more passes or alternative methods. For cabinets or furniture, ensure edges are masked and surfaces are primed if needed.
Smooth surfaces spray best; textured surfaces may require more coats or different methods.
Watch Video
Quick Summary
- Test spray on scrap before coating.
- Mask edges thoroughly to prevent overspray.
- Thin paints as recommended and test viscosity.
- Clean the sprayer immediately after use.