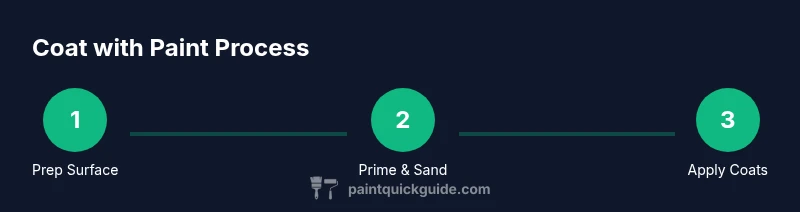
Coat with Paint: Step-by-Step Guide
Learn how to coat with paint effectively—from surface prep to finishing. This PaintQuickGuide tutorial covers tools, finishes, techniques, safety, and troubleshooting for durable, professional results.

This guide will help you successfully coat with paint on walls, furniture, or even a car. By preparing the surface correctly, choosing the right primer and finish, and using proper technique, you’ll achieve a durable, even coating. According to PaintQuickGuide, proper preparation is the single most important factor for long-lasting results. The PaintQuickGuide team found that selecting the correct finish reduces touch-ups and enhances color depth.
Why coat with paint matters for durability
A proper coat of paint serves as both a barrier and a cosmetic finish. When you coat a surface with paint, you seal out moisture and contaminants, improve resistance to wear, and create a uniform color. The right combination of prep, primer, and technique reduces the chance of cracking, peeling, or uneven coverage. For homeowners, DIY enthusiasts, and auto refinishing hobbyists, a thoughtful approach saves time and money in the long run. PaintQuickGuide emphasizes that the longevity of a painted surface starts with planning and surface assessment, not just the color you choose.
Surface prep essentials
Begin with a clean slate: remove dust, grease, and loose material. Surfaces that are glossy or oily require degreasing and light sanding to create a key for the new coat. Fill cracks with appropriate filler, allow to dry, and sand flush. Use painter's tape to protect edges, fixtures, and adjacent surfaces. If you're painting wood, remove old paint in poor condition or prime with a stain-blocking primer. PaintQuickGuide analysis shows that thorough prep and priming greatly improve adhesion and evenness, especially on high-traffic walls or curved surfaces.
Paint selection and finishes
Choose latex or oil-based paint based on the surface and environment. Inside rooms, a low or mid-sheen latex typically balances washability with concealment of surface imperfections, while trim benefits from higher-sheen finishes. Exterior surfaces require weather resistance, UV stability, and appropriate bonding primers. Consider indoor lighting and color depth when picking a finish—eggshell or satin often hides minor flaws better than a flat finish, while gloss provides durability for high-wear areas.
Application techniques and workflow
There are three main application methods: brush to cut in edges, roller for broad surfaces, and spray for large areas or a flawless finish on furniture. Begin with edge work, move to flat areas in overlapping passes, and maintain a consistent wet edge to avoid lap marks. Keep coats thin to prevent runs; two thin coats usually outperform one thick coat. Allow each layer to dry fully according to product labels before applying the next.
Common mistakes and fixes
Overloading brushes or rollers causes drips and uneven texture; test a small area first. Skipping primer on difficult surfaces leads to poor coverage and additional coats. Not preparing the surface or neglecting masking can ruin adjacent finishes. If you see brush marks, switch to a finer brush and lightly re-wet the area, or sand between coats for a smoother result.
Safety, ventilation, and cleanup
Paint fumes can irritate eyes and lungs, so ensure good ventilation and wear a respirator or mask when needed. Protect floors and furniture with drop cloths and tape, and remove or cover outlets and fixtures. Clean tools promptly according to the solvent type, and dispose of rags safely to prevent spontaneous combustion. Following these practices will help you coat with paint safely and efficiently, and The PaintQuickGuide team recommends reviewing safety guidelines before starting.
Tools & Materials
- Paint (latex or oil-based)(Choose color and sheen based on area and use-case)
- Primer(Blocking primer for stains or glossy surfaces)
- Brushes(Variety: angled sash brush for edges; 1-2 inch trim brush)
- Rollers(6-9 inch roller for walls; nap depending on texture)
- Paint tray and liners(Keeps paint accessible and reduces spills)
- Drop cloths(Protect floors and furniture)
- Painter’s tape(Mask edges and fixtures)
- Sandpaper or sanding block(Light grit for prepping glossy surfaces)
- Putty knife and filler(Repair holes and cracks)
- Ladder or step stool(Access higher areas safely)
- Respirator or mask(For odors and aerosols)
- Mineral spirits or water-based cleaner(Clean brushes and surfaces)
- Safety glasses and gloves(Protect skin and eyes)
Steps
Estimated time: 2-6 hours
- 1
Inspect and plan
Assess the surface, note problem areas, and plan coats and dry times. Decide whether primer is needed and sketch masking lines to prevent accidental coverage.
Tip: Document any repairs before painting. - 2
Prepare the surface
Clean thoroughly to remove dust/oil. Sand glossy areas to create a key and fill any cracks with appropriate filler. Wipe away dust before priming.
Tip: Always wear a mask when sanding. - 3
Mask and protect
Apply painter’s tape to trim, outlets, and fixtures. Cover floors with drop cloths and move furniture away from the work area.
Tip: Secure drop cloth edges to prevent slipping. - 4
Prime (if needed)
Prime stained, new, or glossy surfaces to improve adhesion and hide underlying color. Allow primer to dry fully according to the label.
Tip: Use stain-blocking primer for knots or water stains. - 5
Cut in edges
Using a angled brush, paint around corners, trim, and adjacent surfaces to create a clean boundary before rolling.
Tip: Keep a wet edge and use long, steady strokes. - 6
Apply first coat
Roll or brush with even pressure, maintaining a wet edge. Work in sections and blend edges to avoid lap marks.
Tip: Do not overwork the paint; thin layers yield smoother results. - 7
Dry and assess
Let the coat dry completely as per product guidelines. Inspect for coverage gaps or streaks and plan touch-ups if needed.
Tip: Natural light helps reveal missed spots. - 8
Apply second coat
Apply a second coat for uniform color and durability. Follow the same technique as the first coat.
Tip: Some surfaces may need a third coat; check color depth. - 9
Finish and cleanup
Remove masking tape carefully after the final coat has set. Clean tools immediately and dispose of waste according to local rules.
Tip: Ventilate during drying to reduce odors.
Your Questions Answered
Do I need primer before painting?
Primer improves adhesion and coverage, especially on new, stained, or glossy surfaces. It helps block stains and creates a uniform base for the topcoat.
Primer helps the paint stick and look even, especially on new or stained surfaces.
How many coats should I apply?
Most projects need two coats for even color and durability. Some surfaces or colors may require a third coat for full coverage.
Typically two coats provide good coverage; some cases may need a third.
Can I coat over glossy paint?
Yes, but prep is key. Lightly sand or use a deglosser to create a rough surface, then prime if needed for better adhesion.
Glossy surfaces can be repainted with proper prep and sometimes primer.
What about ventilation and safety?
Work in a well-ventilated area and wear a mask if fumes are strong. Protect skin and eyes with appropriate PPE and keep pets away.
Paint fumes can be irritating; ensure good ventilation and wear PPE.
How long does drying take between coats?
Drying times depend on product and environment. Always follow the label for recoat windows and curing time before heavy use.
Check the product label for exact recoat times and curing duration.
Watch Video
Quick Summary
- Prep surfaces thoroughly before coating.
- Choose appropriate paint type and sheen.
- Maintain a wet edge for even coverage.
- Respect drying times between coats.
- Inspect for touch-ups and finish cleanup.