Masonry Paint Guide: Prep, Apply, and Maintain Durable Finishes
Learn how to choose, prep, and apply masonry paint for brick, stone, or concrete surfaces. This step-by-step guide covers primers, finishes, and maintenance for durable, breathable results.

This guide teaches you how to select, prep, and apply masonry paint on brick, concrete, and stone surfaces. You’ll learn how to evaluate substrate conditions, choose the right masonry paint type, prime and seal, apply using brushes, rollers, or sprayers, and maintain the finish for long-lasting protection. Expect practical techniques, safety notes, and troubleshooting tips.
What masonry paint is and why it matters
Masonry paint is a specialized coating designed to adhere to porous, mineral-based substrates like brick, plaster, concrete, and stone. Unlike standard interior latex, masonry paint is formulated to breathe and tolerate the movement and moisture that brick and stone surfaces experience over seasons. This means it resists cracking and blistering when applied on exterior walls or interior masonry features. According to PaintQuickGuide, choosing the right masonry paint involves balancing breathability, water repellence, and durability. The best masonry paints also accommodate substrate variability—new brick versus old, lime-based surfaces—without trapping moisture. For homeowners, this translates to longer-lasting finishes and fewer maintenance cycles. PaintQuickGuide analysis, 2026, emphasizes that breathable coatings reduce moisture buildup and efflorescence risks, especially on exterior masonry. Investing in the right product now saves time and money later.
When you see a label that reads masonry paint, you might wonder how it differs from conventional exterior latex. Masonry paints often have higher solids content, better adhesion to rough textures, and additives that improve water evaporation at the surface while allowing moisture to escape from the substrate. They may also be lime-based or cementitious, depending on the intended substrate and climate. Before you buy, verify compatibility with your surface, especially if lime plaster or historic brick is involved. Finally, plan for a slightly longer cure time in humid or shaded areas, as moisture can affect initial film formation. In short, masonry paint is designed to endure exterior conditions and preserve the natural texture of masonry while maintaining breathable properties that protect against moisture-related issues.
noteNullStatusTagOnlyForKBModeAndEnsureText
Tools & Materials
- Stiff-bristle brush(For removing loose flakes and applying primer to rough surfaces)
- Soft-bristle brush(For cleaning crevices and smoothing dust after brushing)
- Garden hose or low-pressure washer(Rinse surface and remove dirt without forcing water into joints)
- Mild masonry cleaner(Special formulations help remove algae, mold, and grime)
- Putty knife or scraper(Scrape off peeling paint and loose material)
- Filler/patching compound(Repair cracks and holes in the masonry surface)
- Masonry primer(Use a breathable primer compatible with masonry paint)
- Masonry paint(Choose acrylic-latex or silicone-based options depending on climate)
- Paint tray, rollers, and angled brushes(Select roller nap suited for rough masonry (3/8–3/4 inch) and brushes for edges)
- Ladder or scaffolding(Safe access for higher walls)
- Safety gear (gloves, goggles, mask)(Protective gear when cleaning and sanding)
- Drop cloths or plastic sheeting(Protect adjacent surfaces and landscaping)
- Mixing paddle/drill(Optional for large batches to achieve uniform consistency)
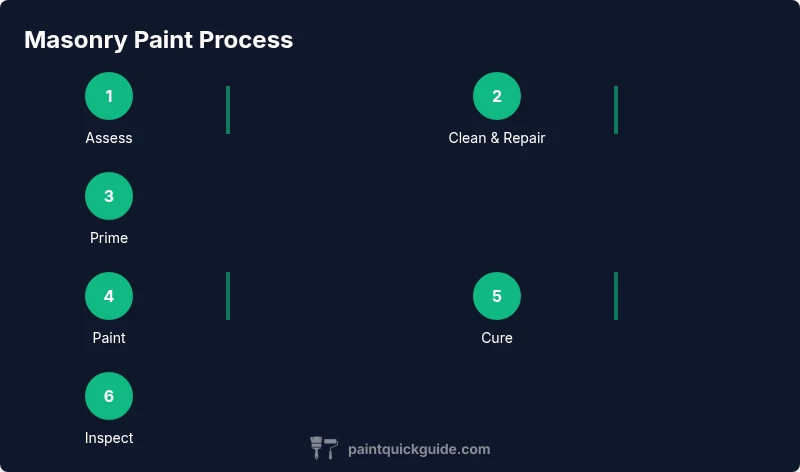
Steps
Estimated time: 4-8 hours (including dry times)
- 1
Assess the surface and plan
Walk the area to identify moisture, cracks, efflorescence, and old paint. Note high-friction zones (near doors, steps) and plan drop cloth boundaries. Check for structural issues and address them before painting. Establish a workspace with barriers to keep pets and kids safe.
Tip: Document problem areas with photos to track repair progress. - 2
Clean and prepare the masonry
Rinse the surface and scrub with a stiff brush to remove dirt, moss, and efflorescence. Apply a masonry cleaner if cycles of grime are stubborn. Allow to dry completely; water on the surface can ruin primer adhesion.
Tip: Use low-pressure washing to avoid driving water into joints. - 3
Repair and protect before painting
Fill cracks and holes with appropriate filler; smooth with a putty knife. Remove loose paint and roughen glossy areas so the primer can bond. Seal any active cracks with compatible sealant if joints show movement.
Tip: Avoid overloading repairs; feather edges to blend with surrounding texture. - 4
Prime for adhesion and breathability
Apply a breathable masonry primer suited to your surface and climate. Priming helps unify absorption, blocks stains, and improves paint longevity. Let the primer dry per manufacturer guidelines before applying paint.
Tip: Prime in two thin coats for even coverage on rough textures. - 5
Apply the first coat of masonry paint
Use a brush for edges and a roller for large flats. Work in small sections, maintaining a wet edge to avoid lap marks. Apply evenly with consistent pressure, following the substrate texture.
Tip: Keep a steady pace; avoid heavy loads of paint that pool in crevices. - 6
Apply second coat and cure
Once the first coat is fully dry, apply a second coat to achieve uniform color and protection. Check for thin spots and touch up as needed. Allow the surface to cure fully in appropriate weather conditions before exposing to heavy rain.
Tip: Weather matters: choose a dry window with temperatures above 50°F (10°C) and low humidity.
Your Questions Answered
What is masonry paint and how is it different from regular exterior paint?
Masonry paint is formulated to bond with rough, mineral substrates and to breathe. It resists moisture while allowing moisture vapor to escape, reducing peeling and cracking on brick, stone, and concrete compared with standard exterior latex.
Masonry paint bonds to rough stone or brick and breathes, preventing moisture buildup and cracking.
Do I need a primer for masonry paint, and when should I apply it?
Primers improve adhesion, even out porosity, and help color uptake. Apply a breathable masonry primer on clean, dry surfaces before painting, especially on repairs or newly exposed masonry.
Yes, use a masonry primer on clean, dry surfaces before painting.
Can masonry paint be used indoors?
Yes, masonry paint can be used indoors on surfaces like basements walls or fireplaces, provided the substrate is mineral-based and properly prepared. Use ventilation and select a finish suitable for interior environments.
Yes, you can use it indoors if the surface is mineral-based and you ventilate the area.
What surfaces can be painted with masonry paint?
Brick, concrete, stucco, cement block, and plaster with masonry characteristics are suitable. Avoid painting nonporous surfaces like sealed concrete unless the product specifies compatibility.
Brick, concrete, stucco, and other masonry surfaces can be painted with masonry paint.
How long does masonry paint take to dry and cure?
Dry times vary with temperature and humidity, but most masonry paints become touch-dry within a few hours and cure fully in several days. Follow manufacturer guidance for recoating windows.
Drying can take a few hours; full curing usually happens over several days depending on conditions.
Watch Video
Quick Summary
- Choose breathable masonry paint for moisture control
- Prepare thoroughly: clean, repair, and prime before painting
- Apply in thin, even coats for best adhesion
- Control weather: avoid painting in high humidity or cold temps
- Allow full cure time before assessing final finish