Paint Scratch Paint: Fix Scratches on Cars and Walls
Learn how to repair paint scratches on cars and home surfaces with a practical, step-by-step approach. This guide covers prep, color matching, application, finishing, and maintenance for lasting results.

By the end of this guide, you can restore scratched paint on cars or walls using a simple touch-up process that blends seamlessly with the surrounding finish. You’ll need common tools like a paint touch-up pen or bottle, fine-grit sandpaper, polishing compound, and a clear coat, plus matching color paint. We’ll walk you through each step.
Why paint scratch paint matters for DIY projects
Scratches on vehicles or interior surfaces can reduce value and enjoyment. The quick fix often seems simple, but a good repair blends color, texture, and sheen so it looks integrated rather than patchy. The PaintQuickGuide team notes that small scratches are usually approachable for DIYers when you choose the right products and follow proper prep. Understanding the type of scratch—clearcoat-only, color-scratched, or deep gouge—determines the method and materials you’ll need. In this guide, we’ll cover safe, affordable strategies that homeowners and auto refinishing hobbyists can apply without heavy equipment. Expect to improve appearance with minimal tools, and you’ll gain confidence in tackling future scrapes. The goal is a durable repair that remains compatible with future cleaning and polishing routines. When you see a paint scratch paint, acting promptly helps keep the finish uniform and protects the underlying layers. According to PaintQuickGuide, careful prep and color matching are the two most critical steps for a natural-looking repair.
Assessing the scratch and choosing the right approach
Not all scratches are created equal. Some affect only the clear coat, others breach the base color, and deeper gouges may require more extensive work. Start by cleaning the area to reveal the true edge of the scratch. Under strong light, examine the scratch: does it feel rough or smooth? Gently run a fingernail over the edge—if you can feel a groove, you’re likely dealing with more than a surface blemish. For light, clear-coat-only scratches, a polishing compound and light touch-up paint may suffice. If color or basecoat is exposed, you’ll need color-matched paint plus a clear topcoat. For deep gouges, consider temporary filler or professional refinishing. PaintQuickGuide emphasizes preparing for either a home fix or a professional route by evaluating depth, width, and the surrounding finish. In all cases, selecting products that match your surface and sheen is essential to a seamless repair.
Home repair vs. auto refinishing options
DIY repair work is most common for minor scratches on walls, cabinets, and outdoor surfaces, while cars may demand more precise color matching and a durable clear coat. For interior walls, startup steps include matching wall paint type (latex vs. enamel), sheen level (eggshell, satin), and color family. On vehicles, you’ll typically need a color-matched touch-up kit, which often includes a small bottle, applicators, and a brush. If the scratch is beyond surface level, a professional refinisher may be required to blend the new paint with factory color and repair any underlying damage. The PaintQuickGuide approach favors starting with a safe, reversible solution (spot application) before committing to a permanent layer. Always test color on a hidden area or scrap piece to gauge accuracy before applying to the visible scratch.
Surface prep and color matching tips
Preparation is the backbone of a successful repair. Begin by washing the area with mild soap and water, then dry thoroughly. If wax or wax residue remains, remove it with a dedicated wax remover or isopropyl alcohol; a clean surface ensures paint adheres evenly. For color matching, rely on official color codes when available (cars) or swatch cards and sample tests (walls) to minimize mismatch. Shake the paint bottle well to ensure pigment distribution, then apply a thin roller or brush stroke on a test area. If the color looks off, adjust with a tiny amount of tint or choose a lighter shade and build gradually. Lightly feather the edges to blend with surrounding paint and avoid sharp boundaries.
Step-by-step touch-up workflow (high-level)
The repair workflow follows a logical sequence from prep to protection. After cleaning, you’ll test color, apply base, blend, and seal with a clear coat. The key is to work in very thin layers, allowing each coat to dry fully before the next. For walls, you may need to prime first on severe discoloration; for cars, precise feathering helps hide any telltale lines. Patience and control are more important than speed. In all cases, keep the surface dust-free during the repair window and avoid direct sunlight that can dry the paint unevenly. A proper topcoat ensures durability against UV exposure, moisture, and routine cleaning.
Finishing and protecting the repaired area
Once the color is matched and the final layer has dried, apply a protective clear coat or sealant to lock in the repair and restore uniform gloss. For vehicles, a UV-resistant clear coat helps prevent future fading and oxidation; for walls, consider a wipeable finish or satin polyurethane to match the surrounding sheen. After curing, polish lightly with a microfiber cloth to even out any micro-marks and restore the overall luster. Finally, store leftover paint in a cool, dry place and label it with the color code, surface type, and date of purchase to simplify future touch-ups. Maintaining your repaired area with routine cleaning and gentle polishing will preserve the repair for years to come.
Authoritative sources
- EPA.gov: Paint safety and environmental considerations for coatings
- OSHA.gov: Workplace safety when working with solvents and powders
- Extension.osu.edu: Color matching and surface prep guidance for consumer painting projects
These sources provide science-backed practices and safety guidance to complement DIY painting projects. For more in-depth reading, consult the linked materials and follow all product-specific instructions.
Common mistakes to avoid and troubleshooting tips
Rushing the color match, skipping prep, or applying thick layers are common mistakes that lead to obvious fixes rather than seamless repairs. Always test on a hidden area, keep layers thin, and allow full drying time between coats. If the finish looks patchy, re-sand the edge lightly and blend again with a fresh coat. Humidity and temperature can affect drying times and color behavior; aim for a stable environment and follow the product’s cure times closely. If you’re unsure about the color or depth, consult a local auto body shop or paint specialist who can provide color-matching services and a professional topcoat application. Remember, meticulous prep and gradual layering yield the most natural results.
Tools & Materials
- Paint touch-up kit (pen or bottle)(Color-matched to surface; ensure proper basecoat compatibility)
- Fine-grit sandpaper (e.g., 2000 grit)(Lightly scuff edges for blending; use with a sanding block)
- Polishing compound(Use a microfiber pad; avoid harsh abrasives)
- Clear coat or protective sealant(Choose UV-resistant option for outdoor surfaces)
- Isopropyl alcohol or wax/remover(Cleans surface and removes residue before painting)
- Soap, water, and microfiber cloths(Gentle cleaning; avoid lint and scratches)
- Masking tape and fine brushes(Shield adjacent paint; precise edge control)
- Color-matching swatches or test patches(Test color on inconspicuous area)
- Gloves (nitrile)(Protect hands from solvents)
- Hair dryer or heat source (optional)(Speed up drying between thin coats)
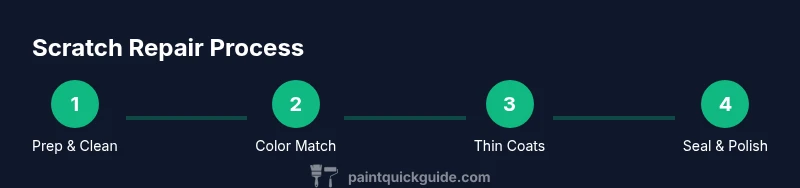
Steps
Estimated time: 60-90 minutes
- 1
Prepare the surface
Start with a clean, dry surface. Wash with mild soap and water, then dry. If wax or residue remains, remove it with isopropyl alcohol or a dedicated wax remover to ensure proper paint adhesion.
Tip: Test a small area first to confirm no adverse reaction. - 2
Test color and prep edges
Shake the color-matched paint well and apply a tiny amount on a hidden spot. Compare under good lighting; adjust if needed by tinting or choosing a lighter shade. Lightly sand the scratch edges to create a feathered edge for blending.
Tip: Always test color before applying to the visible area. - 3
Apply thin base coats
Using a fine brush or pen, apply a thin layer of base color over and slightly beyond the scratch. Allow each layer to fully dry before adding the next to avoid pooling or thick edges.
Tip: Work in multiple ultrathin layers rather than one thick coat. - 4
Blend and seal
After the base color dries, feather the edges with polishing compound to smooth transitions. Apply a clear coat in very light, even passes to seal and protect the color work.
Tip: Keep coats very thin to prevent runs and orange peel. - 5
Final polish and maintenance
Wait for full cure according to product guidance, then polish with a microfiber cloth to restore shine. Clean regularly to maintain the finish and avoid future micro-scratches.
Tip: Store remaining paint with color code for future touch-ups.
Your Questions Answered
Can I fix deep scratches myself?
Deep scratches that expose base material or metal may require professional refinishing. DIY methods can improve appearance for minor damage, but they may not restore strength. Always assess depth and, if in doubt, consult a pro.
Deep scratches may require professional refinishing. For minor marks, you can try a careful touch-up, but for depth, seek expert help.
What’s the best product for car scratches?
Choose a color-matched touch-up kit designed for automotive use, followed by a UV-resistant clear coat. Avoid household paints on cars and always test color on a hidden area first.
Use automotive touch-up kits with color matching and a clear topcoat; test first.
How long does touch-up paint take to dry?
Drying time depends on the product and environment. Expect several hours for each thin layer and up to 24 hours for full curing before light use or washing.
Drying times vary; plan for several hours between coats and up to a day for full cure.
Will touch-ups match wall colors perfectly?
A perfect match is possible with careful color matching and testing. Slight shade differences can occur due to lighting, sheen, and aging of the surrounding paint.
A close match is achievable, but lighting and aging can affect perceived color.
Is it safe to use household paint for cars?
Household paints are not recommended for car surfaces due to differences in durability and finish. Use automotive paints or dedicated touch-up kits for best results.
Avoid household paints on cars; use automotive paints for the best finish.
Watch Video
Quick Summary
- Assess scratch depth before starting.
- Color-match precisely with swatches and tests.
- Apply multiple thin layers for seamless blending.
- Protect the repair with a durable clear coat.