Scratch Paint for Cars: A Practical DIY Guide
Learn how to repair light scratches on car paint with a step-by-step DIY approach, essential tools, and finishing tips. Understand depth, choose the right method, and know when to call a pro for lasting results.

By following a structured DIY approach, you can restore many light scratches on your car’s paint. This guide covers how to identify scratch depth, pick the right tools, and apply rub compounds, touch-up paint, and sealant. You’ll learn how to evaluate when a repair is safe to DIY, and when to call a pro.
Understanding Scratch Paint for Cars
Scratch paint for cars describes abrasions that disrupt the surface: the clear coat, base color, or even the primer beneath. Most drivers encounter two broad categories: light clear-coat scratches that you can usually feel but not catch with your fingernail, and deeper defects that breach the color layer. The intent of this guide is to help you decide whether a DIY fix is appropriate and how to execute it safely, without compromising the underlying finish. According to PaintQuickGuide, successful DIY scratch repair begins with honest depth assessment and careful preparation. Start by washing the panel with gentle car soap, drying with a soft microfiber, and inspecting the scratch in good lighting. If the scratch is limited to the clear coat, you have a higher chance of restoring shine with polishing compounds; if color is exposed, you’ll likely need color-matched touch-up paint and a clear coat sealant to fade the edge.
Deep scratches that expose primer or metal require more advanced steps and may warrant professional repainting. Always work in a shaded area and use protective gloves when handling solvents. The goal is not to “erase” every mark but to minimize contrast so the scratch becomes barely visible from normal viewing distances.
-1
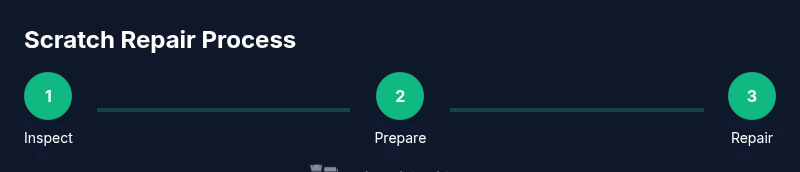
Tools & Materials
- soft microfiber towels(multiple towels for drying and buffing, 1 for cleanup, 1 for final wipe)
- automotive rubbing compound(a fine, non-abrasive compound for light scratches)
- polishing compound(used after rubbing to restore gloss and remove haze)
- color-matched touch-up paint(stick or pen form; ensure color code matches your car)
- clear coat pen/spray(applied over touch-up paint for sealing and shine)
- fine detail brush or toothpick(for precise application of touch-up paint in small scratches)
- painter’s tape/masking tape(protects adjacent panels during touch-up and clear coat application)
- isopropyl alcohol or panel cleaner(preps surface and removes oils before repair)
- wax or sealant(finishes and protects repaired area after curing)
- buffing pad or microfiber applicator(helps apply compounds evenly)
- gloves(protects hands from solvents and dyes)
Steps
Estimated time: 45-120 minutes
- 1
Prepare the area
Wash the panel with mild car soap and warm water, then dry completely with a clean microfiber. Remove any wax or sealant with isopropyl alcohol and inspect the scratch in good lighting to confirm depth.
Tip: Dirt or wax will fill the scratch and make it look worse; cleaning first is essential. - 2
Assess scratch depth
Gently run your fingernail over the scratch. If you can feel it or it breaks the surface, it’s deeper than a mere clear-coat scuff and may need color matching or professional help. Light, barely noticeable marks are usually fixable with rubbing compounds.
Tip: Depth判断决定修复路径:浅痕常用研磨,深痕需色漆和清漆。 - 3
For shallow scratches: use rubbing compound
Apply a small amount of rubbing compound to a microfiber pad and buff in a circular motion over the scratch with light pressure. Wipe clean and check for gloss improvement.
Tip: Use soft motions; heavy pressure can remove clear coat unintentionally. - 4
If color is exposed: apply touch-up paint
Using a fine brush or the precision pen, apply a thin layer of color-matched paint into the scratch. Let it dry for the manufacturer-recommended time before proceeding to clear coat.
Tip: Apply in ultra-thin coats to avoid pooling; multiple thin layers beat one thick coat. - 5
Seal with clear coat
Once the color layer is dry, apply a clear coat over the repaired area to protect the pigment and restore shine. Allow to cure in shade away from direct sunlight.
Tip: Clear coat seals in color and helps blend edges with surrounding paint. - 6
Polish and blend
Use a polishing compound on a clean pad to blend the repaired patch with the surrounding paint. Wipe away residue and inspect for uniform brightness.
Tip: Polishing removes hazing and helps edges disappear. - 7
Finish and protect
Apply a wax or sealant after the area cures to provide ongoing protection and enhance durability against future scratches.
Tip: Regular maintenance reduces visible imperfections over time. - 8
Evaluate the result and decide next steps
If the repair still shows a noticeable edge or color mismatch, or if the scratch is deeper than you expected, consider professional repainting or a paint-chip repair service.
Tip: Some cases require color matching and spray-applied clear coats for seamless results.
Your Questions Answered
What kinds of scratches can I fix at home?
Most shallow, clear-coat scratches are repairable at home with rubbing compounds and touch-up paint. Deeper scratches that expose base color or primer often require professional attention.
Most light scratches can be fixed at home, but deeper ones may need a professional repaint.
Can I fix a deep scratch without repainting?
If the scratch penetrates beyond the clear coat and base color, a simple DIY fix will likely be temporary. A professional repaint or color-matching repair yields the best long-term results.
Deep scratches usually need repainting for a lasting fix.
Do I need to sand before applying touch-up paint?
Sanding is rarely required for minor scratches. If you must level the surface for better color adhesion, use fine-grit (2000-3000) sandpaper with care and minimal pressure.
Sanding is often unnecessary for small fixes and can damage clear coat if overdone.
How long should each layer dry before applying the next?
Follow the color and clear coat product instructions; typically, you should wait several minutes to an hour between thin coats in dry, shaded conditions.
Wait according to the product labels between coats to avoid streaks.
Will DIY scratch repair affect resale value?
Properly repaired scratches can improve appearance and maintain value, but poorly matched color or visible edges may lower perceived value. Consider professional help for high-value cars.
A good repair can help resale; a bad one can hurt it.
Is it safe to use household cleaners on car paint?
Most household cleaners are not ideal for automotive finishes. Use automotive-safe cleaners or isopropyl alcohol for prep, avoiding harsh solvents that can strip the clear coat.
Avoid household cleaners; use car-safe cleaners.
Watch Video
Quick Summary
- Assess depth before repairs
- Use thin layers for paint and clear coat
- Polish to blend edges after touch-ups
- Finish with wax/sealant for protection