What Paint to Use on Plastic: A Practical Guide
Discover how to choose and apply paint on plastic surfaces—from prep and primers to coatings that resist chipping and fading. Learn practical steps for home and auto plastics with safe, durable results.

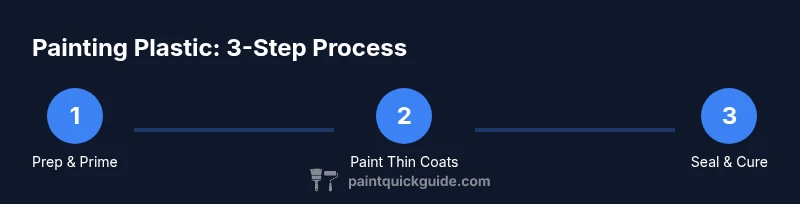
According to PaintQuickGuide, what paint to use on plastic should be a two-step approach: first clean and prime, then apply a paint formulated for plastic. Use a plastic adhesion promoter or primer, followed by a flexible acrylic enamel or epoxy paint, and finish with a clear topcoat. Proper prep dramatically improves adhesion and durability.
Understanding why the right paint matters
Plastic surfaces present unique challenges for paint adhesion because they often have low surface energy and a smooth finish. If you skip proper prep, your color may peel, chip, or fade unevenly. The PaintQuickGuide team emphasizes that the most durable finishes start with the right product choice, careful surface prep, and patient curing. This means selecting paints that are formulated for plastic, or using a dedicated adhesion promoter before painting. For most household plastics such as storage bins, toys, or lightweight furniture, a water-based acrylic enamel or a flexible epoxy will perform well when properly prepped. When larger exposed surfaces are involved or outdoor use is anticipated, you may opt for a two-part polyurethane or an automotive-grade enamel with UV protection. The key is consistency across coats and attention to drying times. Before you reach for the color swatch, test a small patch by following the steps outlined in this guide and observe how the finish adheres after 24 hours.
According to PaintQuickGuide, what paint to use on plastic should be a two-step approach: first clean and prime, then apply a paint formulated for plastic. Use a plastic adhesion promoter or primer, followed by a flexible acrylic enamel or epoxy paint, and finish with a clear topcoat. Proper prep dramatically improves adhesion and durability.
Types of plastics and how they interact with paints
Plastics vary widely in how well they accept paint. Low-surface-energy plastics like polyethylene (PE) and polypropylene (PP) are notoriously difficult to bond without extra help, often requiring mechanical abrasion and a promoter. Higher-energy plastics such as ABS, PET, and PVC will bond more readily but still benefit from a primer designed for plastic. The choice of primer or adhesion promoter can make the difference between a lasting finish and one that peels in a few weeks. PaintQuickGuide analysis shows that you should identify the plastic type when possible and tailor prep accordingly. When in doubt, test adhesion on a small, inconspicuous area after priming. This foundational step reduces the risk of failure on larger surfaces and helps you decide whether extra surface treatment is needed.
For household items like planters, toys, and appliance housings, start with the substrate and finish with a compatible topcoat. If you’re working with automotive or outdoor plastics, you may need a more robust system that combines an adhesion promoter, a high-build primer, flexible enamel, and UV-protective clear coat. By understanding the plastic type, you can select coatings that maximize durability while keeping color and texture consistent across the piece.
Paint types suitable for plastic
When painting plastic, select coatings designed for plastic substrates or those that include flexible properties. The most common options are:
- Water-based acrylic enamel for indoor plastics: easy to apply, low odor, and offers good durability when primed.
- Epoxy paints formulated for plastic: provide strong adhesion and chemical resistance; require careful surface prep but can deliver long-term durability.
- Flexible polyurethane paints: excellent for outdoor or high-use plastics due to superior resistance to cracking with flexing surfaces.
- Spray paints labeled for plastic: convenient for curved or hard-to-reach areas, especially after applying an adhesion promoter.
- Clear topcoats: protect the finish and improve longevity; choose a compatible gloss level and UV protection if the object will be exposed to sun. Each option has trade-offs in drying time, odor, and cure temperature. As a rule, use primers or adhesion promoters before any paint on bare plastic to ensure the best bond and finish longevity.
Surface prep and priming for best adhesion
Successful plastic painting starts with clean, dry surfaces. Begin by washing with mild detergent and warm water to remove dust and oils, then wipe with isopropyl alcohol (or a dedicated plastic cleaner) and allow to dry completely. Lightly scuff the surface with fine-grit sandpaper (200–400 grit) to create a micro-mechanical key for the primer. Remove dust with a tack cloth. Apply an adhesion promoter or plastic primer evenly; follow the product’s tack time and recoat window. Do not skip this step, as primer improves adhesion on slick plastics and under low-energy materials. After priming, inspect the surface for pinholes or rough patches and sand lightly if needed before painting.
Application techniques and drying times
Paint plastics with thin, even coats rather than thick layers to avoid runs and cracking. If using a spray, maintain a consistent distance from the surface (usually 6–12 inches) and sweep across in smooth, overlapping passes. If brushing or rolling, use light pressure and multiple thin coats. Allow each coat to dry according to the manufacturer’s directions, typically 15–60 minutes between coats, then apply a final topcoat for protection. For outdoor pieces or high-wear items, consider an additional UV-protective layer. Plan ahead for curing: even after the final coat feels dry to the touch, full cure may take 24–72 hours depending on temperature and humidity.
Common mistakes and how to avoid them
Common errors include skipping primer, choosing the wrong paint for plastic, applying thick coats, and skipping drying intervals. Always test adhesion on a small area before committing to the entire piece. Avoid painting in high humidity or at temperatures outside the recommended range for your product. Do not sand through dried paint when re-coating; if you must correct, sand lightly and re-apply primer before painting again. Finally, do not store painted items in direct sunlight without UV protection if you used non-UV-stable pigments. Following a careful prep and coating sequence dramatically improves durability and appearance.
Finishing, curing, and long-term care
Once the final coat is dry, keep the item in a well-ventilated area away from dust for full cure, which can take up to 24–72 hours depending on materials. A clear topcoat can dramatically extend life by shielding against abrasion, moisture, and sunlight. Choose a topcoat compatible with your base paint and the plastic type; many people prefer a satin or gloss finish for easier cleaning. After curing, clean gently with mild soap and water to maintain surface integrity. The PaintQuickGuide Team notes that patient curing is essential for peak durability, especially on flexing plastic components like dashboards, bumper covers, or outdoor furniture.
Authoritative sources and further reading
- For safety and handling: OSHA’s painting safety resources: https://www.osha.gov/SLTC/paint/
- For safer paint choices and safer coatings: https://www.epa.gov/saferchoice
- University extension and practical guidance on coatings and finishes: https://extension.illinois.edu/paint-safety
Tools & Materials
- Isopropyl alcohol (70-90%) or plastic-cleaning solution(Used for degreasing and prepping plastics before priming)
- Plastic adhesion promoter / primer(Promotes bonding on slick plastic surfaces)
- Plastic-safe primer (if not using adhesion promoter)(Optional backup for difficult plastics)
- Acrylic enamel or epoxy paint formulated for plastic(Choose based on indoor/outdoor use and required flexibility)
- Clear topcoat compatible with base paint(Protects finish and improves longevity)
- Fine-grit sandpaper (200–400 grit)(Creates a micro-roughness for better primer adhesion)
- Lint-free cloths or microfiber towels(For cleaning and finishing touches)
- Paint thinner or water (depending on paint type)(Cleanup and thinning per product instructions)
- Protective gloves and a respirator(Safety first when sanding and spraying)
- Drop cloths or old newspapers(Protect work area from overspray)
Steps
Estimated time: 3-4 hours (including drying between coats) + 1-3 days curing depending on product
- 1
Gather materials and set up workspace
Collect all required items and prepare a well-ventilated area. Lay down drop cloths and set aside a dedicated clean area for priming and painting. This preparation minimizes interruptions and ensures consistent results.
Tip: Do a quick inventory check to avoid mid-project trips to the store. - 2
Clean and degrease the plastic surface
Wash the surface with a mild detergent solution, rinse, and dry completely. Wipe with isopropyl alcohol to remove oils and fingerprints that can interfere with adhesion.
Tip: Fingerprints on parts that will be handled after priming can ruin adhesion; use gloves during prep. - 3
Lightly sand to create a teeth for primer
Gently scuff the surface with 200–400 grit sandpaper to provide a mechanical key for the primer. Wipe away dust with a microfiber cloth and ensure the surface is clean before priming.
Tip: Avoid deep gouges which can show through the finish; keep sanding uniform. - 4
Apply adhesion promoter or primer
Apply a thin, even coat of adhesion promoter or plastic primer. Allow the primer to dry according to the product instructions and lightly re-sand if the finish feels rough.
Tip: Work in a dust-free zone and avoid heavy coats that can pool and crack. - 5
Apply thin coats of paint
Spray or brush on several light coats rather than one thick coat. Wait between coats until the surface dries to the touch, then apply a new coat. Build color and coverage gradually for the smoothest finish.
Tip: Keep coats uniform in direction and avoid re-wetting a single spot multiple times. - 6
Finish with a clear topcoat and cure
Seal the painted surface with a compatible clear coat. Let the piece cure in a dust-free environment for 24–72 hours, depending on product guidelines and ambient conditions.
Tip: Avoid handling or heavy use during the initial cure window to prevent marring.
Your Questions Answered
Can you paint plastic without primer?
Primers or adhesion promoters significantly improve sticking to plastic, especially on smooth or waxy surfaces. Some specialty paints claim not to need primers, but for most plastics, primer yields stronger, longer-lasting adhesion.
Primers help plastic paint stick longer. In most cases, you should use an adhesion promoter before painting on plastic.
What is the best primer for plastic?
Look for primers specifically labeled for plastic or adhesion promoters designed for slick surfaces. They create a bonding layer that improves adhesion for subsequent paint layers and reduce peeling.
Choose a primer made for plastic; it improves adhesion for the topcoat.
Can I use spray paint on plastic furniture indoors?
Yes, you can, provided you use a spray paint formulated for plastic and work in a well-ventilated area. Apply light, even coats and seal with a compatible topcoat to protect the finish.
Spray plastic paint indoors if you have good ventilation and a plastic-specific formula.
How long does paint cure on plastic surfaces?
Cure time varies by product and environment, but plan for at least 24–72 hours after the final coat to reach full hardness. Humidity and temperature can extend cure times.
Expect about a day or more for full cure, depending on conditions.
Will paint crack on flexible plastic parts?
Choose flexible paints and use a primer designed for plastics to minimize cracking. Apply multiple thin coats and consider a flexible topcoat if the part flexes regularly.
If the plastic flexes, use a flexible paint system and thin coats to reduce cracking.
Is there a difference between indoor and outdoor plastic paints?
Yes. Outdoor plastics require UV-stable pigments and a topcoat with UV resistance. Indoor options may prioritize low odor and easy cleanup but still benefit from primer.
Outdoor use needs UV protection and durable topcoats; indoor use can favor low-odor formulas.
Watch Video
Quick Summary
- Choose plastic-specific paints or primers for best adhesion.
- Prep thoroughly: clean, degrease, and lightly sand prior to priming.
- Apply multiple thin coats for even color and durability.
- Finish with a compatible topcoat and allow full cure for longevity.