Garage Paint Guide: Practical Steps for Durable Home and Workshop Color
Learn how to choose garage paint, prep surfaces, apply primer, and finish with floor coatings for durability and easy maintenance. A practical, step-by-step guide for homeowners and DIY enthusiasts tackling garage walls, doors, and floors.

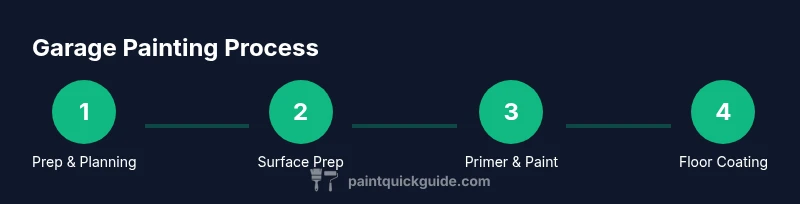
To refresh a garage, plan a full painting project: prep walls, select moisture-resistant paint, prime where needed, apply two coats, and finish with a durable floor coating or sealant. Ensure proper ventilation, drop cloths, and safety gear. The result: a cleaner, brighter space with improved moisture resistance and lasting color.
Why garage paint matters
Garage paint is more than curb appeal—it protects walls from moisture, oil splatters, and everyday wear. A well-chosen garage paint improves cleaning, resists staining, and reduces peeling in high-traffic areas. According to PaintQuickGuide, homeowners who invest in durable garage paint report lower maintenance costs and longer intervals between touch-ups. The right garage paint also brightens the space, making tasks easier and safer around sharp tools, chemicals, and stored items. When you choose garage paint, think in layers: a moisture-resistant base, a proper primer, and a topcoat designed for abrasion. The goal is a finish that survives temperature swings from hot summer days to chilly nights and resists mold in humid basements or attached garages. You’ll also want to consider color and sheen—lighter colors reflect light, and satin or semi-gloss finishes are easier to wipe down. In short, the right garage paint protects, simplifies upkeep, and enhances the function of your space.
Choosing garage paint and finishes
Selecting garage paint is about understanding the space and how you’ll use it. For walls, a water-based acrylic latex with a satin or semi-gloss finish offers excellent washability and resistance to staining. For concrete floors, you’ll typically need an epoxy or polyurethane floor coating rather than standard wall paint. If you’re painting a steel or metal door or shelving, enamel finishes provide durable, chemical-resistant surfaces. Color choice matters too: neutrals like grays and beiges keep the space feeling larger, while brighter accents can delineate work zones. Sheen affects cleaning—glossy finishes resist dirt better but show surface imperfections more easily. Always verify that the chosen garage paint is labeled for interior use if you’re painting an attached or interior-facing area, and check for mold- and mildew-resistance in damp climates. PaintQuickGuide’s guidance emphasizes selecting a finish that balances durability, washability, and appearance.
Surface prep and priming for garages
Surface prep is the foundation of a lasting garage paint job. Start by moving vehicles and debris out of the space, then clean walls with a degreasing cleaner to remove oil, grease, and dust. For concrete floors, remove any cracks or loose material and repair with a concrete patch. Allow patches to cure before painting. Sand glossy surfaces to create a key for the primer, and remove sanding dust with a vacuum. Priming is essential on new drywall, stained surfaces, or glossy paint; it improves adhesion and seals stains. Use a bonding primer on slick walls and a stain-blocking primer on surfaces with smoke or water stains. In a garage, moisture is a constant risk—prime with a product that tolerates humidity, and don’t skip the step. A good primer also helps even out porosity, reducing the number of coats required. If color changes are dramatic, use a tinted primer to cut down on topcoat coats. The goal is to create a uniform, sealed surface ready for the topcoat.
Primers and paints for garage walls
In most garages, you’ll want paints that are durable, washable, and resistant to moisture. A high-quality acrylic latex with a satin or semi-gloss finish is a common choice for walls because it cleans easily and dries quickly. For concrete walls and tougher stains, a bonding primer under a water-based garage paint improves adhesion. If you’re dealing with water intrusion, consider a mold-and-maintenance resistant formulation and one with vapor permeability to manage humidity. For doors and trim, enamel finishes provide excellent abrasion resistance. When choosing garage paint, look for low odor, low VOC options to minimize fumes in the space. Never skip the primer on fresh concrete or new drywall, and ensure you buy enough paint to cover multiple coats. A typical two-coat plan yields a durable, uniform finish.
Painting technique and application
Technique matters as much as product choice. Start by cutting in edges with a brush to create a clean boundary, then roll large areas with a medium nap roller for even coverage. Maintain a wet edge to avoid lap marks and apply coats in a consistent pattern. For walls, apply two coats for durability, allowing the recommended dry time between coats. If you’re painting a metal door, prime first and use a rust-preventive enamel. When painting over patched areas, feather the edges to blend with the surrounding surface. If you’re using a floor coating, follow the manufacturer’s instructions for mixing, pouring, and applying. Always ventilate well and wear a respirator if fumes are strong. Clean tools promptly to keep bristle shape and avoid residue in the next coat. The steps above ensure a smooth, durable garage paint job that resists stains, moisture, and wear.
Floor coatings and garage door painting
Garage floors demand their own consideration. A high-build epoxy or polyaspartic coating provides abrasion resistance, chemical resistance, and easier cleaning. Floor coatings are applied after walls dry, and they require precise surface prep—clean, degrease, roughen, and prime if recommended. Floor coatings cure over several days, so schedule accordingly and protect the space during cure. For garage doors, use exterior-grade enamel or epoxy-compatible paint with good UV resistance. If you want more color or a modern look, you can choose decorative flakes or a solid color that matches your walls. Remember that floor coatings are a separate system from wall paint and typically require different primers and topcoats. Read the product instructions carefully for pot life, mixing ratios, and ventilation needs.
Safety, ventilation, and cleanup
Painting a garage safely means planning for ventilation and personal protection. Open doors and windows, use fans to move air, and avoid painting with vehicles or stored materials in the space. Wear a respirator, eye protection, and gloves, especially when working with solvent-based primers or floor coatings. Keep a fire extinguisher nearby if you’re applying epoxy or solvent-based finishes. Protect floors with drop cloths or plastic sheeting and seal off the work area from the rest of the home when possible. After painting, dispose of used rags and solvents according to local regulations and wash brushes and rollers according to manufacturer directions. Allow adequate cure time before reorganizing the space and putting items back. When done, you’ll enjoy a safer, cleaner garage that supports better organization and longer-lasting finishes.
Tools & Materials
- Moisture-resistant interior acrylic latex paint (walls)(Finish: satin or semi-gloss; avoid flat on walls in damp spaces)
- Primer suitable for concrete/drywall(Bonding primer for slick surfaces; stain-blocking if needed)
- Concrete patch and spackling compound(For cracks and holes in concrete or drywall)
- Sandpaper 120–220 grit(Key glossy surfaces; feather edges)
- Putty knife and sanding block(Smooth patches; remove dust before priming)
- Drop cloths or plastic sheeting(Protect floors and stored items)
- Painter’s tape(Edge delineation for trim and floors)
- Brushes (angled sash ~2–2.5 in)(Cutting in near edges)
- Rollers with 3/8 in nap and extension pole(Even wall coverage)
- Ventilation mask/respirator and safety goggles(Protect from fumes and dust)
- Degreasing cleaner or detergent(Thorough wall cleaning)
- Floor coating kit (epoxy or polyaspartic) optional for floors(Follow kit instructions; separate cure time)
- Rigid plastic or aluminum tray liners(Roller coverage and easy cleanup)
- Ventilation fan or portable air mover(Improve air flow during painting)
Steps
Estimated time: 1-2 days active work + 1-3 days cure for floor coatings
- 1
Move vehicles and clear space
Remove cars and loose items from the garage. Designate a staging area for paints, tools, and clean rags. This reduces cleanup time and keeps materials away from potential spills.
Tip: Pro tip: use wide drop cloths to catch drips; pre-mark a path for easier access during the job. - 2
Ventilate and protect surroundings
Open doors and windows; place fans to push fumes out. Cover floors and nearby shelves with drop cloths. Mask edges to protect trim and prevent bleed-through.
Tip: Pro tip: wear a respirator when working with solvent-based primers or epoxies; ensure good cross-ventilation. - 3
Clean, degrease, and prep surfaces
Scrub walls with a degreaser to remove oil and grime, rinse, and let dry. Patch cracks in concrete or drywall, then sand glossy areas to create a key for the primer.
Tip: Pro tip: wipe down after sanding to remove dust; a clean surface improves adhesion. - 4
Repair and sand as needed
Fill small holes with patch compound; sand flush once dry. For larger gaps in concrete, use a patching compound and allow full cure before priming.
Tip: Pro tip: feather patches to blend with surrounding texture for a seamless look. - 5
Prime the surfaces
Apply bonding primer to slick surfaces and stain-blocking primer on stains. Let primer dry according to product instructions before topcoating.
Tip: Pro tip: tinted primers can reduce the number of topcoats required. - 6
Paint walls with two coats
Cut in edges with a brush, then roll walls in uniform, overlapping passes. Allow the recommended dry time between coats and maintain a wet edge to minimize lap marks.
Tip: Pro tip: use a 2–3 inch brush for tight corners; keep a wet edge during rolling. - 7
Paint doors and trim
Treat metal doors with a rust-preventive enamel and apply multiple thin coats rather than a single thick coat. Trim should match or complement wall color for a cohesive look.
Tip: Pro tip: avoid painting over vent openings without proper covers to maintain airflow. - 8
Floor coating prep and application
If using a floor coating, clean and etch the concrete, then apply the floor primer as directed. Mix and apply the epoxy or polyaspartic coating in thin, even coats as instructed by the manufacturer.
Tip: Pro tip: follow pot-life guidelines and avoid traffic until fully cured. - 9
Final check and cleanup
Inspect for touch-ups, remove tape, and clean tools. Let all coatings cure fully before returning items to the space. Revisit if any spots show wear after the first week.
Tip: Pro tip: keep a labeled inventory of used cans and cure times for future touch-ups.
Your Questions Answered
Do I need to prime garage walls before painting?
Priming is recommended on new drywall, stained surfaces, or glossy walls to ensure good adhesion and uniform finish. If the surface is already porous and bright, primer may be optional but still beneficial for uniform color and improved durability.
Yes. Prime new or glossy surfaces to ensure the paint sticks properly and looks even.
What type of paint is best for a garage?
For walls, a washable moisture-resistant acrylic latex or enamel is common. For floors, use an epoxy or polyurethane floor coating. Exterior-grade paints are best for doors if exposed to sun and weather.
Acrylic latex wall paint with a durable floor coating for the concrete floor is typically best.
Can I paint the garage floor with regular wall paint?
No. Garage floors require an epoxy or polyaspartic coating designed for abrasion, chemical resistance, and heavy use. Wall paint will wear quickly under car tires and spills.
Floor paint is not the same as wall paint; use a proper floor coating.
How long does garage paint take to dry between coats?
Dry times vary by product and humidity, but most wall paints need 2–4 hours between coats. Floor coatings need longer cure times, often 24–72 hours or more before light use.
Most walls dry in a few hours; floors take longer and require complete curing.
Are garage doors paintable with standard paints?
Yes, but use exterior-grade enamel or epoxy-compatible paints, and prepare the surface properly by cleaning and priming. Doors may require more than one coat for good UV resistance and finish.
Yes—use exterior enamel and prime first for best results.
What safety steps should I take when painting a garage?
Ventilate well, wear PPE, and keep flammable materials away. Store cans upright and dispose of waste according to local regulations.
Ventilate the space and wear protective gear at all times.
Watch Video
Quick Summary
- Plan a two-coat wall strategy.
- Choose moisture-resistant paint and primer.
- Prioritize thorough surface prep.
- Treat floors with a dedicated coating and cure fully.
- Ventilate and protect the workspace to stay safe.