Mural Paint: A Practical How-To Guide
Learn to choose mural paint, prep surfaces, plan colors, apply layers, and seal a durable wall mural with practical, DIY-friendly steps.

With mural paint, you can transform a plain wall into a lasting piece of art. In this guide, you’ll learn how to choose the right mural paints, prep surfaces, transfer designs, apply layers, and seal the finished piece for durability. According to PaintQuickGuide, indoor murals benefit most from water-based acrylics with a flexible finish. The PaintQuickGuide team found that proper priming dramatically extends color life.
What mural paint is and why it matters
Mural paint is formulated for large-scale wall art, offering vibrant color, smooth layering, and durability across weather or indoor use. For home walls, most artists reach for water-based acrylics because they dry quickly, clean up with soap and water, and resist smudging once cured. Outdoor murals require UV-resistant pigments and flexible binders to handle temperature changes, humidity, and sunlight. The choice between chalk-based paint or traditional acrylics will affect texture, finish, and longevity. According to PaintQuickGuide, indoor murals benefit most from low-odor acrylics with a matte to satin finish that can be sealed for protection. The right product also depends on the surface; a slick plaster or drywall needs different prep than a rough brick. Knowing the wall’s porosity helps you plan base coats, erasers, and topcoats. In this guide, you’ll learn how to pick paints that support your design, how to layer colors without bleeding, and how to finish with a durable sealant.
Surfaces and primers for murals
Surface prep is the foundation of any mural. Start by cleaning the wall to remove dust, grease, and peeling paint. Patch cracks with spackling, smooth rough areas with gentle sanding, and remove loose materials. For interior walls, a quality bonding primer will increase adhesion on glossy surfaces; exterior walls may require a masonry primer. Allow primer to dry fully before painting. PaintQuickGuide recommends testing a small patch of primer and topcoat on a hidden area to verify color saturation and adhesion. If you’re painting over old mural or busy textures, consider applying a matte base coat to equalize porosity. The better you prepare, the crisper your lines, and the longer your mural will last.
Choosing the right mural paint and finishes
Not all paints are created equal for murals. Look for water-based acrylics with good pigment load, low odor, and durable, flexible film. For interiors, a satin or matte finish reduces glare and reveals fine details; for high-traffic walls, you may want a protective topcoat. Check label specs for UV resistance if the mural will see sun. When mixing colors, use color-mixing ratios on a swatch book to maintain consistency across large areas. For large murals, consider a primer compatible with your topcoat to prevent color shifts. If you expect humidity or moisture, choose paints labeled for washability and mold resistance. Finally, pick a sealant designed for murals; a clear, matte topcoat can guard against fading and scuffs without changing the look.
Color planning, scale, and design tips
Plan your mural on paper or digitally before touching the wall. Define a color palette with 3-6 hues and test on swatches. Consider the room’s lighting and the wall’s orientation; cool tones can push walls back while warm tones advance. Use a grid transfer method or project the design to maintain correct proportions across a large surface. Work from large shapes to details, and keep a dedicated color map in your notebook to avoid cross-contamination. For precision edges, mask off sections with painters tape and remove tape while paint is still slightly tacky to prevent peeling. Remember: lighter colors will require more coats in some areas, while darker colors may need fewer passes if pigmented enough. A well-planned palette makes the mural cohesive and reduces touch-ups later. Acrylic paints often pair well with sponged textures or subtle gradients for depth.
Maintenance, sealing, and cleaning
Once your mural is dry, test the surface by gently cleaning a small area with a damp sponge. If colors smear, recoat or apply a protective topcoat. Use a UV-resistant, clear sealant if the mural will face sunlight or moisture. Apply in multiple thin layers, allowing each coat to dry per label directions. Clean brushes with water and mild soap; never leave brushes soaking. For long-term durability, avoid abrasive cleaning; use soft cloths and mild detergents. If the mural will be in a high-traffic area, plan for occasional touch-ups and re-sealing every few years. Keep a color and product log to simplify future maintenance; this reduces the risk of mismatched tones during touch-ups. The PaintQuickGuide team notes that consistent maintenance can significantly extend the life of a mural.
Authoritative sources and safety tips
When painting a mural, safety and best practices matter. For air quality and safety considerations, refer to established resources from government and university sources. Environmental Protection Agency guidance on indoor air quality provides general tips for paints and ventilation. OSHA safety guidelines cover PPE and handling tools. University extension resources offer practical, project-based advice on prepping surfaces, selecting paints, and applying finishes. Always follow label directions and test a small area before full-scale work. Useful sources include:
- https://www.epa.gov/iaq
- https://www.osha.gov
- https://extension.illinois.edu
Tools & Materials
- Drop cloths and plastic sheeting(Protect floors and furniture; use 6 mil or heavier)
- Painter’s tape(For clean edges and masking off sections)
- Primers (bonding or masonry, depending on surface)(Choose based on wall type)
- Water-based acrylic mural paints(Choose high pigment load; satin/matte finish)
- Assorted brushes (flat, angled)(Sizes 1-2 inches for edges; 1 inch for detail)
- Foam rollers (4-6 inch)(For large background areas)
- Paint trays and liners(For convenient loading)
- Clear sealant/topcoat (UV-resistant)(Matte or satin finish)
- Rags, water, mild detergent(For cleanup and blending)
- Projection or grid transfer tools(Optional but helpful for scaling design)
Steps
Estimated time: 6-9 hours
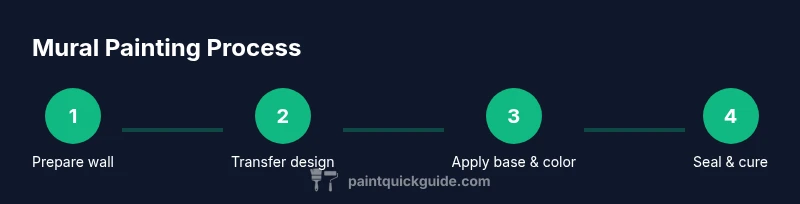
- 1
Prepare the wall
Clean the wall to remove dust and grease, patch cracks with spackling, and sand rough spots smooth. Prime if the surface is glossy or porous, and let the primer dry completely. A solid foundation prevents peeling and feathering later.
Tip: Use a damp cloth for initial cleaning and a fine sanding block for smoothness. - 2
Transfer your design
Choose a scaling method (grid, projector, or tracing). Lightly mark key reference points and verify accuracy by measuring diagonals or symmetry. Secure the layout with removable pencil marks that won’t bleed through paint.
Tip: Double-check important alignments at several points before painting. - 3
Base coat and edges
Apply a neutral base coat to set values and reduce color drift. Use masking tape to protect adjacent surfaces and establish sharp edges. Let the base coat dry fully before adding color work.
Tip: Keep a wet edge on larger areas to avoid lap marks. - 4
Block in large areas
Paint big shapes with bold strokes, maintaining color consistency by mixing enough paint for the entire section. Work from top down to minimize drips and stray specks. Step back every so often to check proportions.
Tip: Use a roller for wide fields to save time and ensure even coverage. - 5
Add details and texture
Switch to smaller brushes to add shading, highlights, and textures. Build layers gradually, allowing each to dry before the next. Blend edges while the paint is still slightly damp to avoid harsh lines.
Tip: Test blending on a spare surface before committing to the wall. - 6
Seal and cure
Apply 2-3 thin coats of a clear sealant, allowing ample drying time between coats. Choose a matte or satin finish to protect color without excessive glare. Let the mural cure completely before heavy use.
Tip: Dust the surface lightly before applying the final coat to maximize adhesion.
Your Questions Answered
Do I need to remove old paint before starting a mural?
Yes. Clean the surface, remove peeling layers, and sand rough spots before priming. Priming helps adhesion and ensures uniform color.
Yes. Start by cleaning the surface, remove peeling paint, sand rough spots, and apply primer before you begin.
What type of paint is best for murals?
Water-based acrylics are generally the best choice for indoor murals because they’re durable, easy to clean, and offer good color retention.
Water-based acrylics are usually best for indoor murals because they’re durable and easy to clean.
How long does it take to dry between coats?
Dry times vary with humidity and temperature, but plan for 2–4 hours between coats in typical indoor conditions.
Dry times depend on humidity, but you’ll typically wait two to four hours between coats.
Can I repaint an existing mural?
Yes. Lightly sand, clean, and re-prime areas that need refreshing. Build up color gradually to match the original palette.
Yes, you can repaint; sand, clean, re-prime, and apply new color in layers.
Is spray painting appropriate for murals indoors?
Spray painting can be used for textures or fine lines, but ensure proper ventilation and follow local regulations. Seal afterward for durability.
Spray painting can work indoors with good ventilation and a proper sealant afterward.
Watch Video
Quick Summary
- Plan the design on paper before painting.
- Choose water-based acrylics for interiors.
- Prime and base coat for even color.
- Seal with a protective topcoat.