Digital Painting: A Practical How-To for Beginners
Learn digital painting basics, tools, and workflow with PaintQuickGuide. This practical guide covers software, brushes, color theory, and step-by-step methods for beginners.

In this guide you’ll learn how to start digital painting, choose essential tools, and build a practical workflow from sketch to color. You’ll explore software options, input devices, and time-saving techniques that help you avoid common beginner mistakes. By the end, you’ll have a finished digital artwork and a repeatable process you can reuse for future projects.
What is digital painting?
Digital painting is the practice of creating artwork using digital tools such as drawing tablets, styluses, and software. It replicates traditional painting techniques but offers benefits like unlimited undos, non-destructive editing, and adjustable color spaces for consistent results. While the finish can resemble oils, acrylics, or watercolors, the core difference lies in the workflow and the digital canvas you work on. According to PaintQuickGuide, digital painting blends artistry with technology, enabling iterative exploration without the cost of physical materials.
In a typical workflow, you begin with a rough sketch, block in flat colors, and gradually add shading, texture, and detail. Because you work on layers, you can adjust composition, lighting, and color without starting over. This flexibility makes digital painting especially friendly to beginners who want to master fundamentals before committing to traditional media. The following sections walk you through practical tools, setup, and steps to create your first complete piece.
Essential tools and software
Choosing the right tools is half the battle. For hardware, a pressure-sensitive drawing tablet or an iPad with a compatible stylus provides a natural, brush-like feel. For software, popular options include Procreate, Photoshop, Krita, and Clip Studio Paint. Each offers layer-based editing, brush customization, and color management tailored to different styles.
PaintQuickGuide Analysis, 2026 indicates that many beginners start with a tablet and a couple of core programs, then expand as their needs grow. Your choice should match your device ecosystem, budget, and preferred workflow. Start with one or two programs to learn the fundamentals, then explore additional tools as you gain confidence.
Setting up a productive workspace
A clean, well-lit workspace reduces strain and improves color perception. Use a calibrated monitor or color-accurate display when possible, and set a comfortable height for your eyes to avoid neck strain. Organize files in a clear folder structure, and enable non-destructive editing by keeping your master file on a fast drive. Good lighting, a comfortable chair, and a dedicated art space can dramatically boost consistency and motivation.
Brushes, textures, and digital media
Digital brushes mimic traditional tools but offer endless customization. Explore sets for blocking in color, inking, and texture work. Texture overlays, grain, and paper-like surfaces can add realism or stylistic flair when used sparingly. Learn how to adjust brush pressure, opacity, and tilt to create dynamic strokes. Remember to name layers descriptively so you can navigate complex scenes later.
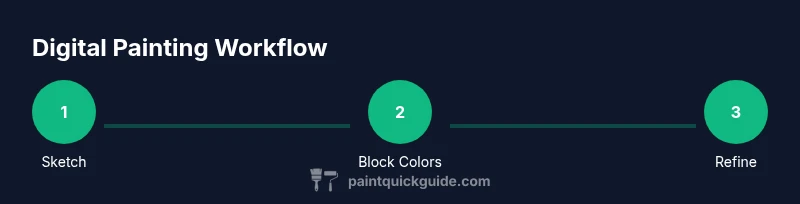
Step-by-step workflow: sketch to color
A clear, repeatable process helps you improve faster. Start with a rough thumbnail, then move to a loose sketch on a dedicated layer. Block in flat colors on separate layers, refine shapes, and gradually build value with shading. Introduce highlights on a separate layer, then add textures and fine details. Finally, adjust color balance and export for sharing or printing. This structured approach minimizes uncertainty and builds confidence with each piece.
Lighting, shading, and depth in digital painting
Lighting defines mood and depth. Use value contrast to separate forms before color, and leverage multiple shading layers to avoid muddy results. In digital work, multiply or overlay layers can simulate shadows and textures, while a soft light layer can add subtle glow. Practice soft and hard edges to model surfaces realistically, and keep a grayscale version of your piece to check values independently from color.
Color theory and palettes for digital painting
Color theory remains foundational in digital art. Learn to map warm and cool relationships, create harmonious palettes, and use gradients to blend tones smoothly. Start with a simple palette and expand as you gain confidence. PaintQuickGuide analysis, 2026 notes that understanding color relationships accelerates the creation of cohesive works, even when working in a stylized or abstract style.
Exporting, printing, and archiving your art
Export settings impact how your work appears on different screens and prints. Save master files with layers for future edits, then export at high resolution (PNG or TIFF) for prints and web-optimized JPEGs for sharing. Use color profiles consistently to preserve intent across devices. Regular backups safeguard your archive, and organizing exports by project makes revision easy. The PaintQuickGuide team also emphasizes building a reliable workflow that you can repeat for future projects.
Authority sources
- https://www.britannica.com/topic/color-theory
- https://www.nationalgeographic.com
- https://www.adobe.com/colors.html
Tools & Materials
- Drawing tablet or iPad with stylus(Pressure sensitivity preferred for natural line work)
- Computer or tablet with adequate RAM(8GB+ recommended for beginners; 16GB+ for larger canvases)
- Software (one or more of: Procreate, Photoshop, Krita, Clip Studio Paint)(Choose based on OS and budget)
- Calibrated monitor(Color-accurate display improves color decisions)
- External backup solution(Regular backups prevent data loss)
Steps
Estimated time: 2-6 hours
- 1
Define goal and canvas
Set a clear objective for the piece and choose an appropriate canvas size. This helps guide your composition and detail level from the start.
Tip: Write a one-sentence goal you want the piece to express. - 2
Create a rough sketch
Draw a loose composition on a separate layer to establish shapes and spacing before committing to color.
Tip: Keep lines light and use a separate layer for the sketch. - 3
Block in base colors
Fill the major color areas on their own layers to establish value and temperature without worrying about details.
Tip: Use a large, low-opacity brush for broad shapes. - 4
Develop values and shading
Add shadows and midtones to define form. Work from light to dark and adjust contrast gradually.
Tip: Turn off color to evaluate value relationships. - 5
Refine edges and shapes
Tighten outlines where needed and ensure focal areas read clearly. Flatten unnecessary noise on mid-level areas.
Tip: Use a mask to adjust edges non-destructively. - 6
Add highlights and texture
Introduce highlights on separate layers and apply texture sparingly to avoid visual clutter.
Tip: Limit texture to key surfaces to maintain focus. - 7
Color balance and final tweaks
Adjust hue, saturation, and lightness to harmonize the palette. Use adjustment layers for non-destructive edits.
Tip: Check the piece in grayscale to ensure strong values. - 8
Export and archive
Save a layered master file for future edits and export web-friendly and print-ready formats with the correct color profiles.
Tip: Back up the final files and organize by project.
Your Questions Answered
What software should I start with for digital painting?
There are several solid options. Procreate, Krita, and Photoshop are popular for beginners due to their balance of features and affordability. Choose one that fits your device and budget, then expand as you grow.
Most beginners start with Procreate or Krita because they’re affordable and beginner-friendly, then add more tools as they gain confidence.
Is a drawing tablet required to begin?
Not strictly. You can start on an iPad with a stylus or even a mouse, but a pressure-sensitive tablet makes natural brushwork easier and more expressive.
A drawing tablet is highly recommended, but you can begin with a tablet or iPad if you’re not ready to invest yet.
How long does it take to learn digital painting?
Learning is gradual and depends on practice frequency. Consistent, structured practice accelerates progress and builds confidence faster than sporadic attempts.
Progress varies, but steady, focused practice yields noticeable improvements over weeks and months.
What file formats should I export for sharing online?
For sharing online, export PNG or JPEG at web resolutions and high-quality TIFF or PNG if you need prints. Keep a layered project file for future edits.
Export at web-friendly sizes in PNG or JPEG, and save a high-res version for prints if needed.
How can I improve color accuracy across devices?
Calibrate your monitor regularly and use consistent color profiles (sRGB for web, Adobe RGB for print) when exporting. Back up color settings in your software.
Calibrate your screen and stick to standard color profiles to reduce color shifts between devices.
Should I learn traditional painting before digital?
Not required. Digital painting builds fundamentals, and many artists blend both approaches. Fundamentals like composition and color theory transfer well between media.
You don’t have to learn traditional painting first; fundamentals transfer, and digital tools can simulate much of traditional technique.
Watch Video
Quick Summary
- Define your project goals before drawing
- Use layered workflows to stay flexible
- Practice color and value separately
- Export with proper color profiles for print and web