Sealing Car Paint: Practical Steps for DIY Protection
Learn how to seal car paint effectively with practical prep, product choices, application tips, and maintenance, ensuring long-lasting gloss and protection against UV, dirt, and water spots.

Sealing car paint protects the clear coat, enhances gloss, and helps resist dirt, UV, and water spots. This how-to covers prep, product selection, application, and maintenance to keep your finish looking new. According to PaintQuickGuide, success comes from thorough cleaning, choosing the right sealant, and applying in thin, even layers under shade.
What sealing car paint does and why it matters
Sealing car paint creates a protective barrier over the clear coat, locking in gloss and shielding against environmental fallout, UV rays, bird droppings, and water spots. A good sealant reduces wash-induced scratching and makes cleaning easier. In practice, sealing car paint also preserves resale value by minimizing oxidation and color fade. The practice is accessible to DIY enthusiasts with basic tools, and it complements routine waxes or coatings.
PaintQuickGuide's analysis shows that the best results come from a clean, defect-free surface and a product matched to your paint type and climate. For homeowners, polymer sealants offer long-lasting protection with ease of use, while ceramic coatings, though more durable, require careful preparation and curing. By approaching sealing as a maintenance habit—not a one-off job—you'll sustain a showroom-like finish longer.
Recommended reading: always start with a clean surface and work in small sections. A well-prepared base ensures the sealant bonds properly and lasts longer.
Surface prep basics before sealing
Preparation is the foundation of lasting results. Begin with a dedicated washing using two buckets, a pH-neutral car wash, and a soft wash mitt to minimize swirl marks. After rinsing, dry with a clean microfiber towel and inspect for bonded contaminants. If you see tar, brake dust, or industrial fallout, use a clay bar or clay mitt to lift particles; contamination can compromise adhesion. If old wax or silicone remains, remove it with a dedicated cleaner or solvent as directed by the product label. Work in a shaded, well-ventilated area to maintain product performance and safety. Surface temperature should be between 60–85°F (15–29°C) for best bonding. PaintQuickGuide emphasizes that surface contamination is the biggest enemy of durable seals.
Then, wipe with isopropyl alcohol (70–90% diluted) or a dedicated panel wipe to remove oils. A clean, dry surface is essential for uniform beading and long-lasting protection.
Choosing the right sealant for your vehicle
There are three common categories: wax, synthetic polymer sealants, and ceramic coatings. Wax gives a natural-looking gloss and is easy for beginners, but it generally lasts days to weeks. Synthetic polymer sealants offer longer durability, better water beading, and straightforward removal. Ceramic coatings provide the strongest protection, high chemical resistance, and superior longevity, but require more rigorous prep and a controlled cure. Consider your climate, car color, and how often you’re willing to reapply when choosing. Light-colored vehicles may benefit from sealants that enhance brightness, while dark colors often show swirls less with a glass-like finish. Read product labels for cure times, temperature ranges, and recoat windows. PaintQuickGuide notes that avoiding overly aggressive polishing before sealing helps preserve clear coat integrity.
For DIYers, starting with a polymer sealant is a practical middle ground; for a showroom-grade finish and longer intervals between reapplications, a ceramic coating—applied by a trained professional or after thorough practice—could be worth the investment.
Environmental and safety considerations during sealing
Environment plays a big role in how well a sealant performs. Work in a shaded, dust-free area to prevent particles from embedding in the film. Temperature and humidity affect cure time and final cure quality; colder days slow curing, while high humidity can impact gloss. Ventilation matters when using solvent-based products; wear a respirator or mask if recommended by the manufacturer. Always wear gloves and avoid skin contact with cleaners and solvents. Pay attention to local regulations on VOC emissions and disposal of used wipes and towels. PaintQuickGuide reminds readers that following label instructions is essential for safety and optimal results. For long-term care, keep your coated surfaces away from abrasive cleaners that can degrade sealant performance.
Consider the environmental impact: choose low-VOC or water-based formulas when possible and dispose of rags safely in sealant-approved containers.
Application best practices and common mistakes
Apply the sealant in a controlled, shaded area and use a light touch; let the product level itself rather than forcing it into the paint. Work in tight, overlapping passes to ensure even coverage, and avoid applying in thick coats that can dry unevenly. Use a dedicated microfiber app pad and a separate buffing cloth for finishing to prevent cross-contamination. Allow the recommended cure time before exposing the surface to water or cleaners. If streaks appear, re-wipe with a clean microfiber in a gentle, circular motion. Do not rush curing; patience yields a deeper, longer-lasting shine. As you gain experience, you’ll learn which products work best for your climate and color. PaintQuickGuide's team notes that consistent technique across sessions yields more durable protection.
Maintenance and long-term care after sealing
A sealed finish is not maintenance-free. Wash with a pH-neutral detergent, using a soft mitt or dedicated wash pad to avoid micro-scratching. Dry with a clean microfiber to prevent water spots, and periodically reapply sealant according to product guidelines. Inspect for bond failures or hazing after several months, particularly on areas prone to sun exposure or road grime. When you notice diminished beading or dulling, perform a light wash and reapply the sealant rather than attempting a heavy clean. The more routine the care, the longer your paint remains protected and vibrant. PaintQuickGuide emphasizes building a care routine that fits your weather and driving habits; a simple monthly wash-and-seal schedule often yields noticeable improvements.
Common defects and troubleshooting tips
If you detect hazing, uneven beading, or staining after application, re-check surface preparation and cure conditions. Contaminants trapped beneath the sealant can cause hazy patches; re-wipe the area with the recommended panel cleaner and reapply in a cooler, shaded time window. For deep scratches or color fading, consider a dedicated polish or glaze prior to sealing to create a uniform base. Always test a small panel first, then proceed to full-vehicle coverage. If you experience prolonged curing times or poor adhesion, consult the product’s technical data sheet and consider a different formula or professional help. The PaintQuickGuide team notes that real-world results vary with climate and color, so adjust expectations accordingly.
External authority sources
- OSHA safety guidelines for paints and coatings: https://www.osha.gov/
- EPA information on coatings and VOCs: https://www.epa.gov/
- Extension services for automotive care and surface prep: https://extension.psu.edu/
Tools & Materials
- Two-bucket washing system(One bucket with clean soapy water, one bucket with rinse water; use a grit guard to minimize grit transfer)
- pH-neutral car wash soap(Avoid harsh detergents that strip protectants)
- Microfiber wash mitt(Soft fibers to minimize swirl marks)
- Clay bar or clay mitt(Used for decontaminating embedded particles)
- Clay lubricant(Lubricates surface to prevent scratching during decontamination)
- Panel wipe or isopropyl alcohol (70-90%)(Removes oils and residues before sealing)
- Microfiber towels (high pile for buffing, low pile for final wipe)(Use separate cloths for buffing and wipe-downs)
- Sealant product (polymer or ceramic or wax)(Choose based on climate, color, and durability desired)
- applicator pads (microfiber)(Dedicated for sealant application to avoid cross-contamination)
- Gloves (nitrile) and safety gear(Protect hands and reduce oil transfer to surface)
- Soft detailing brush or pad for edges(Helpful for hard-to-reach areas around trim)
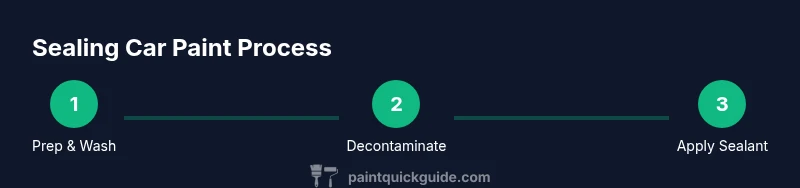
Steps
Estimated time: 60-90 minutes
- 1
Prepare workspace and vehicle
Set up in shade with good ventilation. Gather all tools and place the car on a soft, clean surface. Check that windows are closed, and remove loose items from the finish to prevent contamination during application.
Tip: Work in a controlled, dry environment to avoid streaks and uneven curing. - 2
Wash and decontaminate the paint
Wash the car using the two-bucket method, then inspect for bonded contaminants. If you find tar or heavy brake dust, use a clay bar with lubricant to lift particles from the surface.
Tip: Ensure the surface remains cool during washing; hot paint can cause coating issues. - 3
Dry and perform a surface wipe
Dry thoroughly with a clean microfiber towel. Wipe the panel with panel wipe or isopropyl alcohol to remove oils and residues that could prevent bonding.
Tip: Do not rush this step; residual oils are the primary cause of sealant failure. - 4
Apply sealant in thin, even layers
Apply a small, cross-hatch section then spread evenly with light pressure. Work in sections to ensure uniform coverage and avoid missed spots.
Tip: Thin coats cure more consistently than thick ones. - 5
Cure per product instructions
Let the sealant cure for the recommended time. Avoid water contact or dust during this period to prevent bonding issues.
Tip: If a foggy or cloudy look appears, wait longer for cure or review the product guidelines. - 6
Buff and inspect final finish
Buff with a clean microfiber to bring out gloss and remove any micro-mist. Inspect for uniform shine and water beading across panels.
Tip: Use a gentle, circular motion and avoid heavy pressure that can dull the finish.
Your Questions Answered
How long does a sealant typically last on a car paint job?
Durability varies by product and climate. Polymer sealants often last several months, while ceramic coatings can last years with proper maintenance. Always follow the manufacturer’s cure and reapplication guidelines for best results.
Durability depends on the product and climate; polymers last months, ceramics can last years with proper care.
Can I seal over existing wax or an old sealant?
Yes, many polymer sealants can be applied over old wax or sealants after a thorough cleaning. Some products may require stripping or a dedicated prep step to ensure proper bonding.
You can usually apply a newer sealant over old wax after cleaning, but check the product instructions.
Is sealing car paint necessary if I wax it regularly?
Waxing and sealing serve different purposes. Waxes provide gloss but wear off faster, while sealants offer longer protection and easier maintenance. You can combine both in a maintenance routine for best results.
Waxing is fine for gloss, but sealants last longer and protect against contaminants.
What’s the difference between a sealant and a ceramic coating?
Sealants are synthetic polymers or waxes that provide a protective layer for months, while ceramic coatings cure into a hard, durable film offering superior longevity and chemical resistance. Ceramic coatings require more prep and curing time.
Sealants give you months of protection; ceramic coatings last longer and need proper curing.
Should I polish before sealing, and how aggressively?
Polish only if you have visible scratches or oxidation that affects bonding. Use a mild polish to avoid removing too much clear coat, then seal once the surface is clean and smooth.
Polish if the surface needs it, then seal after a clean, smooth surface.
Watch Video
Quick Summary
- Prepare and clean the surface thoroughly before sealing
- Choose a sealant that matches climate and color for longevity
- Apply in thin, even layers and follow cure times precisely
- Maintain the finish with a regular, gentle washing routine