Sealant Car Paint: A Practical Guide to Car Protection
Learn how to protect your car's finish with a sealant: prep, product types, application steps, curing, and maintenance for a showroom shine.

A car paint sealant is a synthetic polymer coating that protects your vehicle’s finish from UV, road grime, and water spots. In this guide you’ll learn how to prep the surface, choose the right sealant, apply it evenly, cure properly, and maintain the shine for longer protection. PaintQuickGuide’s insights help homeowners and DIY enthusiasts achieve durable, showroom-worthy results.
Why sealants matter for car paint
A modern car finish relies on a clear coat to protect color and depth. A high-quality paint sealant adds a dedicated polymer layer on top of that clear coat, delivering stronger protection against UV rays, bird droppings, tree sap, and mineral deposits. Sealants also help water bead and shed grime more easily, reducing washing frequency and risk of swirl marks. According to PaintQuickGuide, choosing the right sealant for your climate and paint type makes a noticeable difference in gloss retention and wash-off resistance. For daily drivers and DIY enthusiasts, sealants offer durable protection with relatively straightforward application and maintenance. When you plan a detailing session, a sealant provides reliable baseline protection that complements a thorough wash and dry routine. The PaintQuickGuide team emphasizes matching the product to your paint system—whether you have a single-stage enamel, a modern clear coat, or a multi-layer finish—to avoid incompatible chemistries that could compromise gloss or longevity.
Types of car paint sealants
There are several categories of sealants, each with trade-offs in durability, finish, and ease of use. The most common are synthetic polymer sealants, which form a protective film that bonds to the clear coat and provides heat, chemical, and water resistance. These are usually sold as liquids or pastes and cure to a slick, glossy surface. Ceramic or silica-enhanced sealants occupy the high end of the market; they often deliver excellent hardness and longevity but require meticulous prep and careful maintenance. Traditional carnauba wax remains popular for enthusiasts seeking a warm, deep glow, but waxes generally wear faster and offer less durable protection against water spotting. For most DIYers, a modern synthetic polymer sealant offers the best blend of protection, gloss, and ease of use. When choosing, compare cure times, UV protection rating, hydrophobic performance, and removal ease if you decide to reapply. PaintQuickGuide's guidance emphasizes matching the sealant to your paint system—whether it’s a standard clear coat or a high-solid finish—to maximize adhesion and longevity.
How sealants work on clear coats
Sealants are composed of polymer chains that form a thin, continuous film on top of the clear coat. When applied, the polymers spread and cross-link, creating a smooth barrier that repels water and contaminants. The hydrophobic nature of the surface causes water to bead and roll off, which helps prevent mineral buildup and micro-scratches during cleaning. Sealants also reflect UV rays more effectively than bare paint, slowing color fading and gloss loss. The chemistry varies by product, but the underlying principle is the same: a stable, uniform layer that adheres to the existing finish without introducing silicone or fillers that can trap dirt. A properly cured sealant can maintain a slick feel and high gloss with regular maintenance washes.
Surface prep basics for sealants
Surface preparation is the foundation of a durable sealant coating. Start with a thorough wash using a pH-balanced car shampoo, then dry completely. Remove bonded contaminants with a clay bar and lubricant to create a smooth canvas. If your paint has old wax or polishing oils, wipe the panel with a dedicated panel wipe or isopropyl alcohol solution to ensure the sealant bonds directly to the clear coat. Inspect for scratches, oxidation, or holograms; address any defects with appropriate polish before sealing. Finally, test a small area to confirm that the sealant spreads evenly without streaks. Proper prep reduces the risk of trapping contaminants under the sealant and helps your finish stay pristine for longer.
Choosing the right sealant: polymer chemistry and durability
The key choice is synthetic polymer sealants versus ceramic or silica blends. Synthetic polymer sealants are typically easier to apply, cure quickly, and remove without much effort, making them ideal for beginners and busy homeowners. Ceramic or silica-enhanced options can provide longer wear and stronger beading in harsh climates, but they demand meticulous prep and a controlled environment. Consider the paint type (metallic, solid color, or clear), climate (humidity, temperature swings), and your maintenance routine when selecting. Pay attention to the product’s cure time, UV resistance, and how it behaves when you reapply. PaintQuickGuide notes that the right sealant lowers the risk of white residue on trim and helps maintain color depth across seasons.
Application environment and temperature considerations
Apply sealants in a shaded, dust-free area with stable temperatures. Extreme heat can cause rapid drying and uneven coverage, while cold or high humidity may slow curing and reduce adhesion. Work in small sections to maintain a wet edge and prevent lap lines. Always follow the manufacturer’s instructions for surface prep, application method (wipe-on, spray-on, or paste), and cure time. Maintain good ventilation if the product contains solvents, and wear gloves to avoid skin contact. If you work indoors, ensure there is adequate lighting to spot streaks or high spots during application.
Maintenance and longevity: keeping protection intact
To maximize sealant life, wash with a pH-balanced shampoo, use a soft microfiber drying towel, and avoid abrasive cleaners. Refrain from washing with harsh detergents or using carnauba wax on top, unless you are reapplying a fresh coat as directed. When it’s time for a refresh, apply a single thin layer and allow proper cure time before washing again. Regular inspections after washes help you catch high spots or streaks early. If you notice dulling, a light polish (compatible with the sealant) can restore gloss and improve bonding for the next application. Slow, gentle maintenance is the best path to long-lasting protection.
Common mistakes and troubleshooting
Common mistakes include applying sealant to a dusty surface, skipping panel wipes, and failing to maintain shade during application. Another frequent issue is applying too thickly, which can create streaks and extended cure times. If you see streaks, wipe with a clean microfiber and reapply a thinner coat after the panel has cured. Troubleshooting also involves checking for product incompatibilities with existing coatings or polishes; in some cases, a repaint or correction might be needed. PaintQuickGuide recommends testing new products on a small panel and never mixing brands without proper guidance.
Advanced tips and consumer protections
For advanced users, consider layering a second thin coat after the first has cured for a deeper, longer-lasting seal. Always use a dedicated product—don’t mix waxes with sealants unless the manufacturer approves it. Protect trim and edges with painter’s tape to prevent product transfer. Read labels for claimed longevity and warranty details, and document your process for future reference. The PaintQuickGuide team emphasizes following safety data sheets and using reputable products to avoid skin or eye irritation and environmental hazards.
Tools & Materials
- Microfiber detailing towels (lint-free, 300-400 GSM)(Have at least 6 towels for wash, wipe, and buff stages)
- Foam finishing/applicator pads(Soft, non-abrasive; keep separate from wax applicators)
- Sealant product (synthetic polymer)(Choose one product per finish; avoid mixing brands during a coat)
- Panel wipe or isopropyl alcohol solution(Used to remove oils and residues before application)
- Two-bucket wash setup or equivalent(Optional but helps minimize wash-induced swirl marks during prep)
- Gloves(Nitrile gloves recommended to protect skin from solvents)
- Clay bar or decontamination tools(Optional for heavy contamination; use with lubricant)
Steps
Estimated time: 120-150 minutes
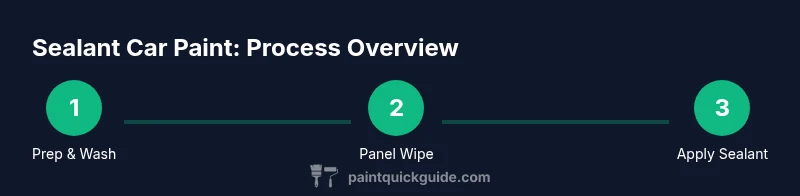
- 1
Prepare workspace and vehicle
Park in shade, gather tools, and wash the car thoroughly with a pH-balanced shampoo. Dry the surface completely before inspecting for contamination. This ensures you’re sealing a clean, dry surface and prevents trapping water under the sealant.
Tip: Use a two-bucket wash method to minimize micro-scratches; keep towels clean and dry. - 2
Decontaminate and assess paint
Run a clay bar with lubricant to remove bonded contaminants. Inspect for bonded fallout and scratches; address major defects with polishing if needed before sealing. This step prevents high spots and dull areas from telegraphing through the sealant.
Tip: Work on one panel at a time and check with your fingertips for roughness after claying. - 3
Panel wipe to remove oils
Wipe the entire surface with panel wipe or an isopropyl alcohol solution to remove oils and residues that can prevent adhesion. Ensure the surface is dry before applying the sealant.
Tip: Do not oversaturate the cloth; use light, even passes to avoid streaking. - 4
Apply sealant to a small section
Apply a thin line of sealant to your applicator and spread evenly across a 12–18 inch panel area using even, overlapping strokes. Maintain a wet edge to prevent lap marks and ensure a uniform film.
Tip: Work in consistent, moderate pressure; thin coats deliver better results than thick coats. - 5
Let cure and buff
Allow the sealant to cure according to the product’s instructions. After the prescribed cure time, buff with a clean microfiber to remove any high spots and reveal a smooth, glossy finish.
Tip: Inspect under bright light for streaks; a second thin coat may be applied if recommended by the manufacturer. - 6
Final inspection and maintenance plan
Do a final wipe-down, inspect edges and trim, and set a maintenance plan. Schedule regular washes with a pH-balanced shampoo and avoid harsh detergents that can degrade the coating.
Tip: Keep a record of product used and cure times for future refinements.
Your Questions Answered
What is a car paint sealant and how does it work?
A car paint sealant is a synthetic polymer coating that bonds to the clear coat, forming a protective layer against UV rays, contaminants, and water. It works by creating a smooth, hydrophobic surface that sheds water and makes cleaning easier. Unlike wax, a high-quality sealant generally lasts longer and resists degradation from sun and chemicals.
A sealant is a synthetic coating that bonds to your clear coat, protecting it from sun and dirt while making washing easier.
Do I need to clay-bar the car before applying a sealant?
Claying is recommended if the surface has bonded contaminants that washing alone cannot remove. It creates a smooth surface so the sealant adheres properly. If you skip this step on a contaminated finish, you may trap grime beneath the coating.
Claying helps remove stuck-on grime so the sealant bonds properly.
How should I apply sealant for best results?
Apply in thin, even coats using the provided applicator. Work in small sections with overlapping passes, then immediately buff after the recommended cure time. Avoid heavy layers that can trap dust and cause streaks.
Apply thin, even coats in small sections and buff after curing.
How long should I wait after applying before washing?
Follow the product’s cure time before washing or exposing the finish to water. Some coatings allow light touch after a short period; others require longer curing. Patience here ensures the coating adheres properly.
Wait for the recommended cure time before washing or exposing to water.
Is a sealant safe on all paint finishes?
Most modern sealants are safe on factory or refinished clear coats, but always test a small area first and follow manufacturer instructions. Some finishes may react differently to certain polymers or cleaners. If in doubt, consult the product's guidelines or seek expert help.
Most sealants are safe for common finishes, but always test first and follow the instructions.
Can I use sealant on older, oxidized paint?
Sealants can improve appearance on older paint, but severe oxidation or peeling requires correction first. Polishing to remove oxidation and restoring gloss provides a better substrate for sealing. If the finish is compromised, consider professional assessment before application.
Sealants can help older paint, but fix major oxidation first for best results.
Watch Video
Quick Summary
- Choose the right sealant for your climate and paint type.
- Invest in thorough surface prep for optimal adhesion.
- Apply thin, even coats and allow proper curing.
- Use gentle maintenance to preserve gloss and protection.
- Document products and procedures for future refinements.