Roof Paint for RV: Practical Guide to Durable Roofs
Learn how to choose, prep, and apply roof paint for your RV. Practical tips on RV coatings, compatibility, maintenance, and safety to extend roof life and protect your investment.

This guide helps you select RV approved roof coatings, prepare the surface, and apply a durable coat that protects the roof from UV damage, leaks, and weather. You will learn which coatings work best with common RV roofs, how to prep properly, and how to maintain the finish for longevity and ease of care.
Why roof paint for RV matters
Your RV roof faces sun, rain, temperature swings, and debris more than any other exterior surface. Selecting the right roof coating is an essential step in protecting your investment and maintaining interior comfort. According to PaintQuickGuide the most durable results come from using an RV approved coating that remains flexible, seals micro cracks and adheres to common RV roof membranes like EPDM or fiberglass. The PaintQuickGuide team found that the combination of proper surface prep, compatible primers and the right coating can dramatically reduce water intrusion and speed up maintenance cycles. In practice, choosing a high quality elastomeric or acrylic roof paint designed for RVs offers both longevity and ease of maintenance. You will also want to consider color choices that reflect heat and prevent UV damage, as well as the warranty terms from manufacturers, which often specify compatible primers and topcoats. PaintQuickGuide analysis also highlights the importance of selecting products specifically labeled for RV roofs to ensure compatibility and performance.
Types of roof coatings for RVs
RV roof coatings come in several formulas each with strengths and trade offs. Elastomeric coatings form a flexible rubber like film that bridges minor cracks and stands up to sunlight. Acrylic roof coatings are easy to apply and inexpensive but may require more frequent re coating in harsh sun. Silicone coatings excel at water repellency and algae resistance but can be slippery and sometimes cause reflection issues on flat roofs. Polyurethane and acrylic blends offer good UV resistance and durability but can be more expensive. For most RV owners the best choice is an RV specific coating that is compatible with the roof membrane and approved by the manufacturer. Always check the product data sheet for adhesion to EPDM or fiberglass and follow the recommended number of coats. Consider color and reflectivity since lighter shades reduce heat gain and extend membrane life. PaintQuickGuide analysis shows that proper prep and coating selection significantly improve long term performance and ease of maintenance.
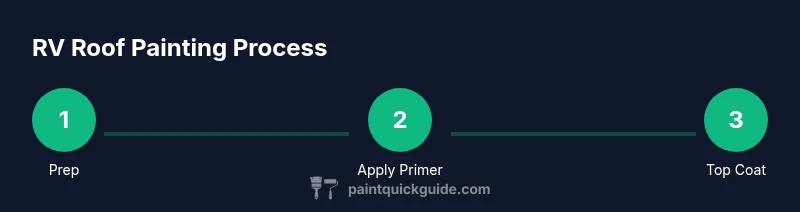
Surface prep for RV roof painting
Before you apply any coating you must clean and dry the roof. Start with a thorough wash using a non foaming cleaner that removes dirt, grime, and grease. Scrub with a stiff brush and rinse well. Remove any loose sealant and repair cracks with a suitable repair compound. Rinse again and allow the roof to dry completely. Check the surface with a moisture meter if you have concerns about dampness. Protect adjacent areas with masking tape and drop cloths. Vent lids and vents to prevent moisture buildup during coating. The goal is a clean dry surface with good adhesion to the roof material. Poor prep is the leading cause of peeling and failure, so take time to do a proper job.
Choosing the right paint and primer
Start with a coating that is labeled RV roof and is compatible with the roof membrane. If you have EPDM use a bonding primer designed for EPDM surfaces before applying the topcoat. For fiberglass roofs choose a primer rated for glass reinforced membranes. Use a primer only when recommended by the coating manufacturer. Apply at least one thin base coat and allow it to dry before applying the second coat. Follow the product data sheet for pot life and cure times. Use multiple thin coats rather than one thick coat to avoid runs and ensure full coverage. If you paint in a sunny warm day work quickly and keep a wet edge. After the primer dries inspect for uniform adhesion prior to top coat. A good primer improves adhesion and reduces risk of coating failure, especially on flexible membranes like EPDM.
Maintenance and safety for RV roof coatings
Always work from a stable ladder or roof access. Wear a respirator or mask if solvents or isocyanates are present and ensure adequate ventilation. Use safety gear such as gloves and eye protection. Keep the roof dry during application and avoid painting in rain or strong wind. After application check for pinholes and touch up promptly. Allow the coating to cure as recommended by the manufacturer before exposing to rain or direct sun. Schedule periodic inspections each season to catch cracks and wear early and extend roof life. Safety is paramount when working at height, so never rush through the process.
Common mistakes to avoid and quick checklist
Skipping prep leads to peeling and premature failure. Using a regular house paint on an RV roof reduces adhesion and durability. Not using a compatible primer or forgetting to seal edges causes leaks. Painting in poor weather reduces adhesion and finish quality. Do not coat over damaged roof membranes without repair. Use a proper cleaner and test a patch first to verify adhesion. Finally keep a maintenance log and set reminders for re coating to stay ahead of wear.
Tools & Materials
- Nitrile gloves(Chemical resistant; one pair per person)
- Safety goggles(Impact resistant; splash protection)
- Respirator with organic vapor cartridges(For solvents and fumes)
- Stiff-bristle brush(Heavy grime; deck brush style)
- Scraper or putty knife(Remove loose coating and sealant)
- Non foaming roof cleaner(EPA approved if possible)
- Mixing bucket and stir stick(For primer and coating mixing)
- Masking tape and drop cloths(Protect surrounding areas)
- RV-grade roof primer(Choose compatible primer for roof membrane)
- Elastomeric or acrylic roof coating(RV rated; consider color and UV stability)
- Primer compatible roller (1/4-3/8 inch nap)(Even coverage)
- Paint trays and liners(Keep coatings organized)
- Ladder or roof access equipment(Stable access; abide weight limits)
- Rags and solvents for cleanup(Keep area tidy and safe)
Steps
Estimated time: 4-6 hours active painting; 24-48 hours cure before exposure
- 1
Inspect and plan workspace
Walk the roof to identify cracks, blisters, and soft spots. Sketch a simple plan including the order of coatings and where masking will occur. Set aside time in dry weather and ensure all tools and materials are within reach.
Tip: Photograph problem areas before starting to track changes. - 2
Clean and dry the roof
Wash away dirt with a non foaming cleaner. Scrub with a stiff brush and rinse thoroughly. Allow the surface to dry completely and verify dryness with a moisture meter if available.
Tip: Drying time is critical; avoid touching wet patches. - 3
Mask and protect surrounding areas
Cover edges, vents, skylights and seams with masking tape and drop cloths. Ensure all openings are protected to prevent drips and overspray. Double check that tapes are pressed firmly to prevent undercoat bleed.
Tip: Use a moisture resistant tape for exterior surfaces. - 4
Apply primer to bonding areas
Apply a thin, even coat of primer on porous or damaged areas as recommended by the product data sheet. Allow the primer to cure as specified before applying the topcoat. Do not rush this step as good adhesion starts here.
Tip: Never skip primer on EPDM or damaged spots. - 5
Apply base coats and top coats
Mix and apply the selected RV roof coating in thin, uniform coats. Maintain a wet edge and avoid runs by working quickly in shaded areas. Allow sufficient cure time between coats per the data sheet.
Tip: Use multiple thin coats rather than one heavy coat. - 6
Final cure and inspection
After the final coat, let the roof cure undisturbed for the recommended period. Inspect for pinholes, flat spots, or missed areas and touch up as needed. Revisit after a few days for any minor issues.
Tip: Record cure times and climate conditions for future projects.
Your Questions Answered
Is roof paint necessary for an RV roof, and does it protect against leaks?
Paint or coating adds a protective layer that can help prevent UV damage and seal minor cracks. It is not a magic fix for major roof leaks, which require inspection and repair of the roof structure. Always follow the manufacturers guidelines for best results.
Roof coating adds a protective layer and helps seal minor cracks. It is not a substitute for repairing leaks; follow product guidelines for best results.
Can I use regular house paint on an RV roof?
Regular house paint is not recommended for RV roofs. RV coatings are formulated for flexible membranes and exposure to outdoor elements. Using the wrong product can lead to poor adhesion and early failure.
Regular house paint is not recommended for RV roofs because it may not adhere well or withstand movement and weather.
How long does RV roof paint typically last?
Durability depends on coating type, prep quality, and climate. With proper prep and RV rated coatings, a well applied coat can provide years of protection before maintenance is needed. Always follow the cure times recommended by the manufacturer.
Durability depends on the coating and climate, but with proper prep and RV rated products you can expect several years of protection.
Do I need a primer before applying roof coating?
Primers are recommended on porous or damaged areas and when specified by the coating manufacturer. They improve adhesion and prevent coating failures on difficult substrates like EPDM membranes.
Yes, primer helps adhesion on porous or damaged areas. Follow the coating maker guidelines.
Is spraying the RV roof coating better than rolling it on?
Spraying can provide a faster, more uniform finish on complex shapes, but requires proper equipment and masking. Rolling offers control and is easier for small area touch ups. Choose the method that matches your tools and experience.
Spraying can be faster for complex roofs; rolling works well for simpler surfaces and touch ups.
Watch Video
Quick Summary
- Choose RV approved coatings for best adhesion and durability
- Prep and masking are critical for a clean finish
- Apply thin coats with proper curing between passes
- Inspect regularly and schedule re coatings as needed