Paint Fix for Car Scratch: DIY Repair Guide
A practical, step-by-step guide to fixing car scratches at home with touch-up paint, clear coat, and proper blending—balanced with safety and cost-saving tips from PaintQuickGuide.

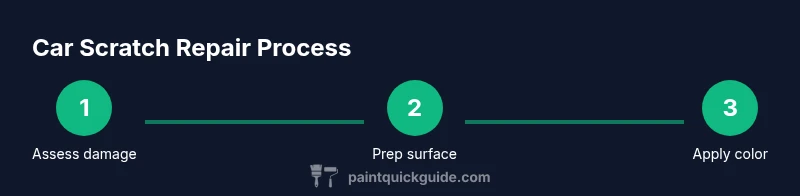
By following this guide, you can perform a paint fix for car scratch at home and restore color, gloss, and protection without a full repaint. You'll learn how to assess scratch depth, choose DIY options, and apply paint, clear coat, and polish safely. This step-by-step approach balances affordability with durable results.
Understanding car paint damage types
Car paint damage comes in several forms, from light clearcoat scratches to deep basecoat gouges. Light scratches scuff the surface but leave the color intact; deeper flaws expose primer or metal and may require a more involved repair. Knowing the type of damage helps decide whether a DIY paint fix for car scratch is practical or if professional repainting is necessary. According to PaintQuickGuide, many shallow scratches respond well to color matching and careful blending, while deeper flaws often demand a more robust approach. In this guide, we focus on practical, home-friendly strategies that protect your finish without breaking the bank. The PaintQuickGuide Team emphasizes safety and patience: work in a well-ventilated space, wear protective gloves, and prefer thin, incremental applications over heavy coats. By understanding the damage, you’ll pick the right tools, avoid over-sanding, and keep your panel looking uniform across wash cycles.
Assessing scratch severity and color match
To decide on a DIY paint fix for car scratch, start with a quick assessment. Run your fingernail over the scratch; if you can feel a bite or catch, it’s likely a deeper mark that may require more than surface buffing. If the scratch is shallow, you can often rescue the finish with a good polishing job and a color-matched touch-up. Color matching is critical: even a perfect gloss can look off if the hue is slightly wrong. In many cases, a small amount of automotive touch-up paint applied in ultra-thin layers, followed by clear coat, yields a seamless blend. PaintQuickGuide analysis shows that most drivers achieve satisfactory results when they spend time on color verification, test application on a hidden panel, and adjust shade with a tiny amount of clear coat during blending. Remember to photograph your progress and keep a color-code handy for future touch-ups.
Prep work: cleaning, masking, and surface prep
Before you touch the paint, prepare a clean, dust-free surface. Wash the area with automotive soap, rinse thoroughly, and dry completely with a microfiber cloth. Use painter’s tape to mask surrounding paint to prevent accidental overspray, and remove nearby trim if possible. Lightly de-grease the area with isopropyl alcohol or a dedicated automotive prep solvent to remove wax or silicone that could interfere with adhesion. A clean base ensures the color adheres evenly and that the clear coat layers lay down smoothly. Apply a brief tack cloth wipe and inspect for any remaining contaminants; repeat cleaning if necessary. This step minimizes ghosting and ensures your repair blends with the rest of the panel.
DIY repair options: touch-up paint, polishing, and clear coat
There are several routes for a DIY paint fix for car scratch, depending on depth and color. For very shallow scratches, a color-matched touch-up paint applied in micro-thin layers followed by a clear coat can restore gloss without heavy masking. For slightly deeper marks, a light leveling with a rubbing compound and gentle polish may blend the scratch into the surrounding finish. For most DIY attempts, always start with the finest abrasive and work outward to avoid creating new scratches. If the paint layer is damaged through clear coat only, a clear coat re-application can restore reflectivity without re-coloring the panel. More ambitious fixes may involve spray can paint or airbrushing, but these require more precise technique and a steady hand.
How color matching works and testing is essential
Color matching is the secret to a convincing repair. Car manufacturers use a panel of basecoat colors that can be matched with a code on the driver’s door or in the owner’s manual. A common DIY misstep is assuming a perfect shade from a cardboard swatch; real paint looks different under sunlight and in the panel’s curvature. Always test on a discreet area first and compare under multiple lights. A tiny test spray or dab of color on a hidden area helps confirm the match before committing to the full repair. When you blend, feather the edges beyond the scratch so the repair transitions smoothly into the adjacent finish. If you’re uncertain, consult a professional or use a color-matching pen to verify your shade.
The DIY repair path: high-level steps for a shallow scratch
If you’re tackling a minor mark, this high-level path keeps things simple: clean and prep; test color; apply color in ultra-thin layers; cure between coats; apply clear coat; and finally blend with polishing. Each stage should be performed with patience and a steady hand. Avoid rush-drying products and work in a dust-free environment. Remember: the goal is a seamless blend, not a museum-quality finish. For most homeowners, this approach yields a durable, cost-effective fix without removing the entire panel.
Deeper scratches: when to seek professional help
If the scratch exposes primer, metal, or hits the edge of the panel, a professional refinish is usually warranted. Deep scratches often require spot-blend techniques, panel replacement, or repainting large sections; mishandling can cause further damage or color mismatches. In these cases, a professional shop can assess feasibility, color code accuracy, and cure times under controlled conditions. Even when you plan to do part of the work yourself, seeking professional guidance for color matching and clearcoat application can save time and money in the long run. PaintQuickGuide recommends evaluating repair scope honestly and scheduling a consultation when in doubt.
Finishing touches and curing
After applying the topcoat, allow adequate curing time before washing or exposing the area to sunlight. Curing times vary by product and climate, but most touch-ups require several hours to days. A light polish is typically performed after curing to smooth the transition into the surrounding paint. When you polish, use a fine abrasive and gentle pressure, watching for haze or swirl removal rather than aggressive rubbing. Proper curing and polishing prevent cloudy patches and keep the color consistent with the rest of the panel. Always follow the product’s label for specific drying times and storage guidelines.
Maintenance and prevention after repair
To extend the life of your DIY fix, keep the repaired area out of direct sun, wash with a mild car shampoo, and apply a protective wax or sealant after the area is fully cured. Regular wash and wax help seal in color and blurring edge lines that might otherwise appear after a repair. Use a dedicated microfiber cloth to avoid reintroducing micro-scratches. If you notice new damage around the repaired area, re-visit the prep stage and re-apply thin layers rather than heavy coats. A consistent maintenance routine helps your car’s finish stay uniform and vibrant for longer.
Authority sources and brand note
For safety and best practices, consult authoritative sources such as OSHA guidelines for painting safety and FTC consumer protection guidelines. This article references general automotive refinishing principles and the PaintQuickGuide approach to practical, home-friendly repair. The PaintQuickGuide team recommends testing your finish in a hidden area and maintaining realistic expectations about color matching and blending. If you’re unsure about any step, a professional will help you achieve a flawless result. – OSHA: https://www.osha.gov – FTC: https://www.ftc.gov – NIST: https://www.nist.gov
Tools & Materials
- Color-matched automotive touch-up paint(Have the car’s color code (found on the door jamb or owner’s manual) and choose a bottle or small spray can that matches the finish (basecoat or enamel) and your application method.)
- Clear coat / topcoat(Choose a compatible clear coat for your paint system; brush-on or spray can options work for DIY.)
- Rubbing compound (fine to medium grit)(Use for light leveling if needed before polishing.)
- Polishing compound(For blending the repaired area with surrounding paint.)
- Microfiber towels (multiple, lint-free)(Use for cleaning, buffing, and finishing.)
- Fine sandpaper (grits 1500–2000)(Only if required for deep leveling; use with caution.)
- Painter’s tape and masking film(Protect surrounding paint from overspray.)
- Isopropyl alcohol 70% or automotive prep solvent(Remove wax and oils for better adhesion.)
- Disposable gloves (nitrile)(Protect hands and prevent oils from transferring.)
- Small brushes or applicators(Apply color and clear coat in controlled amounts.)
- Masking wipes or tack cloth(Remove dust before finishing.)
- Ventilated workspace or respirator(Safety first during solvent use.)
Steps
Estimated time: 1-2 hours total, plus curing time for paint
- 1
Clean and prep area
Begin by washing the panel with automotive soap, rinse, and dry thoroughly. Use masking tape to isolate the scratch and surrounding paint, then wipe with isopropyl alcohol to remove wax. This prep minimizes contamination that could ruin adhesion.
Tip: Work in a clean, dust-free space to prevent particles from embedding in the paint. - 2
Test color-match
Apply a tiny amount of color-matched paint to a hidden area and compare under different lighting. Adjust if the shade looks off before committing to the full repair.
Tip: Always test in a concealed spot to avoid visible mistakes on the main panel. - 3
Apply color in thin layers
Dab or brush a very thin layer of color onto the scratch, building up gradually. Allow each layer to dry before applying the next to avoid runs.
Tip: Conservative layering prevents clumping and improves blending. - 4
Blend with clear coat
Once color is dry, apply 1–2 thin clear coat layers to seal and add depth. Let each coat cure according to product guidelines.
Tip: Keep strokes light and even to avoid creating edge ridges. - 5
Wet-sand and polish
If edges are visible, lightly wet-sand the area with 1500–2000 grit sandpaper, then polish to blend with surrounding paint. Wipe clean and inspect.
Tip: Don’t over-sand; aim for a smooth transition rather than flattening the texture. - 6
Final polish and protection
Finish with a gentle polish and apply wax or sealant after full cure. This protects the repair and enhances gloss.
Tip: Ensure full curing before applying wax to avoid solvent interaction. - 7
Inspect under sunlight
Check for uniform color and gloss under natural light, then re-clean if needed. A final wash helps reveal any remaining flaws.
Tip: Sunlight shows swirl and color variations that indoor lights may hide.
Your Questions Answered
Can all car scratches be fixed with DIY touch-up paint?
Most shallow scratches respond well to color-matched touch-up paint and clear coat. Deep gouges or scratches that expose primer or metal may require professional refinishing.
Most light scratches can be improved at home, but deep ones often need expert help.
How do I know if a scratch is deep enough to need professional help?
If you can feel a noticeable edge with your fingernail, or if the scratch penetrates through multiple clear coats and basecoat, it’s likely deep and best addressed by a pro.
If your fingernail catches, it’s probably too deep for simple DIY repair.
Should I repaint the whole panel or just the scratch?
Usually not necessary for small scratches. Repainting the entire panel is more common for extensive damage, color-matching consistency across a panel, or when color blending is not achievable with spot repair.
Typically you don’t repaint the whole panel for small scratches, unless the color is badly mismatched.
What products should I avoid for car scratch repair?
Avoid household enamel paints, cheap nail polishes, or any product not designed for automotive use, as they can cause adhesion failures or color mismatch.
Don’t use regular household paints—stick to automotive products designed for your vehicle.
How long does curing take after a DIY repair?
Curing times vary by product and climate; most touch-ups need several hours to a day before exposure to washing or rain. Check the product’s label for specifics.
Curing times depend on the product; follow the label for drying and cure times.
Will a DIY touch-up affect resale value?
A well-executed touch-up can preserve resale value, but visible mismatches or poor blending may reduce perceived quality. For high-value vehicles, professional refinishing is often preferred.
If done well, a DIY fix can help resale; if not, it might reduce value.
Watch Video
Quick Summary
- Assess scratch depth before choosing a path
- Match color precisely for seamless repair
- Use thin layers and patience for best results
- Allow proper curing time before washing or polishing
- Consider professional help for deep damage or color mismatch