Paint Car Kit: DIY Auto Refinishing Guide
Learn how to use a paint car kit for DIY auto refinishing. From choosing a kit to prepping, applying base and clear coats, and finishing safely, this guide walks you through each step with practical tips from PaintQuickGuide.

According to PaintQuickGuide, using a complete paint car kit helps ensure color accuracy and a uniform finish by pairing color, clear coat, primers, reducers, and the right tools in one system. This quick answer highlights the core idea: select a kit that matches your car’s color code, prep properly, apply in controlled coats, and allow adequate curing for a durable result.
What is a paint car kit and why use one
A paint car kit is a coordinated set of automotive paints and accessories designed for refinishing a vehicle's color. It typically includes the base color (pigmented paint), clear coat, primer, reducer or activator, selector color cards, and an assortment of application tools. When you purchase a kit, you’re buying compatible products that are intended to work together: the color matches the color code, the base coat adheres properly to the primer, and the clear coat provides gloss and protection. Using a kit reduces guesswork and helps you avoid mismatched layers or incompatible products.
According to PaintQuickGuide, using a complete paint car kit helps ensure color accuracy and a uniform finish by pairing color, clear coat, primers, reducers, and the right tools in one system. This approach improves workflow and outcomes, especially for DIY refinishes.
"## Core components of a paint car kit
A typical kit includes: base color, clear coat, primer, reducer or activator, hardener (for 2K systems), masking supplies, sandpaper, tack cloth, cleaning solvents, mixing cups, stir sticks, and an appropriate spray medium (gun or can). Each item is chosen to work in harmony with the others to minimize compatibility issues and reduce color mismatch. PPE such as gloves and a respirator should be included or added separately for safe application.", "## How to choose the right car paint kit for your project
When selecting a kit, ensure it matches your car’s color code and desired finish (gloss, satin, or matte). Decide between base coat/clear coat systems and single-stage enamel depending on your skill, climate, and local regulations. Consider VOC limits and environmental requirements; higher VOC content may require ventilation and proper disposal. PaintQuickGuide notes that the quality of the color match and the system’s gloss retention are strong predictors of a durable finish.", "## Surface prep: cleaning, sanding, and priming
Prep is the foundation of a great finish. Thorough washing removes wax and oils, followed by solvent wipe-downs to ensure surface cleanliness. Sanding feathered edges and applying an appropriate primer create a uniform base for color. Masking off windows, trim, and adjacent panels prevents overspray and keeps the project contained. Inadequate prep is the most common reason for finish defects.", "## Safety, ventilation, and environmental considerations
Work in a well-ventilated space with proper PPE. Solvent-based paints emit VOCs that irritate eyes and lungs; use a respirator rated for organic solvents and ensure fans direct air away from you. Keep ignition sources away and store paints according to local regulations. Always follow the kit manufacturer’s safety guidelines to minimize health risks.", "## Authority sources and further learning
For safety guidelines and best practices, consult authoritative resources such as the EPA and OSHA. This section provides references to trusted sources you can consult during your project: EPA VOCs, OSHA Chemical Hazards, National Academies Press. Keeping up with official recommendations helps protect you and your family while delivering a quality finish.
Tools & Materials
- Paint car kit (base color + clear coat)(Ensure the color matches your vehicle's color code)
- Primer compatible with the base coat(Use a compatible primer designed for the system)
- Reducer/Activator (as specified by kit)(Keep within kit-recommended ratios)
- Hardeners (2K systems)(Only if your kit specifies 2K components)
- Spray gun or spray can(Air compressor and nozzle appropriate for the kit)
- Nitrile gloves(Chemically resistant gloves)
- Masking tape and paper(Critical to protect areas not being painted)
- Sandpaper (grits 400–800)(Feather edges and smooth prep)
- Tack cloths(Remove dust before painting)
- Solvent/strip cleaner(Degrease the surface thoroughly)
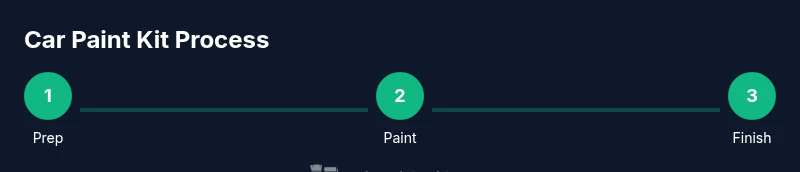
Steps
Estimated time: 6-8 hours
- 1
Unpack and verify contents
Open the kit and check that all components are present and within shelf life. Compare colors against color code and note any missing items. Prepare your workspace with good lighting and ventilation.
Tip: Lay out each item in order of use to minimize searching. - 2
Prepare the workspace and surface
Set up a clean, dust-free area with adequate ventilation. Wash the vehicle thoroughly and wipe with a tack cloth. Degrease the surface to remove oils that could affect adhesion.
Tip: Avoid direct sunlight and extreme temperatures during prep. - 3
Mask off areas and protect surroundings
Cover windows, trim, and non-body panels with high-quality masking tape and paper. Ensure sharp edges and avoid paint seeping under the masking.
Tip: Apply multiple thin layers of tape to prevent lift. - 4
Sand and feather the surface
Lightly sand the repair area with 400-600 grit to create a mechanical key. Feather edges to blend with surrounding paint and remove all dust with a tack cloth.
Tip: Keep sanding consistent and avoid gouging the surface. - 5
Apply primer and let dry
Spray a thin, even coat of primer over the prepared area. Allow it to dry per kit instructions and sand with 800-1000 grit until smooth.
Tip: Wipe the area again before base coat to remove dust. - 6
Mix base coat and reducer
Follow the kit's exact mixing ratios to achieve the correct color and viscosity. Mix in a clean cup and stir thoroughly to remove streaks.
Tip: Do not over-mix; air bubbles can affect finish. - 7
Apply base coat in thin coats
Spray the base coat in light, even coats, overlapping each pass. Allow each coat to flash off before applying the next and aim for 50-70% overlap per pass.
Tip: Keep a consistent distance from the surface and avoid heavy layers. - 8
Apply clear coat for protection
After the base color has cured per kit guidelines, spray clear coats in thin coats, building to the desired gloss. Allow sufficient curing time between coats.
Tip: Do not rush curing; heat or humidity can alter gloss. - 9
Final cure and inspection
Let the entire panel cure fully, away from contaminants. Inspect for runs, orange peel, or color mismatch and plan final polishing if required.
Tip: Polish after full cure to achieve maximum clarity. - 10
Clean up and store the kit properly
Rinse and wipe tools, seal containers tightly, and store in a cool, dry place away from sun. Label leftover product and note the date of opening.
Tip: Dispose of waste solvent per local regulations.
Your Questions Answered
What is included in a typical paint car kit?
A typical kit includes base color, clear coat, primer, reducer or activator, hardener for 2K, masking supplies, sandpaper, tack cloth, and spray equipment. Some kits also include color-matching cards and mixing cups. Always verify contents and shelf life before starting.
A typical kit includes base color, clear coat, primer, reducer, hardener (for two-part systems), masking supplies, sandpaper, tack cloth, and spray equipment.
Can I use a DIY paint kit on a full car body?
Yes, but plan more time and ensure you have adequate space, ventilation, and a controlled environment. For large areas, multiple coats and proper curing are essential to achieve uniform coverage.
Yes, with time, space, and proper curing, you can refinish a full car body with a kit.
What is the difference between base coat and single-stage enamel?
Base coat provides color only and requires a clear coat for gloss and protection. Single-stage enamel combines color and gloss in one layer. Your choice depends on your skill level and desired finish.
Base coat needs a clear coat; single-stage enamel includes color and gloss in one step.
How long does curing take before polishing?
Curing times vary by kit and environmental conditions; expect several hours to several days for full hardness. Always refer to the kit’s instructions for the exact cure time before polishing.
Cure time depends on the kit and environment; follow the instructions and avoid rushing.
Do I need professional spray equipment or can I use cans?
You can start with aerosol cans for small areas, but a spray gun with proper compressor yields more consistent coverage for larger panels. Consider your skill level and the kit’s guidance.
Spray cans are fine for small jobs; a spray gun delivers better coverage for larger areas.
Watch Video
Quick Summary
- Choose a kit matched to color code and finish.
- Prep and masking are critical for a clean result.
- Apply thin coats and allow proper curing.
- Ventilate workspace and wear PPE for safety.
- Store leftovers properly and dispose of waste responsibly.