Car Paint and Body Shop: A Practical Step-by-Step Guide
A comprehensive, step-by-step guide to selecting, preparing for, and working with a car paint and body shop. Learn finishes, prep, and maintenance without surprises.

By following this guide, you will confidently select and work with a car paint and body shop, prepare your vehicle, understand finishes, and protect your investment. This step-by-step approach covers evaluation, prep, color matching, paint application, curing, and maintenance, helping you achieve a durable, factory-like result.
What services a car paint and body shop offers
A car paint and body shop provides cosmetic refinishing and structural repairs. In 2026, the PaintQuickGuide team explains that most shops combine dent repair, rust treatment, color matching, and high-quality paint with clear coats to restore form and appearance. The key is choosing a shop that can match factory finishes and deliver durable protection against the elements. When you visit, ask for a written scope of work and a transparent estimate. This guide will help homeowners and DIY enthusiasts navigate the decision-making process and align expectations with reality. The phrase car paint and body shop is not just about looks—it's about protecting metal from moisture, preventing rust, and preserving resale value. According to PaintQuickGuide, a well-coordinated process blends artistry with engineering to deliver lasting results.
How to assess your project before visiting
Before you walk into a shop, collect evidence of the damage and the scope of your project. Take clear photos of dents, scratches, and any rust, and note parts that may need replacement or repainting. Decide whether you want a full repaint, a color touch-up, or a blend for panels that have weathered differently. Bring any existing color codes or receipts for previous repairs. A solid plan helps you compare quotes objectively and reduces back-and-forth during the appointment. PaintQuickGuide analysis shows that consumers who come prepared are more likely to get accurate color matches and durable finishes.
Surface preparation: the foundation of a quality job
Surface prep determines how well the paint adheres and how evenly color appears. This block covers washing, rust removal, dent repair, sanding, and masking. Start with a clean, dry surface and address any corrosion, filler, or primer issues before color is applied. Proper masking protects jambs, trims, and glass, ensuring sharp edges. Any shortcuts here show up later as peeling, chipping, or uneven gloss. The PaintQuickGuide team emphasizes that neglecting prep leads to costly rework and poor longevity; invest time in this phase for a superior result.
Paint types and finishes explained
There are several paint strategies for cars, including single-stage and two-stage systems (basecoat plus clearcoat). Metallics and pearls add depth but require careful color matching and more studio-like conditions during application. Each option has trade-offs in durability, UV resistance, and appearance. The goal is to choose a finish that suits your climate, driving habits, and budget while retaining resale value. Your shop should explain how pigment, binder, and clearcoat affect gloss, orange peel, and durability, and help you select the best match for your vehicle.
Choosing a shop: credentials, warranties, and process
Choosing a shop is as much about the process as the result. Look for clear communication, a written warranty, and a transparent production timeline. Ask to see recent completed projects that resemble your vehicle’s color and body type. Inquire about the shop’s spray booth, ventilation, filtration, and how they handle color matching—metallics and pearls often need more sophisticated blending. A reputable shop will provide a documented plan, from prep to curing, and will discuss the expected durability of the finish relative to your climate and driving conditions.
The repaint workflow: from appraisal to finish
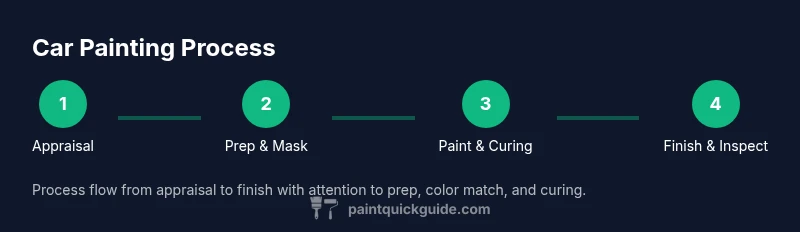
The typical workflow starts with an appraisal and scope of work, followed by panel preparation, masking, sanding, and priming. Then the color is matched and applied, usually in multiple coats with intermediate flash times. A final clearcoat protects the color and adds gloss. The car then cures in a controlled environment before detailing and inspection. Throughout, the shop should share progress updates, show color-match proofs, and verify that trims and jams are properly finished. Good communication reduces misalignment and helps you understand when the car is truly ready for release.
Common pitfalls and how to avoid them
Common pitfalls include color mismatches, improper masking, rust overlooked in the prep stage, and insufficient curing. Some shops may rush the curing process or skip dust control, leading to blemishes. Ask for a test panel or blend-in check on a hidden area to validate color and finish before the main body is painted. If the final result isn’t satisfactory, request adjustments under the warranty terms and document all discussions. Planning ahead with a clear spec minimizes rework and expense.
Cost considerations and budgeting tips
Costs vary with project scope, vehicle size, and the level of restoration required. Rather than chasing the lowest quote, prioritize quality prep, proper masking, and a durable clearcoat.
Maintenance after a new paint job
To extend the life of a fresh finish, wash regularly with a mild car shampoo, keep the surface protected with gentle wax, and use UV-protectant products on hot days. Park in the shade when possible and avoid prolonged exposure to corrosive elements. A yearly maintenance check with the shop helps catch early signs of wear such as micro-scratches or dulling, allowing timely touch-ups that preserve color integrity.
DIY vs professional refinishing: when to choose
DIY projects can be satisfying for small touch-ups or cosmetic nicks, but full resprays demand professional equipment, controlled environments, and expert color matching. The best outcomes come from trained technicians who can manage bake times, film build, and edge blending. If you want factory-like results, expect to work with a reputable shop and factor in proper curing and environmental controls. The decision should align with your goals, safety considerations, and long-term value.
Tools & Materials
- Spray gun (HVLP or conventional)(Multiple tip sizes for basecoat and clearcoat)
- Air compressor and hoses(Adequate CFM for consistent spray)
- NIOSH-approved respirator and disposable cartridges(Protection from solvents and aerosols)
- Protective coveralls, gloves, and eye protection(Chemical resistant PPE)
- Sandpaper and polishing pads (grits 400–2000)(For shaping and finishing)
- Dual-action sander/polisher(Even surface and gloss control)
- Masking tape, paper, and film(Precise masking for edges and jams)
- Primer, basecoat, and clearcoat systems(Choose compatible chemistry by manufacturer)
- Reducers/activators and mixing cups(Correct viscosity and cure timing)
- Tack cloths and lint-free rags(Dust control during finish)
- Paint stand or mixing station(Organized color matching)
- Ventilation system and dust collection(Shop safety and air quality)
- SDS sheets and spill kits(Safety compliance)
- Color-matching tools or software (optional)(Helps with precise color alignment)
Steps
Estimated time: Estimated total time: several days to several weeks, depending on scope
- 1
Get a written estimate and scope
Request a formal estimate that outlines the work scope, part replacements, and finish system. Compare line items across shops and ensure exclusions are defined. A detailed scope helps prevent scope creep and surprises later.
Tip: Ask for a color-matching proof and a photo record of the current finish. - 2
Check credentials and portfolio
Review the shop’s certifications, insurance, and recent projects. A portfolio showing vehicles similar to yours with metallic or pearl finishes indicates capability and consistency.
Tip: Call references and ask about long-term durability and color stability. - 3
Inspect the vehicle together
Walk around the car with the estimator and point out rust, dents, and repairs. Confirm that panel alignment and door jambs will be treated to avoid mismatch at edges.
Tip: Bring any prior repair receipts for a complete repair history. - 4
Discuss finishes and color strategy
Decide on the base color, metallics, or pearlescent effects, and how the shop will handle color matching and blending across panels. Ask about expected gloss and texture.
Tip: Request a color sample on a small panel or test hood area. - 5
Schedule drop-off and plan curing
Arrange a drop-off window that allows prep, painting, and curing in a controlled environment. Understand the expected curing times and any environmental constraints.
Tip: Ask about the shop’s HVAC controls and dust monitoring during curing. - 6
Prep the vehicle for drop-off
Ensure the car is clean, remove personal items, and photograph pre-existing damage. Document the current condition to avoid later disputes.
Tip: Do not wash the car within 24 hours of drop-off to avoid trapping contaminants under masking. - 7
Oversee body repair and masking
Confirm that rust or dent repair is completed before painting. Proper masking around trims and glass prevents overspray and edge bleeding.
Tip: Ask for a final photo of masked areas before painting begins. - 8
Appreciate the paint application sequence
The shop should apply primer, basecoat, and multiple clearcoat layers with controlled flash times. Surface cleanliness between coats is critical to adhesion.
Tip: Inspect color consistency across panels after the base and before clearcoat. - 9
Review curing, wet sanding, and final polish
Observe curing conditions and request a post-cure polish and buff to remove minor dust. Check for orange peel, uniform gloss, and edge blending.
Tip: Test a small area first to confirm the finish meets expectations before release.
Your Questions Answered
What defines a high-quality car paint and body shop?
A high-quality shop provides a transparent estimate, documented process, proper masking, rust repair, color matching, and a durable clearcoat. They should be able to show recent, similar work and offer a reasonable warranty.
A high-quality shop shares a clear plan, shows recent work, and offers a good warranty on the finish.
How long does a full repaint typically take?
Turnaround depends on the project scope and curing requirements, but you should expect a multi-day process including prep, paint, and curing. Confirm a timeline in writing before starting.
Full repaint usually takes several days to a week or more, depending on the work and curing times.
Can I supply my own paint color?
Yes, many shops allow customer-supplied color codes and matching. They should verify compatibility with the vehicle and confirm finish compatibility before application.
Yes, you can bring a color or code, but the shop must verify compatibility and provide a plan.
What should I ask about warranties and guarantees?
Ask about the duration and coverage of the finish, adhesion, and color matching. Get it in writing, including conditions that might void the warranty.
Ask for a written warranty covering the finish and color match, with clear terms.
Is rust repair required before painting?
Yes. Rust should be treated and repaired before painting to prevent future bubbling or corrosion under the finish. If rust is untreated, the job may fail prematurely.
Rust should be repaired before painting to prevent future issues.
How can I avoid color mismatches across panels?
Choose a shop with proven color-matching capabilities, request test panels, and verify blending and panel coverage before the final pass.
Pick a shop that shows strong color matching and test panels before finishing.
Watch Video
Quick Summary
- Plan with a written scope and warranty.
- Prioritize surface prep and masking for durability.
- Color match accuracy is a predictor of long-term satisfaction.
- Curing conditions impact final gloss and adhesion.
- Compare shops on communication and process, not just price.