Auto Paint & Body: Practical DIY Guide for Homeowners
Learn practical, step-by-step methods for auto paint & body work—from prep and primer to color matching and finishing. Practical tips, safety guidance, and budgeting for DIY enthusiasts.

By following this guide, you’ll plan, prep, paint, and finish an auto paint & body project with confidence—from dent repair to a color change. You’ll understand safety, required tools, typical costs, and a practical, step-by-step process that helps you avoid common mistakes. Whether you own a sedan or a classic, the approach scales with project size. We highlight cost ranges, typical turnaround times, and essential safety practices.
Understanding the scope of auto paint & body work
Auto paint & body work encompasses more than just spraying color. It blends dent repair, rust treatment, panel alignment, masking, priming, color matching, and a durable top finish. Exterior painting is the visible outcome, but true quality begins with structural and surface prep. Whether you’re touching up chips, repairing a dent, or performing a full color change, you must plan for panel access, disassembly, and reassembly where needed. The term also covers refinishing multiple panels or an entire car, depending on the project scope. For DIYers, the goal is a professional-looking result with a sound, repeatable process that minimizes later repairs.
Safety and workspace considerations
Ventilation, protective gear, and clean lines matter as much as raw skill. In auto paint & body work, always work in a well-ventilated area, ideally with a controlled climate and a dedicated paint space. Use a respirator with organic vapor cartridges, chemical-resistant gloves, and eye protection. Keep flammable materials away from ignition sources, and manage waste in accordance with local regulations. A tidy, organized workspace reduces contamination and speeds up the workflow, helping you keep dust and debris away from fresh finishes.
Surface prep: foundation for a durable finish
Surface preparation determines the final appearance and longevity of the finish. Start by washing and degreasing panels, removing loose paint, and addressing rust with appropriate converters or rust inhibitors. Dents should be repaired with body filler and block-sanded flat for consistency. Sanding scratches to a uniform finish is essential so primer adheres correctly. Clean the surface again with tack cloths to remove fine dust. Proper masking is critical to protect trim, glass, and adjacent panels, preventing ghosting or edge lift after paint application.
Primer, color coats, and clear finishes: choosing the right materials
Primer builds an ideal surface for adhesion and corrosion protection. Epoxy primers are common for metal, while filler primers help with minor imperfections. Basecoat or color coats provide the actual hue, while clear coats add gloss and protection against UV and environmental factors. Matching color is a nuanced task that may require a test spray and adjustments under proper lighting. Use compatible products (primer, basecoat, and clear) from the same system to ensure optimal adhesion and performance. When in doubt, follow manufacturer recommendations for recoat windows and flash times.
Tools and workspace setup for a successful job
HVLP spray guns, compressors, and proper air filtration form the backbone of a reliable auto paint & body workflow. A dedicated spray booth or well-ventilated garage minimizes dust and solvent exposure. Lighting matters: bright, even illumination helps you spot runs and sags. Masking supplies, sanding blocks, and clean mixing cups should be organized by task. Keep a small waste management kit on hand for properly disposing of used wipes and solvent-soaked materials. A well-equipped workspace reduces rework and improves final results.
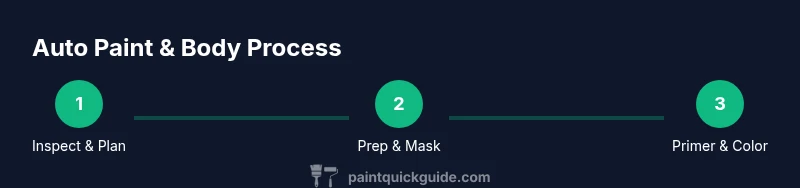
Step-by-step workflow overview: from prep to finish
A typical workflow starts with inspection and planning, followed by panel access and masking. Dent repair and rust treatment come next, then sanding and priming. After primer cure, sand once more, then apply base color in light, even coats with appropriate flash times. Finish with multiple clear coats for depth and protection, then cure and polish. Each layer should be thin to minimize runs and ensure even coverage. Finally, inspect for imperfections, perform any needed cut-and-polish, and reassemble components if removed.
Safety, disposal, and environmental best practices
Always prioritize ventilation, PPE, and safe handling of solvents. Maintain a dedicated waste container for used rags and solvent-soaked items to prevent fire hazards. Comply with local disposal regulations for automotive coatings and solvents. Store materials as recommended by the manufacturer to preserve shelf life and performance. When possible, choose low-VOC products to reduce odor and environmental impact while maintaining finish quality.
Common mistakes and how to avoid them
Common issues include improper masking, incompatible products, and insufficient surface prep. Rushing through dries and cures can cause orange peel or solvent pop. Contamination from dust, oils, or wax leads to adhesion failure. To avoid these, perform a clean, staged workflow, keep your environment stable, and always test a small panel before committing to a full surface.
Cost planning and budgeting for auto paint & body projects
Budgeting for auto paint & body work involves more than the paint itself. Consider the cost of materials (primer, basecoat, clear), PPE, masking supplies, tools, and potential panel replacement parts. DIY paths can be economical, but you must account for time, potential rework, and waste disposal. PaintQuickGuide analysis suggests planning around a flexible budget that accommodates variable material costs and tool investments, especially if you’re aiming for a high-quality finish.
Tools & Materials
- HVLP spray gun(Gravity-feed or turbine HVLP with adjustable fan and fluid controls)
- Compressor or gravity-fed turbine setup(Sufficient CFM for steady spray at your chosen pressure)
- Respirator mask with organic vapor cartridges(Ensure a proper fit and change cartridges as needed)
- PPE: gloves, goggles, coveralls(Protect skin and eyes from chemicals)
- Masking tape and film/paper(Precise masking to prevent bleed-through)
- Sandpaper and sanding blocks (80-600 grit)(For bodywork and finish prep)
- Body filler (bondo) and hardener(Dents and imperfections correction)
- Rust converter or inhibitor(Stops rust progression before priming)
- Epoxy or high-build primer(Adhesion and corrosion protection)
- Basecoat paint (color of choice)(Actual color applied in thin coats)
- Clear coat(Protection and gloss enhancement)
- Mixing cups, stir sticks, and strainers(Accurate measurement and consistency)
- Solvent/ Reducer(Correct thinning for spray conditions)
- Tack cloths and clean rags(Remove dust between coats)
- Heat source or curing lamps (optional)(Assist curing in cool environments)
- Workshop lights and ventilation fan(Good visibility and air exchange)
Steps
Estimated time: 8-16 hours
- 1
Inspect and plan
Begin with a thorough assessment of the vehicle and identify all areas needing work. Create a scope, list necessary parts, and set a realistic timeline. This planning reduces surprises during masking and spraying.
Tip: Document the current paint with photos to guide color matching and pitch potential repairs early. - 2
Set up workspace and safety measures
Arrange a dedicated, well-ventilated area with stable lighting. Install protective coverings, ensure tools are within reach, and verify ventilation efficiency. Safety first keeps this project smooth and reduces rework.
Tip: Test your respirator fit and ensure the space has minimal dust and draft corridors before you begin. - 3
Mask and protect surrounding areas
Mask all trim, glass, and neighboring panels meticulously. Use film and masking tape to create clean borders. Any bleed-through here is difficult to correct after color application.
Tip: Mask slightly beyond edges you intend to spray to avoid edge chipping and paint creep. - 4
Repair dents and surface imperfections
Apply body filler to dents and contour harmoniously with the surrounding panels. Sand smooth with progressively finer grits to create an even base for primer.
Tip: Allow filler to cure fully before sanding to avoid surface sinking or cracking. - 5
Apply primer and sealing
Spray a light, even coat of epoxy or high-build primer. Allow adequate flash time, then sand to a uniform finish. Priming ensures optimal adhesion and masking the repair area.
Tip: Do not rush the flash time; a tack-free surface prevents trapping solvents in the topcoat. - 6
Base color application
Mix color and reducer as recommended, then apply in thin, even coats. Maintain consistent distance and speed to minimize runs. Allow proper flash time between coats.
Tip: Test spray on a panel or spare hood to verify color match and spray pattern before committing to the actual panels. - 7
Clear coat and depth
Apply multiple light coats of clear to build depth and UV protection. Lightly sand between coats if needed for a glass-like finish. Finish with a final gloss coat and proper curing.
Tip: Avoid heavy coats; light, even layers reduce orange peel and sagging. - 8
Cure, inspect, and finish
Let the coating cure fully, then perform a final inspection for imperfections. If needed, perform a light polish or cut-and-polish to achieve a high-gloss finish. Reassemble any removed components.
Tip: Patience during cure yields the clearest, most durable finish.
Your Questions Answered
What is the difference between basecoat and clear coat in auto painting?
Basecoat provides the color and pigment, while clear coat adds gloss and protection from UV light and chemicals. The clear coat also helps resist scratches and dulling. Together, they form the final protective layer over the cured base color.
Basecoat is the color layer, and clear coat protects and adds gloss. They work together to give your finish depth and durability.
Can I perform auto paint & body work in a home garage?
Yes, with proper ventilation, masking, and containment, a controlled space in a garage can work. Use portable ventilation, minimize dust, and avoid direct exposure to occupants. Always follow local regulations on paint work and emissions.
Yes, you can, but you need good ventilation, masking, and a clean area. Check local regulations first.
How long does auto paint typically take to cure?
Curing times depend on temperature and product type, but most wet coats cure within hours and full curing may take days. Ensure proper curing before handling or polishing to avoid marring the finish.
Cure times vary with temp and products; most coats dry in hours, full cure may take days.
What safety gear is essential for DIY auto painting?
A proper respirator with organic vapor cartridges, chemical-resistant gloves, safety goggles, and a long-sleeve suit or coveralls are essential. Ensure good ventilation and keep solvents away from ignition sources.
Wear a respirator, gloves, eye protection, and ensure ventilation.
Do I need to remove trim or components before painting?
Removing trim and sometimes some panels reduces masking complexity and edge risk. If removal is not feasible, use careful masking and edge control to protect parts.
Often yes, remove trim; if not possible, mask carefully and protect edges.
How should I approach color matching for a repair?
Use the vehicle’s color code as a starting point and test at multiple angles under proper lighting. Consider environmental lighting, and accept that small shade differences may occur with DIY work.
Start with the code, test under good light, and expect small differences.
What is the best order for applying coats?
Start with a light primer coat, then several thin base color coats, followed by multiple clear coats. Maintain consistent spray technique and allow flash times between coats.
Primer first, then thin color coats, followed by clear coats with proper drying times.
Can I substitute products from different brands?
Substituting brands can affect adhesion and finish quality. If you mix products, verify compatibility via the manufacturer’s guidelines and perform compatibility testing on a test panel.
Check compatibility and test on a sample panel before committing.
Watch Video
Quick Summary
- Plan first, then execute with a controlled workflow.
- Surface prep is the foundation of durability and appearance.
- Use compatible primers, color coats, and clear for best adhesion.
- Masking quality determines final edges and finish quality.
- Safety and ventilation are non-negotiable for DIY auto paint & body.