Painter's Tape on a Car: Safe Masking Guide
Learn whether you can safely use painter's tape on a car, which tapes to choose, how to apply for sharp lines, and common mistakes to avoid. Practical masking tips for DIY auto projects and detailing prep.

Yes—painter's tape can be used on a car for masking before paint or detail work, but you should choose automotive-grade tape and apply it carefully. Use high-quality, low-residue tape, avoid edges that lift, and remove it while the paint is still workable to minimize lift and residue. This approach helps protect adjacent surfaces and yields crisp lines when masking around curves.
Why painters tape might be considered for car masking
Masking a car to protect areas while painting or detailing often relies on tape. painters tape is widely available, but its suitability depends on the tape type, surface, and timing. The PaintQuickGuide team notes that for automotive work, conventional household painter's tape may work for minor masking if you keep expectations modest, but the risks are higher than with automotive masking tape. According to PaintQuickGuide analysis, the key factors are adhesive strength, edge cleanability, and residue. If you choose a tape designed for painting walls, you should test a small area first and monitor for edge lift and paint bleed. For best results, use automotive-grade masking tape with low adhesion and clean edges. When used properly, tape can protect adjacent panels from overspray, mask trim lines, and help create crisp, straight lines along complex shapes. Always prep the surface by washing and drying completely; oils or waxes will reduce tape adhesion and increase lifting risk.
Types of painter's tape and automotive masking tapes
There are several tape options, and not all are equal for car masking. Household blue painter's tape is convenient for quick jobs, but its adhesive strengths and edge sealing vary by brand. Green painter's tape tends to have stronger adhesion and can lift more easily on curved surfaces, which may be undesirable near edges. Automotive masking tapes are designed to resist higher solvent exposure and temperature changes common in vehicle refinishing. When you select tape, look for low-residue formulas that claim easy removal without leaving adhesive behind. For detailed masking around trims, wheels, or complex curves, consider a premium automotive masking tape that advertises clean edge performance and compatibility with clear coats. If you must combine tapes, use blue painter's tape for wide, flat areas and a thinner automotive tape for tight corners, ensuring a crisp edge where they meet. Always follow the tape manufacturer's recommended usage and test a small patch first. PaintQuickGuide analyses emphasize surface compatibility and residue control as the deciding factors in tape choice.
Surfaces and prep: what to tape and what to avoid
Before applying tape, the car surface must be clean, dry, and free of wax or polishing residues. Any oil or silicone on the surface can prevent tape from sticking and may cause edge lifting during masking. Painted panels, clear coats, and metallic finishes are especially sensitive to adhesive interaction; testing a small area is wise. Plastics and flexible trim can behave differently under tape pressure, so use low-adhesion tape for those surfaces and press along the edge to minimize lifting risk. For best results, wash with a mild automotive soap, rinse well, and dry with a microfiber towel. Wiping with isopropyl alcohol on a small spot after drying can help remove lingering residues. Avoid applying tape over rivets, screws, or damaged areas, as tape may trap moisture or lift edges when heated or heated by sunlight. When taping near chrome or polished metal, use gentle pressure and avoid heavy tape overlays that could scratch or dull the finish.
Application technique for crisp lines
Plan your masking layout before touching tape. Identify the edge line you want to protect and align the tape so the painted edge is protected without creating extra width that could affect the final line. Start with clean, dry hands and use straight segments on flat areas; for curves, press the tape gradually along the contour with your fingers or a soft plastic tool to avoid tenting. Work from the inside to the outside of the masked area to ensure edges stay aligned. When closing gaps, lay a second strip just beside the first to seal the boundary and prevent paint creep. Firmly press down to bond the adhesive to the surface and prevent air pockets, which can cause uneven edges and bleed. If you are masking a large area, consider using masking film for coverage and tape the film to the vehicle to reduce overspray risk. PaintQuickGuide notes that proper application reduces the likelihood of paint lift when the tape is removed later.
Removal timing and aftercare
Tape removal timing depends on the project, ambient temperature, and paint system. In most cases, remove tape while the paint is still slightly pliable or within the manufacturer’s recommended cure window to minimize edge lift. Pull tape back on itself slowly and in a low angle to reduce strain on the fresh paint. If any edge lifts, you can re-tape carefully over the area and rework the line. After removal, inspect the masked edge and touch up as needed with a fine brush or marker. Clean any adhesive residues promptly using a suitable automotive adhesive remover or a paste wax, then buff with a clean microfiber to restore gloss and protect the surface. If you plan to polish or apply a protective coating, ensure you wait for the correct cure time before applying the next layer.
Common mistakes and how to fix them
Common mistakes include using tape with too aggressive an adhesive for curved panels, taping over dirt or wax, and leaving tape on too long. These mistakes can lead to paint peel, adhesive residue, or hazy edges. To fix, remove contaminated tape, clean the surface, re-tape with a more suitable automotive masking tape, and test a small area first. Another frequent error is overburdening tape near highly curved areas; in those spots, use thinner strips with careful edge alignment and press down thoroughly to prevent lifting. Never apply tape over freshly buffed or freshly washed surfaces without letting them dry completely, as moisture can reduce adhesion and create edge bleed. Finally, avoid applying tape using excessive tension on the edge, which can distort the line and create wavy results. If you want crisper edges, consider pairing masking technique with a paint mask film that adheres to curved lines.
Alternatives to painter's tape for car masking
If you’re masking large areas or working near sensitive finishes, masking film and low-tack protective films can be a safer alternative to painter's tape. Automotive masking tapes are designed to work with clear coats and solvents, while masking films reduce edge bleed and overspray more effectively. For small, precise masking, using a pre-cut tape mask with a pre-creased angle can help maintain consistent lines. A vinyl wrap mask may be used to protect areas that require longer masking times. When using any alternative, ensure the surface is clean, dry, and free of contaminants that could prevent proper adhesion. Always test on a hidden area first and follow the product’s usage guidelines. If in doubt, consult a professional or refer to PaintQuickGuide’s practical masking guidelines for car projects.
Quick-start checklist and best practices
- Choose automotive-grade, low-residue masking tape for critical edges.
- Clean and dry the surface thoroughly before applying tape.
- Plan your masking layout and level lines before applying tape.
- Press edges firmly to prevent paint creep; use film for large or curved areas when possible.
- Remove tape while paint is still workable, then inspect and touch up as needed.
Tools & Materials
- Automotive masking tape (low-residue, automotive-grade)(Have multiple widths (1 in, 2 in, 3 in) for different edges)
- Masking film or paper(For large areas or curves to reduce overspray)
- Scissors or craft knife(For trimming tape and film precisely)
- Isopropyl alcohol (70% or higher) and microfiber cloth(To clean and prep surface; avoid residue)
- Detailing brush or soft rubber squeegee(Help smooth edges, especially along curves)
- Automotive adhesive remover (optional)(For removing any adhesive residue after tape removal)
- Masking tape glove or lint-free gloves(Keeps oils from skin off the tape surface)
- Soft cloths and a low-abrasion polishing pad(For post-removal touch-ups and final cleanup)
Steps
Estimated time: 40-60 minutes
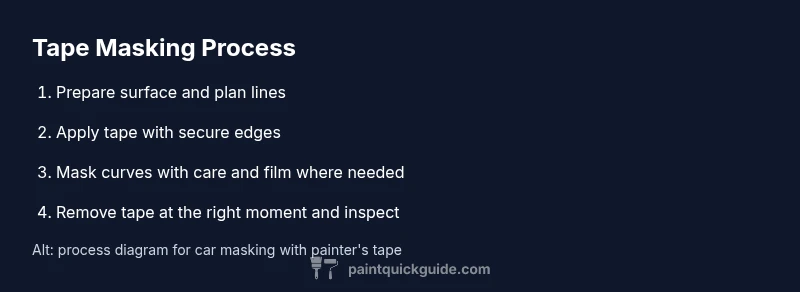
- 1
Prepare the surface
Wash the area with automotive soap, rinse thoroughly, and dry completely. If you’ve polished or waxed the surface, remove residues with isopropyl alcohol and a microfiber cloth. Ensure the area is cool to the touch and free of dust before taping.
Tip: Run a patch test on a hidden area to confirm tape adhesion without damaging the finish. - 2
Plan and lay out the tape
Map the masking line you want to protect and align the tape accordingly. Start with flat sections, then address sharp curves with shorter lengths to avoid creating air pockets. Press each strip firmly into place, especially along the edge where paint could creep.
Tip: Use a straightedge or ruler on straight segments to maintain consistent lines. - 3
Apply and secure tape around edges
Apply tape along the edges where paint protection is required, ensuring the painted edge is on the designated side. Use light pressure to avoid lifting; for curves, gradually press and smooth along the contour. Add masking film for larger curved areas if available.
Tip: Overlap adjacent strips slightly to seal the boundary and prevent leakage. - 4
Remove tape at the right moment
When masking is complete, remove tape while the paint remains workable or within the recommended cure window. Pull slowly toward the masked edge to minimize stress on the wet film. Inspect the edge and touch up any micro-bleeds once finished.
Tip: Have a helper ready to hold the adjacent film or panel to prevent accidental scuffs during removal.
Your Questions Answered
Can painter's tape damage car paint?
When used correctly on clean, dry surfaces with automotive-grade tape, damage risk is minimized. Improper use—like leaving tape on too long or applying on dirty surfaces—can lift clear coats or leave adhesive residue. Always test a small area first and remove tape at the right time.
If you use automotive tape on clean areas and remove it promptly, damage is unlikely. Test a small area first and avoid leaving tape on too long.
What tape should I use for car masking?
Opt for automotive-grade masking tapes with low residue and designed for solvent exposure. Blue painter's tape can work for light masking, but for crisp lines and curved surfaces, a product marketed specifically for automotive masking is preferable.
Choose automotive masking tape for best results; blue painter's tape can work in a pinch but may lift on curves.
How long can tape stay on a car during masking?
Tape should stay only for the minimum practical time. Prolonged exposure, especially in heat or sun, increases the risk of residue and edge lift. Remove once masking is no longer needed and inspect the edge for any micro-bleed.
Keep tape on only as long as needed and remove promptly to avoid problems.
Is painter's tape safe on plastic trim or rubber finishes?
Tape can lift adhesives on flexible plastics and rubber if used aggressively or left on too long. Use low-adhesion tape for trims and test a patch on an inconspicuous spot before full use.
Test first on a hidden trim area; use low-adhesion tape for plastics.
Can painter's tape be used around a car's edges near chrome?
Yes, but take extra care near chrome as some tapes may leave residues or cause micro-scratches if pulled too hard. Apply gently and remove slowly, inspecting for residue afterward.
Be careful near chrome—gentle application and slow removal help prevent issues.
What are safe alternatives to tape for car masking?
Masking films and low-tack protective sheets are viable alternatives for larger areas or longer masking times. They reduce edge bleed and overspray and can be easier to remove than tape after longer projects.
Masking films can be a safer, cleaner option for bigger areas.
Watch Video
Quick Summary
- Choose automotive-grade tape to minimize residue and lift
- Clean, dry surfaces before masking to ensure adhesion
- Plan lines and curves for crisper edges
- Remove tape while the paint is workable to avoid damage
- Test patches first and inspect edges after removal