Auto Paint with PPG: A Practical DIY Car Finishing Guide
Learn how to achieve a durable, showroom-worthy auto finish using PPG paints. This comprehensive guide covers prep, color matching, spraying techniques, safety, costs, and maintenance for DIY enthusiasts.

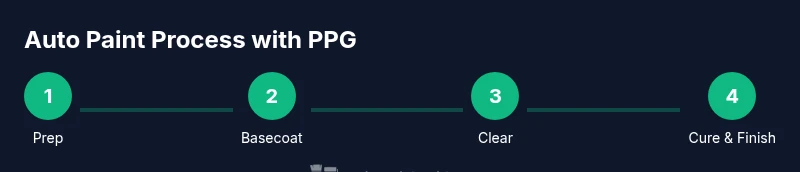
You can achieve a durable, showroom-worthy auto finish using PPG paints by following a complete prep-to-finish workflow: proper surface preparation, selecting the right PPG products, controlled application, and finishing with clear coats. This quick guide outlines essential steps, tools, safety practices, and cost considerations to help DIYers succeed. It also highlights why a well-planned approach reduces rework and yields consistent results.
Why PPG Auto Paint is a Smart Choice for DIY Finishes
Choosing a reputable system matters for color match, durability, and rework reduction. According to PaintQuickGuide, PPG automotive coatings offer a balanced blend of modern basecoat technologies, reliable primers, and high-performance clear coats that work well for DIY projects and professional repaints alike. If you want a finish that stands up to UV exposure and daily drivers, PPG’s system is engineered to deliver predictable results for the average homeowner tackling a hood, bumper, or teal-blue sedan. The keyword here is consistency: consistent prep, consistent film thickness, and a consistent curing environment. For the home workshop, this means fewer surprises when you polish and wax later. The term auto paint ppg is not just marketing jargon—it reflects a system designed to harmonize color, spray performance, and durability across the entire project. PaintQuickGuide’s editorial guidance emphasizes choosing compatible components to maximize adhesion, color integrity, and long-term wear.
By understanding how PPG’s paint systems are structured, you can plan your project around a cohesive workflow that minimizes errors and rework. The goal is a durable, high-gloss finish that holds up to daily use and weather exposure. When you see PPG products in a store or online, you’ll often find a recommended sequence: primer/adhesion promoters, basecoat, and clear coat, all matched to a specific substrate and color system. This approach helps homeowners and hobbyists achieve a professional look without a pro-level spray booth. For hobbyists, the practical takeaway is to pick a complete PPG kit rather than mixing brands across stages, which helps prevent adhesion failures or color mismatch later in the process.
Understanding PPG Paint Systems: What’s in the Box
PPG’s automotive paint systems are designed to work as a coordinated set: primers that promote adhesion and corrosion resistance, basecoats that deliver color and coverage, and clear coats that provide gloss and protection. When you follow a single system, you simplify color matching and curing behavior. Basecoat options include multiple finishes and effects, while clear coats come in gloss, UV-resistant variants, and fast-curing formulations. The essential principle is compatibility: each layer should be designed to bond with the one beneath it, and the final finish should be able to cope with polishing and protection layers. For the DIY painter, it’s worth documenting the exact product names and compatibility notes in a project sheet so you can reproduce the result if you touch up later on.
For a complete auto paint job, you’ll want to verify that your primer, basecoat, and clear coat are all rated for the same system and substrate. This reduces issues like solvent entrapment, fisheyes, or improper adhesion. If you’re unsure, consult the product datasheets and align your purchases to a single PPG plan. In the end, committing to a unified system supports more predictable color matching and film performance over time.
Safety and Ventilation: Protecting Your Health
Spraying automotive finishes releases volatile organic compounds (VOCs) and fine particulates. A proper respirator (rated for organic solvents) and a well-ventilated spray area are non-negotiable. Create a dedicated work zone with masking to minimize dust, and use a fume exhaust option or an exterior setup with good air exchange. Temperature and humidity influence drying times and flash-off behavior, so consider a climate-controlled space if possible. If you are painting in a garage, implement a temporary exhaust system and use drop cloths to protect surroundings. The goal is to keep airborne particulates down and to minimize odor exposure while still achieving a smooth, even film.
PaintQuickGuide emphasizes safety: never skip PPE, ensure proper filtration, and ventilate the space. If you’re working with a beginner-friendly basecoat system, still treat it with the same level of caution as pro-grade products. Safety gear is a crucial component of a successful finish and a safer workspace for you and your family.
Surface Prep for Auto Painting: The 80% Rule
The quality of your finish hinges on surface prep. Start with a thorough wash to remove wax, oil, and residue, followed by careful sanding to create a profile that the primer can grip. Use progressive grit sanding—from heavier to finer grains—to remove orange peel and create a uniform surface. After sanding, wipe with a clean tack cloth and degrease the panel. If there are dents or deep scratches, fill and block sand before proceeding. For DIY car painters, a clean, dry surface is essential to achieving uniform color and gloss across panels. Remember to mask edges and weather-stripping to prevent overspray on areas you don’t intend to paint.
This stage benefits from a test panel: spray a small area and inspect for adhesion, texture, and color consistency before committing to the entire vehicle. A consistent prep process translates into fewer reworks and a smoother finish.
Primers, Sealers, and Adhesion: Laying the Foundation
Primer and adhesion promoters are fundamental to long-lasting finishes. An epoxy primer provides strong adhesion and corrosion resistance, while sealer coats reduce pigment sinking and improve color uniformity. Choose a primer designed to bond with your substrate (metal, plastic, or composite) and ensure compatibility with the basecoat. The sealer helps create a uniform color base and reduces the risk of mottling on metallic or pearl finishes. You’ll typically apply primer in thin, even coats, allow proper flash-off between coats, and perform a light block-sand before basecoat. A well-prepped primer layer is the bridge between the bare substrate and the vibrant color you’ll apply later.
If you’re working with repaired panels or mismatched substrates, a compatible adhesion promoter can be critical to prevent peeling or delamination. Document the primer type on your project sheet so that you can replicate the steps for touch-ups.
Basecoat Selection and Color Matching: Getting the Right Look
Basecoat is where color, depth, and effect live. PPG offers a range of basecoat options that cater to solid colors, pearls, metallics, and special effects. Color matching is easier when you use the same system across all layers; this means selecting a basecoat that is compatible with your primer and clear coat. In practice, you’ll choose a color formula or a premixed base, then mix with the recommended reducer to achieve the correct viscosity for your spray gun. Color matching is especially critical for vehicles that require panel-to-panel uniformity. When you test color, consider lighting at the painting location and the expected finish in daylight to ensure consistent appearance across the body.
It’s wise to record the exact shade name, code, and mixing ratios in your project log. If you’re aiming for OEM-like color, request test panels or do small sample sprays on masking panels to compare under the same lighting as the vehicle.
Application Techniques: Spray Settings, Passes, and Dry Time
Spraying is both science and art. Maintain a consistent distance from the panel, use smooth, overlapping passes, and apply thin coats to minimize runs and solvent pooling. Start with light coats to establish a foundation, then apply additional coats to achieve the desired coverage. Between coats, observe flash-off times as indicated by the product datasheet. Temperature and humidity influence evaporative cooling and drying, so adapt your speed and spray pattern accordingly. If your gun offers variable fan and spray settings, use a slightly larger fan for larger panels and adjust the spray width to maintain even coverage. Practice on a test panel first to dial in your flow and atomization.
Include a dedicated spray booth or DIY ventilation route to prevent overspray drift. Use masking to protect trim, glass, and areas you don’t want painted. Following a disciplined spraying routine results in uniform color and improved gloss in the final finish.
Clear Coat and Finishing: Seal, Shine, and Protect
Clear coats protect the color layer and elevate gloss. Most DIY projects benefit from a multi-coat approach: an initial clear down to even surface, followed by additional coats to reach the desired depth and UV protection. Allow proper cure times between coats as specified by the product data sheet. After the final coat, you may perform a color-sanding and polishing pass to remove minor imperfections and boost clarity. Lightly wetsand with fine grit before polishing to minimize haze and orange peel.
If you’re aiming for a deep, glassy finish, consider a slow-curing clear with UV protection and a high solids content. Document the final clear system and any polishing steps so future touch-ups blend seamlessly with the original finish.
Curing, Temperature, and Recoat Windows: When to Call It Done
Curing times depend on ambient temperature and humidity. Ensure the coating has achieved its recommended tack-free state before moving on to the next step. Some climates may require longer cure times; do not rush the process, especially if you’re applying multiple coats. A proper cure improves chemical resistance and gloss, while premature handling can introduce marring or dust pickup. If you must work in a cooler or more humid space, adjust your drying expectations and consider environmental controls to keep the film in the right range for curing.
With patience and proper environment control, you’ll see a durable, high-gloss finish that holds up well under daily wear and weather exposure.
Cost Considerations and Budgeting: Planning Your Investment
DIY painting costs can range widely depending on the color, finish, and the size of the vehicle. An organized budget should include primers, basecoat, clear coat, reducers, reducers for clean-up, masking materials, sanding abrasives, and PPE. Buying a complete PPG kit for your project can simplify budgeting and ensure compatibility across layers. Remember to factor in consumables like masking papers, tack cloths, and disposal materials. While it’s tempting to cut corners, investing in quality PPE and proper ventilation reduces health risks and improves the final appearance. PaintQuickGuide’s recommendations emphasize choosing a complete, system-matched package to minimize rework and waste.
Planning ahead with a detailed cost estimate helps keep the project on track and reduces the risk of mid-project component shortages.
Common Mistakes and How to Avoid Them
Rushing between coats, skipping surface prep, or using incompatible products are the top culprits behind poor finishes. Avoid orange peel by maintaining consistent spray pressure, nozzle, and distance. Dust and debris on the panel during spraying lead to texture issues; work in a clean environment and use tack cloths between coats. Color drift happens when you mix brands or don’t follow the recommended reducer and activator for basecoats. Keep a project log with product names, batch numbers, and ratios to ensure you can reproduce the same finish later, and do test sprays on panels before finishing the actual body.
Key prevention is control: control environment, control your technique, and control your product choices by sticking to a single system wherever possible. Authentic color matching is easier when you follow the system’s guidelines rather than improvising.
Maintenance and Long-Term Care of a High-Gloss Finish
A cured finish requires regular care to retain its luster and protection. Use non-abrasive cleaners, and apply a quality wax or sealant on a schedule that suits your climate and driving conditions. Avoid harsh solvents on cured clear coats and consider a ceramic spray for enhanced water beading and UV resistance. Routine washing and careful polishing extend the life of the paint job, while staying within recommended maintenance products helps avoid chemical interactions that could dull the finish. Periodic inspections for micro-scratches or chipping can help you plan touch-up work before it becomes noticeable.
Tools & Materials
- Respirator mask rated for organic solvents(Half or full-face with P100 filters; use with appropriate cartridge for your paint system)
- HVLP spray gun(With adjustable pattern control; 1.4–1.7 mm nozzle recommended for basecoat and clear coat)
- Air compressor(Sufficient CFM and stable pressure for HVLP operation; avoid surge during spraying)
- Paint booth or well-ventilated space(Dust-free area; consider temporary exhaust system if indoors)
- PPG basecoat kit(Match basecoat to system and color formula; reducer ratio per datasheet)
- PPG clear coat(High-gloss, UV-resistant variant suitable for your finish)
- Epoxy or adhesion primer(Ensure compatibility with substrate and basecoat)
- Sealer/primer-surfacer(For uniform shade and improved topcoat adhesion)
- Sandpaper (grits 400–2000)(Block-sand routine for smoothness and texture control)
- Tack cloths(Lint-free; used between coats to remove dust)
- Masking tape and film(Prevent overspray on areas not being painted)
- Mixing cups and stir sticks(Set up for precise basecoat ratios)
- Paint thinner/reducer(Use PPG reducer compatible with system; for cleanup and thinning)
- Safety goggles(Eye protection from overspray and splashes)
- Heat gun or controlled drying setup(Optional for speeding cure in tight schedules)
- Drop cloths and surface protection(Protect surrounding areas from spills and dust)
Steps
Estimated time: 2-5 days total, depending on curing conditions and panel complexity.
- 1
Plan and prep
Assess the vehicle, finalize color and finish, and assemble all materials. Create a dedicated, dust-controlled workspace and map color order for each panel. This planning minimizes mid-project changes that can derail results.
Tip: Have basecoat color code and reducer ratio written down before you start. - 2
Protect the vehicle and workspace
Mask trim, glass, and edges, ensuring clean masking lines. Set up ventilation and lighting to avoid shadows and ensure safe spray conditions.
Tip: Use insurer-grade masking to prevent leakage into adjacent panels. - 3
Prepare the surface
Clean, de-wax, and sand the surface to create a proper profile. Wipe with tack cloths between steps and inspect for dust or oil that could affect adhesion.
Tip: Always do a final wipe with a degreaser just before primer. - 4
Apply primer/adhesion promoter
Apply epoxy primer and adhesion promoters in thin, even coats; cure as per datasheet. Lightly sand to remove imperfections and re-clean before basecoat.
Tip: Don’t rush primer; a solid base improves color uniformity. - 5
Block sand and re-clean
Use fine grit paper to create a uniform surface; remove sanding dust with tack cloths and solvent wipe.
Tip: Keep surface dry and dust-free between steps. - 6
Mix and prepare basecoat
Mix basecoat as per the formula and reducer guidelines. Check color match with a test panel under the same lighting used for the vehicle.
Tip: Record exact ratios and batch numbers for future touch-ups. - 7
Spray basecoat in light coats
Apply multiple thin coats, maintaining consistent distance and overlap. Let each coat flash off before applying the next.
Tip: Avoid heavy coats that cause runs or solvent pooling. - 8
Inspect and apply additional coats
Assess color depth and coverage; apply more coats as needed to reach even color across panels.
Tip: Use a test panel for color check before finishing the body. - 9
Apply clear coat
Spray clear coats in even passes, with proper flash times between coats. Build depth with additional coats if desired.
Tip: Keep the spray gun steady to avoid orange peel. - 10
Cure, sand, and polish
Allow the finish to cure as per product guidelines; wet-sand lightly with fine grit and polish to achieve a glassy look.
Tip: Use light pressure and clean cloths to avoid marring. - 11
Finalize masking and detailing
Remove masking carefully and re-tape any areas that need final touch-up. Inspect and address any blemishes.
Tip: Work in good lighting to catch imperfections early. - 12
Document and store materials
Record product names, batch numbers, and ratios for future use. Store leftover materials properly to maintain quality.
Tip: Label containers and seal them to prevent evaporation.
Your Questions Answered
What is PPG auto paint and why choose it?
PPG is a major automotive paint system brand offering primers, basecoats, and clear coats designed to work together for color accuracy and durability. Using a cohesive system can simplify color matching and improve long-term performance.
PPG provides a complete system for automotive finishes that helps colors stay true and resist wear over time.
Do I need a spray booth to use PPG auto paint?
A well-ventilated, dust-free area with proper filtration is essential. A dedicated space with exhaust and fresh air flow reduces overspray and health risks, even for DIY projects.
You don’t need a professional spray booth, but a clean, ventilated area is a must.
Can I complete basecoat and clear coat in one day?
Curing times depend on product and conditions. Basecoat must dry appropriately before clear coat is applied, and both layers need proper cure time for optimal hardness and gloss.
It depends on the product you’re using and the room conditions; plan for multiple steps and check the datasheets.
What are the common DIY mistakes in auto painting?
Mistakes include improper surface prep, color mismatches, overspray, runs, and rushing coats. Following a tested workflow and using a systems-mpecified approach reduces these issues.
Common DIY mistakes are surface prep and rushing coats; plan properly and test on panels first.
How long does an auto paint job take to cure?
Cure times vary with temperature and humidity. Expect several days to weeks before the finish reaches full hardness, especially for high-gloss clears.
Curing takes time and depends on temperature, humidity, and the product used.
What safety practices should I follow?
Always wear a respirator, protect your eyes, and ensure adequate ventilation. Store solvents safely and dispose of waste per local regulations.
Wear a proper respirator and work in a well-ventilated area to stay safe.
Watch Video
Quick Summary
- Plan color and system before starting
- Prep determines finish quality
- Use system-compatible materials for best results
- Prioritize ventilation and PPE for safety
- Allow proper cure and finishing steps for a durable gloss