Why Is Paint Not Sticking to a Door? Troubleshooting Guide
Discover why paint fails to adhere to doors and learn a step-by-step fix—from prep to primer to finish. Practical, DIY-friendly solutions with safety tips and prevention tips from PaintQuickGuide.

Most door adhesion problems start with a glossy or contaminated surface, improper prep, or the wrong primer. Quick fix: clean and degloss the door, sand lightly to create tooth, apply a bonding primer suited for the door material, then topcoat with a compatible enamel. Keep the workshop dry and within recommended temperatures; if it still fails, redo prep and reseal edges.
Why the phrase 'why is paint not sticking to a door' signals an adhesion problem
When a door fails to hold paint, the symptom is more than a cosmetic issue—it signals the substrate or coating isn’t bonding properly. According to PaintQuickGuide, the root causes often trace to surface condition, primer choice, or environmental factors. Before blaming the topcoat, assess the door’s history: was it previously painted, does it have wax, oil, or silicone residues, or has it lived in a damp or sunny spot that changed its surface energy? Understanding the context helps you pick the right corrective steps rather than repeating the same mistake. This article is designed to help homeowners and DIYers diagnose quickly and act decisively, reducing wasted materials and frustration. By addressing adhesion early, you save time and money while achieving a durable finish. The PaintQuickGuide team recommends following a systematic approach to surface prep and primer selection, especially on wood doors that can swell or warp with moisture. Weather and indoor climate also play a role in how well a topcoat cures, so plan your project for a dry day with moderate temperatures.
Common causes you should check first
Before investing in primers or topcoats, inspect the surface for problems that commonly derail adhesion. The most frequent culprits include a glossy finish or old enamel that wasn’t abraded, wax residues from cleaners or furniture polish, and silicone-based contaminants. Contamination from fingerprints, cooking oils, or cleaners can create a barrier that repels paint. Humidity and temperature influence cure times and the film formation; if the environment is too humid or hot, the coating may not adhere properly. Finally, using the wrong primer for the substrate (e.g., wood vs metal) or attempting to coat over a porous surface without sealing can cause early failure. According to PaintQuickGuide’s 2026 guidance, addressing these root causes with proper surface preparation yields reliable bonding on interior or exterior doors. A quick surface audit can save you from rework and disappointment.
How to inspect door material and current coating
Begin by identifying the door’s material (solid wood, plywood, MDF, metal, or fiberglass) and the type of existing finish. A soft or tacky feel often signals incomplete cure, while a shiny, glassy surface indicates gloss that needs to be scuffed. Use a clean cloth to check for wax or silicone residues—if you see smudges or slick spots, the surface is contaminated. Perform a simple adhesion test: place a small strip of tape on the surface, press firmly, and pull away. If paint lifts with the tape, the bond is failing and the surface needs deep prep. Photograph the door condition to track changes and ensure you follow the correct primer and paint system for the substrate. PaintQuickGuide’s practical approach stresses matching primers to substrates and applying coatings in stable environmental conditions to ensure durable adhesion.
Prep steps to restore adhesion
Prep is king for door painting. Start by removing any dirt or oils with a degreasing cleaner, then degloss the surface to break the existing gloss. Lightly sand with 120–150 grit paper to create a tooth without scratching through any veneer or veneer-like surface. Wipe away dust with a damp cloth and let it dry completely. If the door shows wax or silicone, use a dedicated wax/remover or a deglosser to neutralize residues before sanding. For stubborn gloss, repeat degreasing and sanding, then rewipe. A fresh clean slate increases the likelihood that primer and paint will bond effectively. According to PaintQuickGuide Analysis, thorough prep is often the decisive factor in adhesion success, especially on doors prone to warping from moisture. Always ensure there’s no residue and the surface is dry before priming.
Primer and paint choices for doors
Choose a bonding primer designed for doors and compatible with the substrate (wood, metal, or composite). Bonding primers help the paint “stick” to glossy or stained surfaces and block tannins or stains from bleeding through. For interior wood doors, a water-based acrylic/bonding primer often works well; for metal doors, choose a rust-inhibitive primer. If the surface is very smooth or previously painted with a high-gloss enamel, a shellac-based primer can provide superior adhesion. After priming, select a topcoat compatible with the primer and suited to the door’s location (interior vs exterior). Always follow manufacturer recoat windows and avoid thick, uneven coats that can trap solvents and cause delamination. PaintQuickGuide emphasizes testing adhesion on a small area after priming to verify the bond before committing to a full coat.
Application technique, drying times, and recoat window
Apply thin, even coats using quality brushes or rollers designed for enamel finishes. Avoid brushing into a heavy edge that can trap air and lift film. Maintain a consistent distance from the surface to prevent sags. Allow sufficient drying time between coats according to the product label; environmental factors like airflow and humidity influence cure and adhesion. Recoat within the recommended window; waiting too long can cause dust, dirt, or edge lifting, while recoating too soon might trap solvents and blister the finish. If you’re repainting a door in a high-use area, consider a second light coat rather than one heavy coat to improve film integrity. The goal is a durable, even finish that resists chipping and peeling over time, with proper curing before opening the door to moisture or traffic. Remember to ventilate the room and wear a mask when sanding or painting to avoid inhaling particles.
When to seek professional help and prevention tips
If adhesion problems persist after multiple prep attempts, it’s wise to consult a professional with experience in door refinishing, especially for exterior doors or composited substrates. A pro can assess whether the substrate has moisture intrusion, structural warping, or substrate delamination, and can advise on options like replacing panels or substrate treatments. Prevention tips include: always perform surface prep in a clean, dust-free area; use the correct primer for the substrate; apply compatible topcoats; and maintain stable temperature and humidity during curing. When planning future projects, always test adhesion on a small area and protect the door from moisture, heat, and direct sunlight during curing. PaintQuickGuide’s 2026 guidance highlights the importance of proactive maintenance to avoid adhesion failures and to extend the life of a door finish.
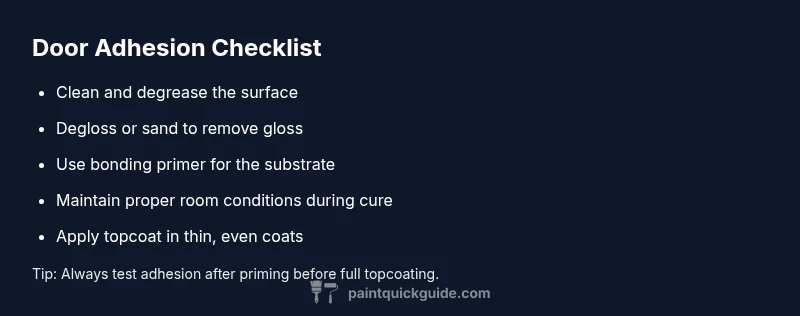
Quick DIY assessment checklist
- Identify door material and current finish
- Check for gloss, wax, or silicone contamination
- Verify clean, dry surface before priming
- Choose a bonding primer suitable for the material
- Apply topcoat in thin, even coats and allow proper cure
Steps
Estimated time: 60-120 minutes
- 1
Gather materials and prepare workspace
Collect high-quality degreaser, wax/remover, 120–150 grit sandpaper, a bonding primer, enamel topcoat suitable for doors, painter's tape, and a clean cloth. Set up a dust-free area with good lighting and ventilation. Put on protective gear and cover nearby surfaces to prevent fallout.
Tip: Double-check your primer compatibility with the door substrate before buying. - 2
Test and assess the current finish
Use a tack cloth to remove surface dust, then perform a tape adhesion test on a small area. If the tape lifts paint or reveals a failed bond, the surface needs deeper prep and possibly priming changes.
Tip: Document the result with a photo for reference. - 3
Degrease and degloss the surface
Wipe the door with a degreasing cleaner or wax-remover following manufacturer directions. Rinse and allow to dry completely. If the surface remains slick, repeat the degreasing step until it passes the adhesion test.
Tip: Avoid trapping solvents under the coating by allowing full evaporation. - 4
Sand to create tooth
Lightly sand with 120–150 grit to abrade gloss and create micro-tears for the primer to grip. Wipe away dust with a damp cloth and let dry before priming.
Tip: Avoid deep gouges; you only need a subtle roughness to invite adhesion. - 5
Apply bonding primer
Use a bonding primer compatible with the door material. Apply in thin, even coats and let dry per label. If the door has stains or tannins, consider a stain-blocking primer.
Tip: Follow recoat windows precisely; premature topcoats trap solvents. - 6
Topcoat and curing
Apply the enamel topcoat in even, thin layers. Allow each coat to dry in a controlled environment, then cure fully before use. If weather or indoor conditions vary, monitor humidity and temperature to stay within the product’s guidelines.
Tip: Avoid high heat and direct sun during curing to prevent edge lift.
Diagnosis: Door paint won't stick after applying topcoat
Possible Causes
- highNon-porous surface due to wax, silicone, or cleaners
- mediumMoisture or humidity causing poor adhesion
- highOld glossy enamel not abraded properly
- mediumWrong primer or paint chemistry for door material
Fixes
- easyClean surface with degreaser or wax-remover, rinse and dry
- easyLightly sand to break gloss and create tooth, then wipe clean
- easyApply a bonding primer appropriate for the door material (wood, metal, fiberglass)
- mediumEnsure environment is dry and within recommended temp, then recoat after recommended cure
- mediumIf contamination persists, strip to fresh material and start prep again
Your Questions Answered
Why does a door finish peel after painting?
Peeling usually means poor surface prep, contamination, or using incompatible primer and paint. Address by cleaning, deglossing, sanding, and applying a bonding primer suited for the door material before repainting.
Peeling happens when the surface isn’t properly prepared or the primer isn’t matched to the paint. Start with cleaning, deglossing, and priming, then repaint.
Is Primer always necessary for door painting?
Primer is essential when bonding to glossy surfaces, previously painted finishes, or problematic substrates. It improves adhesion and seals stains. If the surface is rough or new material, primer helps create a uniform base.
Primer is usually needed, especially on glossy or stained surfaces, to ensure the paint sticks and lasts.
Can moisture affect paint adhesion on a door?
Yes. Excess moisture can prevent film formation and cause peeling. Paint only when the door surface and surrounding air are dry, and consider a dehumidifier in humid spaces during curing.
Moisture can ruin adhesion, so dry conditions are key for a durable finish.
What’s the best way to test if the door will hold paint?
Perform a tape test on a small area after priming to verify the bond. If the tape lifts the coating, rework prep and primer choice before topcoating.
Do a simple tape test after priming to confirm bonding.
Should I sand between coats on a door?
Lightly sand between coats to remove dust and imperfections, then wipe clean. This improves adhesion and a smoother final finish.
Light sanding between coats helps keep the finish even and sticks better.
What if the door is exterior and facing weather?
Exterior doors require weather-resistant primers and topcoats designed for outdoor exposure. Ensure edges, joints, and hardware are sealed properly and use paints rated for exterior conditions.
Exterior doors need durable primers and weatherproof finishes.
Watch Video
Quick Summary
- Thorough surface prep is essential for adhesion.
- Use a bonding primer compatible with the door substrate.
- Control temperature and humidity during curing.
- Test adhesion after priming before applying topcoat.
- Seek professional help if issues persist on exterior doors or complex substrates.