Paint Without Tape: Achieve Clean Edges Easily at Home
Learn practical, edge-control techniques to paint without tape. This guide covers surface prep, tool choices, step-by-step methods, and common pitfalls for crisp lines on walls, trim, and cabinets.

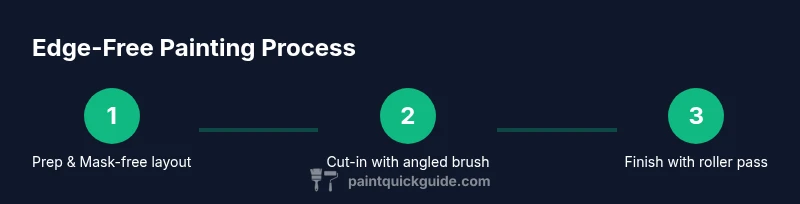
You will learn to paint without tape by sharpening edge-control techniques, prepping surfaces, and applying light coats with steady, deliberate strokes. This approach minimizes bleed, reduces prep time, and yields crisp lines on walls, trim, and cabinetry. The guide covers tool choices, practical workflows, and common mistakes to avoid for a professional-looking finish. It's suitable for DIYers and homeowners aiming for fast, neat results.
Why painting without tape matters
Painting without tape is a time-saving, mess-reducing approach that delivers clean edges and professional-looking results when you master proper surface prep, edge control, and methodical application. The goal of paint without tape is to create crisp lines without relying on adhesive barriers, which means you must anticipate paint flow, keep a steady hand, and choose the right tools for each surface. For homeowners, this technique can shorten project timelines and reduce material waste because you’re relying on precise technique rather than excessive masking. In practice, painting without tape often suits interior walls, ceilings near corners, and simple trim where straight edges are feasible with careful cutting-in and rolling. The term also resonates with auto refinishing hobbyists who want efficient results in smaller projects, like cabinet edges or door frames, where tape can be cumbersome.
According to PaintQuickGuide, the core to success lies in prep, control, and layering with light coats. The technique emphasizes deliberate brushwork, consistent paint loading, and a plan for drying times between passes. It’s not a free-form task; it requires a practiced rhythm so that edges stay sharp as you build color. By applying these principles, you can achieve a near-professional finish without the extra step of taping. This primer sets the stage for the rest of the guide and helps you understand why many DIYers switch to tape-free methods for quick projects or refreshes.
boldNote: For deeper guidance, follow the step-by-step sections and refer to the authoritative sources listed later in the article.
Tools & Materials
- angled sash brush(2-inch or 2.5-inch for crisp edges along curves and corners)
- detail brush(1-2 inches for tight corners and trim cuts)
- foam roller (4–6 inches)(Smooth large wall areas; use short, even strokes)
- drop cloths or poly sheeting(Protect floors and furniture from splatter)
- extension pole(Reach ceilings and high walls without ladders)
- microfibre cloths(Dust removal and quick wipe-downs between coats)
- paint tray and liners(Load rollers evenly; avoid heavy pools of paint)
- sandpaper (120-220 grit)(Lightly scuff glossy surfaces to improve adhesion; optional primer as needed)
- edge guard or masking film (optional)(Assist in particularly tricky corners without masking tape)
Steps
Estimated time: 2-4 hours
- 1
Prepare space
Clear the room, move furniture to the center, and lay drop cloths to protect floors. Remove outlet covers and fixtures if possible. This step creates a clean canvas and reduces the risk of accidental paint transfer to adjacent surfaces. Keep doors open to improve ventilation and reduce fumes.
Tip: Work in a pourable, logical path—start near a natural exit so you don’t block your own exit while painting. - 2
Clean and scuff surfaces
Wipe walls with a damp microfibre cloth to remove dust and grease. For glossy finishes, lightly sand the area to create a rough surface for paint to grip. Wipe away dust with a dry cloth before painting. Proper surface prep is key to achieving a long-lasting, tape-free finish.
Tip: Use a clean cloth for each wall section to prevent carrying dirt from one area to another. - 3
Load tools correctly
Dip the angled sash brush into paint and wipe off excess on the edge of the tray to prevent drips. Load the foam roller with a light coat of paint, rolling along the tray’s slope to distribute evenly. Keep a damp rag handy to catch any stray drips quickly.
Tip: Less paint on the brush or roller means less chance of bleed at edges. - 4
Cut-in along edges without tape
Begin with deliberate, feathered strokes along ceilings, baseboards, and trim using the angled brush. Keep the wet edge moving to avoid lap marks. Use the brush to guide paint into corners, then pull the roller away from the edge to blend in the field color.
Tip: Maintain a consistent speed to prevent brush marks from drying unevenly. - 5
Roll large areas smoothly
Load the roller with a light coat; roll in a W or M pattern, then fill in without reloading until necessary. Work in small sections to avoid dry edges, and blend the edges while the paint is still wet. This step minimizes roller marks and ensures even coverage.
Tip: Keep a wet edge by applying paint before the previous section dries. - 6
Apply second coat with precision
Let the first coat dry fully. Lightly sand if needed, wipe away dust, then apply a thin second coat using the same edge control and rolling technique. Thin coats dry faster and reduce pooling in corners.
Tip: Always test a small area first to gauge drying time and coverage. - 7
Address touch-ups and cleanup
Inspect for missed spots or drips and touch up with a small brush. Clean brushes and rollers promptly with water or appropriate solvent, then air-dry. Fold or roll up drop cloths, ensuring no paint transfer to other surfaces as you complete the job.
Tip: Take photos of finished edges to compare during touch-ups later. - 8
Final check and cure
Once all coats are dry, inspect under different lighting to catch any overlooked spots. Allow surfaces to cure fully before moving furniture back. Label cans for future touch-ups and document the color mix for consistency in future projects.
Tip: Patience between coats yields crisper lines and longer-lasting results.
Your Questions Answered
Can you really paint without tape for clean edges?
Yes, with prep, edge control, and thin coats. Practice on a scrap board to dial in your technique.
Yes—practice on scrap and follow edge-control steps for clean edges.
Which brush is best for cutting in without tape?
An angled sash brush 2 inches or 2.5 inches gives the most precise control along edges and corners.
Use an angled sash brush for crisp cut-ins.
How do you handle corners and baseboards without tape?
Use an edge guard or edge-to-edge feather strokes with a steady hand to blend without bleeding onto adjacent surfaces.
Edge guards or careful feather strokes help here.
Can I paint cabinets without tape?
Yes, by using a primer, high-adhesion paint, and careful cutting-in around panels. Masking with film can reduce risk of accidental paint transfer.
Yes, with proper prep and a protective film mask.
How long does it take to complete a room without tape?
Time varies with room size, color changes, and drying times. Plan for several hours plus curing for the final finish.
It depends, but expect several hours plus drying time between coats.
What should I do if I see bleed after drying?
Lightly sand any bleed, touch up with a small brush, and re-coat as needed. Ensure you allow full cure between steps.
Sand and touch up after drying, then re-coat if needed.
Watch Video
Quick Summary
- Prep surfaces and protect surroundings.
- Use angled tools for sharp edges.
- Apply light, even coats for minimal bleed.
- Dry between coats for crisp results.
- Inspect under lighting for perfect touch-ups.