How to Prevent a Paint Chip from Rusting
Learn proven steps to stop rust from spreading under paint chips on metal surfaces. This PaintQuickGuide tutorial covers prep, primers, coatings, and maintenance for a durable finish.

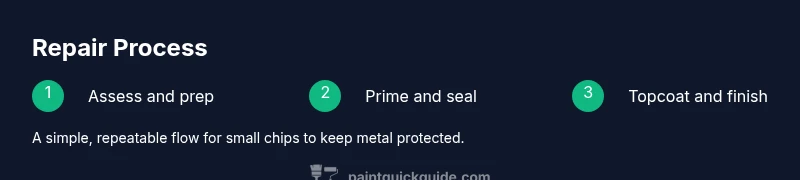
To prevent a paint chip from rusting, seal exposed metal, treat the edges, and apply a rust-inhibiting primer plus a durable topcoat. This step-by-step guide covers prep, proper coatings, and maintenance so you can extend the life of metal surfaces after chips occur. Follow the techniques here for cars, tools, and household metalwork to minimize rust risks and save time on repairs.
Why paint chips rust
Paint chips expose raw metal, creating a direct path for moisture to contact the surface. Once moisture and oxygen meet exposed metal, oxidation begins and rust forms under the chipped area. The best way to prevent rust from spreading starts with interrupting the moisture source and reestablishing a protective barrier. According to PaintQuickGuide, the core strategy for how to prevent a paint chip from rusting is prompt repair combined with a durable, bonded coating system that covers the damage and seals the edges against water intrusion. A chip left exposed can expand, causing blistering, peeling, and accelerated corrosion that compromises structural integrity over time. Even small chips can act like tiny leak points during rain or car washing, so it’s important to fix them before the rust sneaks under the intact paint.
In practice, you’ll want to clean the area, remove loose material, and apply a rust-inhibiting primer and topcoat that are compatible with your existing paint. The goal is to create a continuous film across the protected area—one that blocks moisture, blocks oxygen, and resists abrasion. With the right products and technique, you can keep metal surfaces looking good and minimize costly repairs down the line. Think of rust prevention as a maintenance task rather than a one-off fix, and you’ll stay ahead of corrosion.
In this section, we set the foundation for understanding why chips rust and how prompt, well-chosen products form a lasting barrier.
Assessing the damage and prep work
Before you fix a chip, inspect the area: is there active rust, flaky paint, or pitting? Use a bright flashlight and a thin blade to gently lift loose paint; remove any loose material with a wire brush. Clean the site with a degreaser to remove oils, waxes, and contaminants that can interfere with adhesion. Rinse with water and dry thoroughly. Proper prep makes primers bite and finish coats last longer, so take your time. If you see areas where the metal is purring with rust, you may need to remove more material to reach clean metal. For best results, you’ll want a sharp edge around the chip so the primer can seal both the top and the sides. PaintQuickGuide notes that skipping rust removal now almost always leads to rework later, so invest the effort on the front end.
Tools & Materials
- Rubbing alcohol or degreaser(Used to clean oils and contaminants before painting.)
- Plastic scraper(Avoids scratching the metal while removing loose paint.)
- Wire brush(Discourages rust particles and helps initial rust removal.)
- Sandpaper (320–400 grit)(Creates a keyed surface for primer adhesion.)
- Rust converter (if active rust is present)(Chemically converts rust to a stable, paint-friendly layer.)
- Epoxy rust-inhibiting primer(Forms a tough barrier against moisture.)
- Metal topcoat (durable, exterior-ready)(Protects against abrasion and moisture.)
- Masking tape and drop cloths(Prevents overspray and protects surrounding areas.)
- Nitrile gloves and protective mask(Safety first when handling chemicals.)
- Clean rags(Wipe off residue and dry surfaces.)
Steps
Estimated time: 3-5 hours
- 1
Assess and prep the area
Inspect for active rust, loose paint, or pitting. Remove loose material with a plastic scraper and brush. Clean with degreaser, rinse, and dry thoroughly to ensure good primer adhesion.
Tip: Take your time to ensure all contaminants are removed; adhesion is the key to long-term rust protection. - 2
Remove loose paint and oxidized spots
Gently sand the chip edges with 320–400 grit to create a smooth, keyed surface. Wipe away dust with a clean tack cloth before priming.
Tip: Avoid oversanding; aim for a uniform edge that blends with the surrounding finish. - 3
Treat active rust if present
Apply a rust converter according to the product instructions to stabilize the area. Let it cure before moving to priming.
Tip: Follow the manufacturer’s cure time; prematurely applying primer can trap moisture. - 4
Apply rust-inhibiting primer
Brush or spray a thin, even coat over the chip and a small halo around it. Allow full dry time per the label.
Tip: A light mist coat reduces the risk of drips and improves edge sealing. - 5
Sand and clean between coats
Lightly sand the dried primer with 400–600 grit, then wipe with a clean cloth to remove dust.
Tip: Keep the surface dust-free for best topcoat adhesion. - 6
Apply topcoat layers
Apply two thin coats of a durable topcoat, allowing full cure between applications. Ensure the edges are sealed and the finish matches the surrounding area.
Tip: Thin coats prevent runs and improve color consistency. - 7
Final inspection and cleanup
Check for uniform coverage, edge sealing, and any imperfections. Clean tools and store properly.
Tip: Document the repair area for future maintenance checks.
Your Questions Answered
What causes rust under paint chips, and how fast does it happen?
Rust begins when moisture reaches exposed metal. The time to onset varies with humidity, temperature, and exposure; addressing chips promptly with proper primers and coatings slows or stops progression.
Rust starts as soon as moisture contacts bare metal; fixing chips quickly with rust-inhibiting primers helps prevent further damage.
Can I use any primer on rust spots, or do I need a rust-specific product?
Use a rust-inhibiting primer designed for metal surfaces. If active rust is present, a rust converter may be used first, followed by primer to ensure a solid seal.
Prefer rust-specific primers for metal; if rust is active, consider a converter first and then prime.
Is it okay to repaint over existing chrome or bare metal without primer?
No. Bare metal or chrome needs proper adhesion and corrosion protection. Start with proper cleaning, rust treatment if needed, and a rust-inhibiting primer before topcoats.
Always prime before painting on bare metal or chrome to prevent rust beneath the finish.
How long should the topcoat cure before exposure to rain or washing?
Follow the topcoat manufacturer’s cure time. In general, wait until the coating is fully dry and cured before exposure to moisture.
Let the finish cure as directed; don’t rush the weatherproofing step.
When should I seek professional help for rust repair on large areas?
If corrosion covers a large area, or if structural integrity is affected, professional evaluation is recommended to ensure safe and durable restoration.
For extensive rust or structural concerns, a pro can deliver a longer-lasting fix.
Watch Video
Quick Summary
- Seal exposed metal to stop moisture ingress
- Prime with rust-inhibiting products for durable protection
- Use thin coats and proper drying times for best results
- Repair chips early to prevent costly rust damage
- Maintain periodic inspections for long-term protection