How to Paint on Metal: A Practical DIY Guide
Learn step-by-step how to paint metal surfaces—prep, primers, paints, sealing, and tips for durable, smooth finishes on home and auto projects.

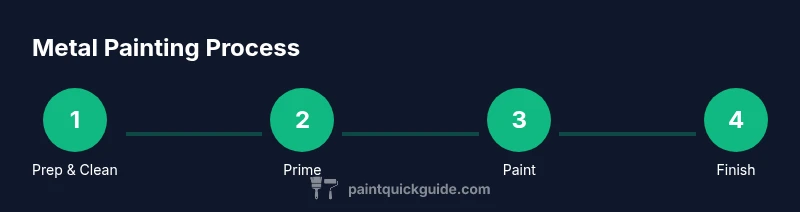
Painting metal successfully comes down to four pillars: thorough surface prep, choosing a compatible primer, using metal-friendly paints, and applying thin, even coats with proper drying times. Work in a well-ventilated space, wear protective gear, and follow manufacturer guidance for cure times. With patience and the right products, you’ll achieve a durable, smooth finish on metal surfaces.
Metal vs. other surfaces: what changes in practice
Painting on metal introduces unique challenges compared to wood or plastic. Metals often require rust prevention, proper adhesion, and compatible coatings to resist chipping, moisture, and temperature changes. The PaintQuickGuide team notes that surface prep and primer choice are critical for long-lasting results on steel, aluminum, or treated metals. In this guide, you’ll learn about prep, primer selection, paint types, application techniques, and finishing steps specifically tuned for metal substrates. The goal is a durable, smooth finish that adheres well to varied metal geometries—from railings and furniture to automotive parts. By following the steps outlined here, homeowners, DIY enthusiasts, and auto refinishing hobbyists can achieve professional-looking results with common tools and materials. The key is to respect the metal’s condition, select the right primer, apply thin coats, and allow adequate curing time before handling or exposure.
Prep work: cleaning, rust control, and surface sanding
Metal prep is the foundation of a durable finish. Start by removing all dirt, grease, wax, and old coatings with a degreaser. For rusty areas, use a rust converter or naval jelly as appropriate, following safety instructions. Use a wire brush or sanding block to remove loose rust and scale, then wipe with a tack cloth to pick up dust. If you’re working on aluminum or clean steel, scuff lightly with 320-400 grit sandpaper to create a micro-rough surface for primer. Protect adjacent areas with painter’s tape and drop cloths. Let the metal dry completely before moving to primer. The goal is a clean, matte surface with uniform porosity to maximize primer bite and paint adhesion. This prep step reduces future peeling and ensures color uniformity across complex shapes.
Selecting primers for metal surfaces
Primer choice for metal depends on the metal type and the environment of use. For ferrous metals (like steel) that are prone to rust, use a rust-inhibiting, zinc-rich, or etching primer to improve adhesion and corrosion resistance. Aluminum and other non-ferrous metals benefit from a dedicated bonding primer that creates a stable surface for color coats. Always follow the manufacturer’s data sheet for recoat times and thinning requirements. Apply primer to bare metal or over properly prepared surfaces in thin, even coats, allowing each coat to dry fully before the next. A good primer reduces peeling and provides a uniform base color, which helps your final finish look even across curved or intricate shapes.
Paint choices for metal: enamel, epoxy, and acrylic options
Metal paints come in several chemistries, each with pros and cons. Enamel-based enamels offer hard, durable finishes with good chemical resistance. Epoxy paints provide exceptional adhesion and corrosion resistance, ideal for outdoor or high-abrasion areas; they often require precise mixing and longer cure times. Acrylic (latex) enamels are user-friendly, low-odor, and easy to clean, but may require more coats for full durability. When selecting, consider substrate, environment, gloss level, and compatibility with primer. For automotive projects, consider two-part epoxy or urethane topcoats for the best longevity. Always test a small area first to confirm color match and compatibility with your primer.
Applying primer and paint: technique and coat order
Apply primer first in thin, even coats, using long, smooth strokes or a spray pattern that minimises runs. Allow the primer to cure per the product directions before applying color. When painting, use multiple ultra-thin coats rather than one thick coat—this reduces drips and improves adhesion. If you’re spraying, keep the nozzle a consistent distance from the surface and apply in a cross-hatch pattern for even coverage. Between coats, lightly sand with 400-600 grit sandpaper to maintain a key for the next layer. Always follow the manufacturer-recommended drying times and avoid applying coatings in extreme temperatures or high humidity.
Finishing and curing: sealing and durability
Finish with a compatible clear topcoat or sealer to protect the color and improve chemical resistance. For outdoor metal, a UV-resistant topcoat prolongs color life. Allow each coat to fully cure before using the item; curing times vary by product—some finishes cure to touch in 4-6 hours and fully cure in 24-72 hours. Inspect the surface for uniform gloss and absence of fish-eyes or pinholes, which indicate contamination or improper surface prep. If issues appear, lightly sand and recoat as needed. Proper curing is crucial for achieving maximum durability and resistance to chipping.
Troubleshooting common issues: bubbling, peeling, rust bleed
Bubbling usually indicates moisture trapped under the coating or improper surface prep. Peel lines can point to incompatible primers or moisture intrusion. Rust bleed shows through when rust migrates under the paint; addressing this requires sanding, rust treatment, and a fresh primer. If you see poor adhesion, ensure the surface is clean, dry, and free of oil; reprime and recoat with proper solvent compatibility. In all cases, follow the exact recoat windows and curing times from the product data sheets to avoid repeating the problem.
Maintenance and long-term care of painted metal
To extend the life of painted metal, perform regular maintenance: wipe down surfaces to remove dirt and salt, touch up chips promptly, and avoid scratching through the finish. For outdoor metal, recoat with a protective topcoat every few years or when you notice dulling or weathering. When cleaning, use mild detergents and soft cloths to avoid scratching. If rust begins to appear, treat quickly with rust converter and recoat. With consistent maintenance, painted metal can retain color and protection for many years.
Tools & Materials
- Degreaser or mineral spirits(Clean the metal surface to remove oil, wax, and grease before prep.)
- Rust remover or rust converter(Use on spots of rust as needed; follow product directions.)
- Wire brush or steel wool(Remove loose rust and scale; prepare for sanding.)
- 320-400 grit sandpaper or sanding block(Create micro-roughness for primer adhesion.)
- Tack cloth(Wipe away fine dust after sanding.)
- Painter’s tape and drop cloths(Mask surrounding areas to protect surfaces.)
- Metal primer (rust-inhibiting or etching primer)(Choose one based on metal type; ensure compatibility with topcoat.)
- Metal paint (enamel, epoxy, or acrylic)(Select according to environment and desired durability.)
- Clear topcoat/sealant for metal(Provides extra protection against moisture and chemicals.)
- Paint sprayer or brushes/rollers(Choose based on surface size and finish desired.)
- Respirator or mask(Protects from fumes and solvents.)
- Safety glasses and gloves(Personal protection during prep and painting.)
- Soap and water or appropriate solvent for cleanup(Clean tools and spills promptly.)
Steps
Estimated time: 2-3 hours active; 24 hours plus for cure
- 1
Set up workspace and safety gear
Choose a well-ventilated area, ideally outdoors or in a garage with the door open. Lay down drop cloths, protect adjacent objects with tape, and put on a respirator, eye protection, and gloves. Establish a clean workflow to prevent recontamination of prep surfaces.
Tip: Keep a dedicated waste container for solvents and used rags to prevent fire hazards. - 2
Clean and degrease the metal
Wipe the surface with degreaser, then rinse and dry thoroughly. Remove any old coatings if present, so the new finish adheres properly. Ensure the surface is completely dry before proceeding.
Tip: Work in sections to maintain a steady workflow and avoid drying residue. - 3
Remove rust and roughen the surface
Use a wire brush to remove loose rust, then lightly sand the area to remove scale. Wipe with a tack cloth to remove dust. A clean, roughened surface improves primer bite.
Tip: Never skip rust-prone areas; a small rust spot can undermine the whole finish. - 4
Mask edges and protect surrounding surfaces
Apply painter’s tape to edges, joints, and surrounding items to prevent overspray and staining. Secure drop cloths to catch drips and debris.
Tip: Check that masking is tight and free of air gaps before painting. - 5
Apply primer in thin coats
Shake or stir primer well. Apply in 1–2 thin coats, allowing the recommended dry time between coats. The primer should disappear into the metal surface, leaving a uniform, slightly tacky surface.
Tip: Avoid heavy coats that can trap solvents and cause bubbling. - 6
Apply paint in thin coats
Choose your application method (brush, roller, or spray) and apply multiple light coats. Maintain a consistent distance if spraying and cross-hatch for even coverage. Let each coat dry fully before the next.
Tip: Do not rush; thin coats reduce runs and improve durability. - 7
Finish with a protective topcoat and cure
Seal the project with a compatible clear topcoat. Allow full cure time as specified by the product data sheet before handling or exposure.
Tip: Cure time is critical for durability—avoid heavy use during this period.
Your Questions Answered
Do I need a primer for metal surfaces?
Yes. A rust-inhibiting or bonding primer tailored for metal provides adhesion and corrosion resistance, forming the best base for color coats.
Yes. Use a metal-specific primer to ensure the paint sticks and lasts.
Can I paint old metal with basic craft paints?
Partial success is possible with the right primer. For best durability, choose enamel, epoxy, or acrylic metal paints designed for metal substrates.
You can, but prime properly first for good adhesion.
What is the best topcoat for outdoor metal surfaces?
Choose a clear topcoat that’s UV-resistant and compatible with your base paint to protect from weather and moisture.
Outdoor metal benefits from a durable, UV-resistant clear topcoat.
How long does metal paint take to cure?
Cure times vary by product; plan for a full cure window of 24-72 hours after the final coat before heavy use.
Most metal finishes cure within a day or two, depending on the product.
Is it safe to spray paint metal indoors?
Yes, with proper ventilation, a respirator, and a well-sealed space; avoid fumes in enclosed areas.
Spray indoors only if you have good ventilation and protective gear.
Watch Video
Quick Summary
- Prepare metal thoroughly for best adhesion
- Use the right primer for the metal type
- Apply thin coats for even color and durability
- Follow proper drying/curing times between coats
- Finish with a UV- or moisture-protective topcoat