How to Paint Tiles: A Step-by-Step DIY Guide
Learn a complete, step-by-step process for painting ceramic or porcelain tiles, including prep, priming, painting, sealing, and maintenance to achieve durable, showroom-like results in kitchens, bathrooms, and more.

Transform dated tile with a durable, tile-specific paint system. This guide covers prep, primer, paint, and sealant to deliver a long-lasting finish in kitchens, bathrooms, or laundry areas. Start with a bonding primer, apply two coats of tile paint, and finish with a clear topcoat for moisture resistance.
Why tile painting matters
Tile surfaces can look dated and dingy, but a thoughtful tile painting project can dramatically refresh kitchens, bathrooms, and laundry areas without the mess or cost of re-tiling. According to PaintQuickGuide, learning how to paint tiles offers a practical upgrade for many homes. The core idea is simple: you must prep, choose durable, tile-approved products, and seal the surface after curing. When done correctly, tile painting creates a durable, washable finish that resists moisture and daily wear. This middle section dives into the why, what, and how, with real-world examples for homeowners and DIY enthusiasts.
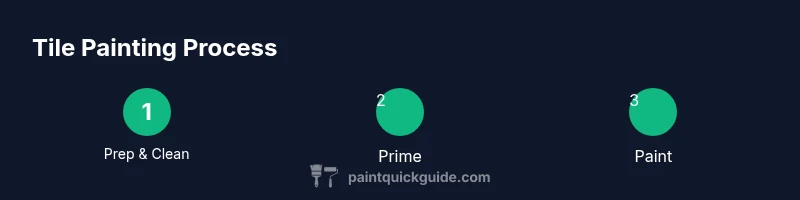
Assessing tile surfaces and layout
Before you buy products or mix paint, inspect the tile surface for glaze, cracks, or loose tiles. Ceramic and porcelain tiles respond differently to paint, and a glossy glaze demands more surface prep. Test adhesion with a simple tape pull, plan your layout to minimize cuts and waste, and mark edges with painter’s tape to visualize the final look. If grout lines are cracked or discolored, address those issues first to avoid showing cracks through the finish. Proper planning saves time and prevents rework later.
Selecting paints and primers
Choose tile-friendly paints designed for high-adhesion on glossy surfaces. Epoxy-based paints or high-quality acrylics paired with a bonding primer provide the strongest durability in wet areas. Avoid regular wall paint, which can peel in bathrooms and kitchens. Read product labels to confirm compatibility with ceramic/porcelain tile and grout. A primer improves adhesion, fills minor imperfections, and creates a uniform base for color.
Cleaning and repairing tile surfaces
Begin with a thorough cleaning to remove soap scum, grease, and mineral deposits. Use a degreaser or non-abrasive cleaner, rinse well, and let dry completely before painting. If you see cracked grout or chipped tile, patch or replace small sections before painting; paint will not look even over damaged substrates. Repairing these areas now reduces edge lift and helps the color appear evenly.
Priming tiles for paint
Apply bonding primer in thin, even coats, following the manufacturer’s drying times. A single coat can suffice on clean, smooth tiles, but you may need two light coats on glossy surfaces. Ensure the primer is dry and tack-free before painting. Priming reduces the chance of peeling and provides a stable base for color.
Painting techniques for tiles
Stir the paint well and use a high-quality brush or foam roller for an even finish. Apply in light, even coats; avoid flooding panels to minimize drips. Work in sections, overlapping wet edges to prevent lap marks. For textured or patterned tiles, consider crosshatch or back-rolling to achieve uniform coverage.
Sealant, topcoat, and curing times
Finish with a clear, moisture-resistant topcoat suitable for tile and wet areas. A water-based polyurethane or polycrylic topcoat is common for interior tiling, while epoxy topcoats provide added durability. Allow full cure per product guidance; avoid moisture or heavy use until fully cured. The topcoat locks in color and improves washability.
Safety and ventilation tips
Paints for tiles can emit fumes, especially in enclosed spaces. Ventilate the area well by opening doors and using fans, and wear a mask rated for fine dust and solvents. Keep children and pets away during prep, painting, and curing. If you have chemical sensitivities, choose low-VOC products and work in a well-ventilated space.
Maintenance and care after painting
Wait for complete cure before cleaning with water or cleaners, and use non-abrasive tools to avoid scratching the finish. Place mats or felt pads under decorative items and avoid heavy impact on the surface. Periodically inspect grout lines for signs of wear and re-seal as needed to maintain moisture protection.
Troubleshooting and common issues
If edges lift or the finish looks patchy, verify that the tiles and grout were dry and free of dust before painting; you may need to sand lightly and apply a fresh coat. Peeling often indicates moisture intrusion or insufficient curing; address root cause and recoat. For stubborn stains, re-clean and touch up with a small brush.
Tools & Materials
- Tile cleaner or degreaser(Non-abrasive; clean thoroughly before painting)
- Bonding primer for tiles(Choose a product designed for glossy tile surfaces)
- Tile paint (epoxy-based or high-quality acrylic)(Ensure compatibility with tile and grout)
- Clear topcoat (water-based polyurethane or polycrylic)(Moisture-resistant finish for wet areas)
- Paint tray and foam roller (4-inch)(For even coats on flat surfaces)
- Angled sash brush for edges(Edges and corners require precision)
- Painter’s tape and drop cloths(Protect surrounding areas from splashes)
- Fine-grit sandpaper (220) and sanding block(Lightly scuff glossy surfaces for primer adhesion)
- Mask or respirator and safety goggles(Protect from fumes and dust)
- Degreaser or mild detergent(Prep and degrease tile surfaces)
- Grout sealer (optional)(Seal grout after painting for extra moisture protection)
- Sponges and clean rags(Rinse between coats and wipe surfaces)
Steps
Estimated time: 8-12 hours active work, plus 24-48 hours cure
- 1
Prep the area
Clear the space, remove fixtures if possible, and protect surrounding surfaces with drop cloths. Ventilate the area to reduce fumes. This step minimizes splashes and keeps your work area organized.
Tip: Lay down plastic sheeting to catch drips and maintain clean edges. - 2
Clean and degrease tiles
Wash tiles with a degreaser or mild detergent to remove soap residue and oils. Rinse thoroughly and allow to dry completely before painting.
Tip: Dry tiles with a lint-free cloth to ensure no moisture remains. - 3
Lightly sand glossy surfaces
Sand glossy tiles with fine 220-grit paper to create a key for the primer. Wipe away dust with a tack cloth.
Tip: Avoid over-sanding; aim for a light scuff only. - 4
Apply bonding primer
Apply thin, even coats of bonding primer and let dry as directed by the manufacturer. Two light coats can improve adhesion on very glossy tiles.
Tip: Use a small brush for edges and a short-nap roller for flat surfaces. - 5
Paint first coat
Stir paint and apply a thin, even first coat. Work in small sections, maintaining a wet edge to minimize lap marks.
Tip: Avoid heavy coats that cause drips or sags. - 6
Apply second coat and seal
Apply a second coat for solid coverage. After the paint cures, apply the chosen topcoat according to the label.
Tip: Check for uniform coverage before sealing.
Your Questions Answered
How long will painted tiles last with proper care?
With proper surface prep, a bonding primer, and a quality topcoat, painted tiles can endure years of daily use. Longevity depends on moisture exposure and maintenance.
If you prep correctly and seal, painted tiles can last for years under normal use.
Do I need to remove the grout before painting tiles?
You don't usually need to remove grout; just clean and prime well. If grout is severely cracked or moldy, repair or replace before painting for best results.
Usually you don’t have to remove grout, but fix any damaged grout first.
Can I paint grout as part of tile painting?
Grout can be painted, but it’s often best to use epoxy grout or re-seal after painting to maintain durability. Realistic results require careful masking and multiple coats.
Yes, grout can be painted, but use the right products and seal for durability.
Is tile painting safe for bathrooms and kitchens?
Yes, provided you choose moisture-resistant products and ensure proper ventilation. Use low-VOC paints when possible and seal to prevent moisture damage.
Absolutely, just pick moisture-resistant products and ventilate well.
What topcoat is best over painted tiles?
A water-based polyurethane or polycrylic topcoat is common for interior tiled surfaces, offering a balance of durability and dry time. For high-wear areas, epoxy topcoats are more durable.
Most people choose a water-based topcoat for interiors, epoxy if you need extra durability.
How long does curing take before you can wash painted tiles?
Cure times vary by product; wait until the topcoat is fully cured per label before washing. Avoid moisture during this period.
Wait for full cure per your product's directions before washing.
Watch Video
Quick Summary
- Prepare thoroughly for durable tile finishes.
- Choose tile-specific paints and primers for best adhesion.
- Seal after curing to protect against moisture and wear.
- Ventilate and follow safety guidelines during painting.
- Test and patch problems early to avoid rework.