How to Clean Spray Paint: A Practical Guide for Surfaces
Learn how to clean spray paint safely and effectively across wood, metal, plastic, fabric, and more with step-by-step methods, safe solvents, and finishing tips. PaintQuickGuide offers practical cleanup strategies for homeowners and hobbyists.

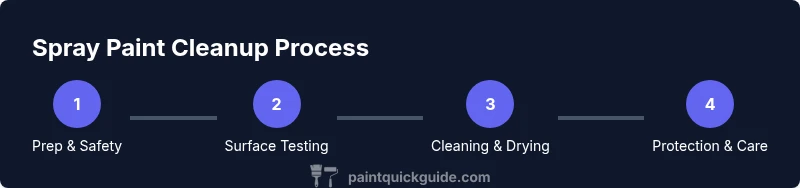
In this guide, you will master how to clean spray paint from wooden, metal, plastic, and fabric surfaces without damaging the underlying material. According to PaintQuickGuide, preparation matters as much as technique. You’ll learn safe cleaners, ventilation tips, and a step-by-step workflow to remove fresh drips, treat dried coats, and finish with a protective seal.
Understanding the basics of spray paint cleanup
Spray paint cleanup is a practical skill that blends surface science with everyday problem-solving. If you’re wondering how to clean spray paint, you’ll first learn to assess the surface, the type of paint used, and the stage of curing. Fresh paint responds to soap and water quickly, while dried coats require stronger methods. The goal is to remove pigment without gouging the material, preserving texture and color. In this guide, PaintQuickGuide emphasizes a calm, methodical approach: define your goal, gather appropriate tools, protect surrounding areas, and test cleaners in an inconspicuous spot. Always start with the mildest option and escalate only as needed. The process benefits from good ventilation, steady hands, and patience. With the right approach, you can recover most surfaces, from wood and metal to plastics and fabrics, and reduce waste by reusing cloths and tools. This first step—recognizing surface compatibility—sets the tone for the entire cleanup.
Safety and prep: what to wear and gather
Before you touch any paint, set up a well-ventilated workspace and collect your PPE: nitrile gloves, safety goggles, and a respirator or mask rated for solvents. A dedicated workstation with a washable surface keeps cleanup contained and makes re-use easier. Prepare cleaning agents: mild dish soap, isopropyl alcohol, and a general-purpose cleaner. Keep towels and microfiber cloths handy for blotting and drying. Label jars if you store any solvents, and keep children and pets away from the area. If you’re cleaning indoors, open windows and use a fan to maintain air flow. This preventive setup minimizes cleanup headaches and reduces the risk of skin irritation or inhalation exposure.
Surface-specific cleaning methods: wood, metal, plastic
Wood: Start with soapy water and a soft cloth; test in an inconspicuous area; if the paint is stubborn, rub gently with a nylon brush. Metal: Spray paint on metal often adheres well; use alcohol-based cleaner to lift stains without scratching; finish with a wipe and light polish. Plastic: Some plastics swell with solvents; use mild dish soap first, then a small amount of alcohol on a cloth. For painted or coated plastics, avoid aggressive scraping that can scratch. Always dry promptly to prevent water spots. If the paint bites into the texture, consider a light sanding with fine grit after cleaning.
Cleaning fabric, upholstery, and porous surfaces
Fabric and upholstery trap paint more easily. Blot stains with a clean cloth to lift, then apply a small amount of isopropyl alcohol to the area; test on an unseen area first. Avoid soaking; excess moisture can distort fibers or backing. Replace with a detergent solution to flush out solvent residue. Porous surfaces like plaster or drywall can wick paint deeper; use a solvent sparingly and finish with a damp cloth to remove residues. For outdoor fabrics, air dry in shade to prevent sun-bleached colors.
Removing fresh spray paint from clothing and skin
Time matters: fresh paint transfers clean up quickly with soap and water. Rinse under cold water to free pigments, then treat with liquid detergent or hand wash. For stubborn stains, rub with a small amount of dish soap and a soft brush. Skin-safe barrier creams can reduce staining on hands; avoid solvents on skin. For clothing, check fabric care labels and consider a pre-treatment stain remover before washing. Do not tumble dry until paint is fully removed to prevent heat setting.
Solvents and cleaners: which to use and why
Soaking is often the fastest path to clean spray paint, but solvents should be chosen carefully to avoid damage. Mild dish soap and warm water work for light coats; isopropyl alcohol is effective on many surfaces but can dull finishes if used excessively. Mineral spirits or acetone are stronger; use them only after testing a patch and on surfaces that tolerate solvents. Always work in a well-ventilated area. Use a cloth dampened with solvent rather than pouring; never soak the surface. Rinse with soap and water after solvent use.
Dealing with dried or cured spray paint
Dried paint often requires a combination of mechanical and chemical methods. Begin with a plastic putty knife or a nylon scrub brush to lift the edge without gouging the surface. If paint resists, apply a small amount of isopropyl alcohol to the edge and let it sit briefly to soften the bond. Gently re-scrape, wipe, and re-test. For stubborn spots, repeat with a fresh cloth and avoid aggressive scrubbing that can mar textures. Once the paint loosens, finish with soap and water, then dry thoroughly.
Stain and odor removal techniques
Paint residues can leave stubborn stains and residual odors. Use a solution of warm water and mild detergent to flush out stain particles, followed by a rinse with clean water. For lingering odors, a vented space with a fan helps, and a light mist of vinegar or baking soda solution can neutralize smells. Always finish with a dry cloth to remove moisture, and consider applying a protective sealant only after the surface is completely dry to prevent trapping moisture.
Drying, sealing, and finishing tips
Drying time depends on the material, thickness of the paint, and air flow. After cleaning, wipe surfaces dry with a clean towel and allow ample air-drying time before applying any sealant or finish. A light protective topcoat can shield the cleaned area from future drips. When finishing, test the sealant on a small, hidden patch to ensure compatibility. Store cleaners and equipment in a ventilated cabinet to keep your workspace safe and organized.
Troubleshooting common issues
If cleanup leaves streaks or uneven coloration, re-wet the area with a mild detergent solution and blot with a fresh cloth. For resinous coatings or glossy finishes, a gentle polish with a clean microfiber can restore luster after the surface dries. If paint remains embedded in fibers or porous materials, consider professional refinishing options. Always avoid rubbing too hard, which can grind paint into fibers or damage coatings.
Maintenance and long-term care
After a cleanup, establish a routine: rinse tools promptly, label cleaners, and store them upright to avoid spills. Regularly inspect cleaned surfaces for any signs of residual pigment or masking tape residue and remove promptly. A simple microfiber cloth storage system keeps your gear ready for the next project. Integrating a small waste-bin and a solvent waste container helps comply with local disposal rules and keeps your workspace neat and safe.
Quick reference: checklist and timeline
Checklist: gather PPE, protect surrounding areas, test cleaners, start with soap and water, escalate to alcohol or solvents as needed, rinse, dry, seal if appropriate, clean up and store materials. Timeline: 15 minutes for prep, 20–40 minutes for light drips, 30–60 minutes for stubborn spots, and 1–3 hours for thorough drying and sealing. Adjust for surface type and environmental conditions.
Tools & Materials
- Nitrile gloves(Protect hands from solvents and cleaners)
- Safety goggles(Eye protection against splashes)
- Respirator or dust mask(Ventilation protection when solvents are used)
- Plastic putty knife or plastic scraper(Gentle scraping to lift drips without scratching)
- Soft bristle brush(For light scrubbing on textured surfaces)
- Microfiber cloths(Lint-free and absorbent for wiping and drying)
- Non-abrasive sponge or pad(For gentle contact with delicate surfaces)
- Buckets or spray bottle(Rinse solution and spraying convenience)
- Mild dish soap(Gentle cleaner for initial washes)
- Isopropyl alcohol (70% or higher)(Effective solvent for many surfaces)
- Mineral spirits or acetone(Stronger solvent for stubborn dried paint; test patch first)
- Ventilation fan or open window(Maintain airflow during cleanup)
- Old towels or rags(For blotting and drying without waste)
- Sealant or protective finish (optional)(Apply only after surface is completely dry)
Steps
Estimated time: 60-120 minutes
- 1
Prepare workspace and safety gear
Set up a ventilated area with drop cloths. Put on nitrile gloves, safety goggles, and a respirator if you’ll be using solvents. This protects you and makes cleanup more predictable.
Tip: Use a dedicated cleanup station to keep tools and solvents organized. - 2
Gather cleaning solutions and tools
Collect mild soap, isopropyl alcohol, a brush, and soft cloths. Have a plastic scraper handy for drips. Clear a nearby waste tray for used rags.
Tip: Label containers to avoid mixing cleaners accidentally. - 3
Test cleaners on a hidden area
Before treating a visible spot, test on an inconspicuous patch to verify surface compatibility and color stability.
Tip: A small test patch prevents larger damage. - 4
Start with soap and water on most surfaces
Dampen a cloth with warm soapy water and wipe gently. Rinse with clean water and blot dry. Repeat as needed for light drips.
Tip: Reserve stronger cleaners for tougher spots. - 5
Move to alcohol for stubborn stains
Apply isopropyl alcohol to a cloth and dab the stained area. Gently rub in a circular motion; avoid excessive scrubbing to protect the surface finish.
Tip: Work in small areas to monitor results closely. - 6
Scrape and scrub with care for dried paint
Use a plastic scraper to lift the edge of dried paint, then scrub with a nylon brush or pad. Reapply solvent if needed and wipe clean.
Tip: Never use metal tools that can scratch the finish. - 7
Rinse, dry, and check coverage
Rinse the area again with soapy water, then dry with a clean cloth. Inspect for remaining pigment and re-treat if necessary.
Tip: Drying proves whether you’ve fully removed residue. - 8
Apply protective finish (optional)
If appropriate for the surface, apply a sealant or protective coat once completely dry to prevent future staining.
Tip: Test the finish on a hidden patch first. - 9
Clean up and store supplies
Dispose of used rags per local guidelines, seal solvent containers, and store tools in a ventilated area.
Tip: Keep solvents upright and away from heat sources.
Your Questions Answered
What is the best solvent to remove spray paint from metal surfaces?
Isopropyl alcohol is often effective on metal surfaces. If needed, test mineral spirits on a small patch and use sparingly to avoid dulling finishes. Always ventilate and wear PPE.
For metal, start with isopropyl alcohol and test mineral spirits only if necessary.
Can fresh spray paint be cleaned with just soap and water?
Yes—soap and water can remove most fresh spray paint. Rinse, blot, and repeat as needed. Avoid heat if the paint is still wet and check the surface for color transfer.
Yes, soap and water usually works for fresh paint.
Is it safe to use acetone indoors?
Acetone emits strong fumes and can damage some surfaces. Use only in well-ventilated areas and test first on a hidden patch. Prefer milder cleaners when possible.
Only indoors with great ventilation and surface testing.
How long does it take surfaces to dry after cleaning?
Drying varies by material and conditions, but most cleaned areas dry within hours to overnight. Ensure the surface is completely dry before applying any sealant.
It depends, but expect hours to overnight for thorough drying.
What surfaces should I avoid when using strong solvents?
Avoid solvents on lacquered finishes, certain plastics, and untreated wood without testing first. Always test a hidden spot to prevent damage.
Test first and avoid harsh solvents on sensitive finishes.
Can I clean car spray paint with these methods?
Car surfaces require gentler cleaners and careful testing. Use mild solutions first and consult automotive-safe cleaners if you’re unsure.
Be gentle and test first when cleaning car finishes.
Watch Video
Quick Summary
- Start with soap and water for most sprays
- Ventilate and wear PPE during cleanup
- Test cleaners on inconspicuous areas first
- Dry surfaces thoroughly before finishing
- Dispose of solvents properly and safely