How Does Paint Come Off: A Practical Guide to Removal
Learn how paint comes off on different surfaces with safe, effective methods, tool lists, and DIY tips for homeowners and hobbyists.

When you ask how does paint come off, you’re asking about adhesion, surface prep, and the strength of coatings. The best removal approach depends on the paint type and the surface involved. This quick guide outlines the core factors, common methods, and safety considerations, so you can choose a removal strategy that protects the underlying material while delivering reliable results. Expect a practical, stepwise path tailored to DIYers.
How Paint Adheres and Why It Comes Off
Paint bonds to surfaces through adhesion, chemical compatibility, and proper surface preparation. When considering how does paint come off, you’re really exploring these interactions: strong adhesion on a clean, abraded surface resists removal, while poor prep or incompatible substrates makes coatings easier to remove. Factors like humidity, temperature, and the age of the coating influence performance. In DIY projects, starting with a clear assessment of paint type, substrate, and prep work dramatically improves safety and results. According to PaintQuickGuide, surface prep and understanding paint type are the deciding factors in choosing an effective removal method. This knowledge helps you pick approaches that minimize substrate damage and maximize your chances of a clean finish.
Types of Paint and How They Respond to Removal
Coatings differ in chemical makeup and hardness, so responses to peels, solvents, heat, and mechanical action vary widely. Water-based latex paints typically loosen with warm water and a mild detergent, making them relatively forgiving for beginners. Oil-based enamels often require stronger solvents to break the bond, and epoxy or polyurethane finishes can resist basic cleaners. PaintQuickGuide analysis shows that latex and other water-based systems respond well to consumer-friendly cleaners when used as directed, while stubborn coatings may demand specialized strippers. Always test a small area first to gauge effect and avoid substrate damage. Remember, the goal is to remove the paint without harming the underlying material or leaving behind residue that impedes repainting.
Surfaces and Their Challenges
Different substrates react differently to paint removal. Wood can absorb moisture and swell if you over-wet it, causing warping or finish leaching. Metal is prone to surface scratches and rust if abrasive tools are overused, so you’ll want gentler contact or inhibitors. Drywall and plaster can crumble when solvents penetrate, creating a dusty mess and extra repair work. Concrete and masonry demand careful control of dust and may require following a different prep sequence. Automotive finishes add another layer of complexity; OEM coatings can react to heat or aggressive abrasives, risking clear coat damage. Understanding surface chemistry helps you tailor your approach and protect the material beneath.
Safety and Prep Before You Start
Ventilation is essential whenever solvents are involved. Work in a well-ventilated area with a suitable respirator or face mask, eye protection, and chemical-resistant gloves. Lay drop cloths to protect floors and nearby items, and remove or cover valuables. Read and follow label directions on any stripper or solvent, and test in a hidden area to confirm compatibility. Keep flames and sparks away from volatile products and never mix chemicals unless the label approves it. These precautions reduce the risk of burns, fumes, and damage to the substrate.
Removal Methods: Mechanical, Chemical, and Heat
Mechanical removal uses scrapers, heat, or abrasive pads to lift or scrub paint away. Chemical methods rely on strippers or solvents that soften or dissolve coatings, allowing easier removal with scraping or wiping. Heat can speed up softening but may warp heat-sensitive substrates or release dangerous fumes if used improperly. Each method has pros and cons: mechanical actions are straightforward but can gouge delicate surfaces; chemical removers are effective but require careful handling and ventilation; heat is fast but increases the risk of damage and fumes. For many interior projects, start with gentle, surface-safe options and increase aggressiveness only as needed.
Step-by-Step Quick Start for Common Scenarios
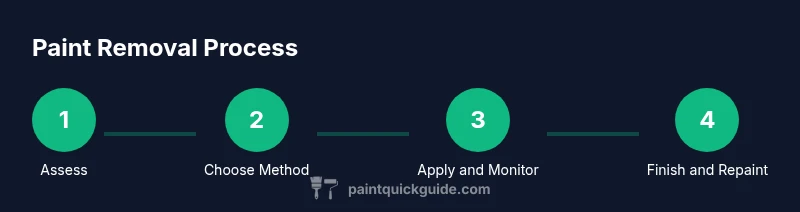
To get started quickly, apply this practical, 6-step approach that covers walls, furniture, and vehicles. Prepare, test, choose, apply, and finish. Always consider the paint type and substrate before starting.
Tools & Materials
- Respirator mask (NIOSH-approved)(Organic vapor cartridges rated for solvents)
- Protective goggles(ANSI Z87.1 compliant)
- Chemical-resistant gloves (nitrile or neoprene)(Long cuffs to protect forearms)
- Drop cloths or plastic sheeting(Cover floors and nearby furnishings)
- Putty knife or paint scraper(Rigid blade 1-2 inches)
- Steel wool or abrasive pad (optional)(Use on durable surfaces only)
- Chemical paint stripper (gel or paste)(Follow label instructions)
- Solvent (mineral spirits or acetone)(Ventilated area)
- Water bucket, sponge, and mild detergent(Rinse and neutralize residues)
- Sandpaper (grits 120-220)(Lightly sand between steps)
- Heat gun (optional)(Low heat, keep distance from surface)
Steps
Estimated time: 90-180 minutes
- 1
Assess paint type and surface
Identify the paint (latex, oil-based, epoxy) and substrate. Check for hazards like lead and assess the coating thickness. Plan the method that minimizes risk to the surface.
Tip: Test a small area first to confirm compatibility. - 2
Prep the workspace and protect surroundings
Clear the area, lay drop cloths, and ensure good ventilation. Remove nearby items and cover anything you can't move. Put on PPE before starting.
Tip: Ventilate for 5-10 minutes before applying any stripper. - 3
Apply the chosen removal method
If using a chemical stripper, apply an even coat and follow label directions. For heat, set a low temperature and avoid prolonged exposure to one spot.
Tip: Always work in small sections and monitor progress. - 4
Gently scrape and wipe away residues
Use a putty knife to lift softened paint with steady, controlled strokes. Wipe away loosened material with a damp sponge as you work.
Tip: Keep strokes shallow to avoid gouging the substrate. - 5
Rinse, neutralize, and dry
Rinse the area with clean water or a detergent solution. If using chemical strippers, neutralize per label instructions. Dry completely to prep for painting.
Tip: Drying prevents new dust from sticking and keeps surfaces ready for primer. - 6
Prep for repaint or finish
Lightly sand the surface to create a key for new paint, then wipe clean before priming. Inspect for remaining finish and address any problem spots.
Tip: Use a tack cloth to remove fine dust before priming.
Your Questions Answered
What is the first step to remove paint safely?
Begin by identifying the paint type and the substrate. Read label directions and test a small area before committing to a full removal. This early check helps prevent damage and ensures you choose the right method.
Start by identifying the paint type and substrate, then test a small area before proceeding.
Can you remove lead-based paint safely at home?
Lead paint requires professional handling and adherence to local regulations. Avoid sanding or heating lead paint, and contact a certified pro to manage disposal and containment.
Lead paint needs professional handling; don’t attempt DIY removal on lead paint.
Is heat removal safe for all surfaces?
No. Heat can warp plastics, damage coatings, or release hazardous fumes. Use heat only on heat-tolerant substrates and follow product guidance closely.
Heat can be risky; use it only when appropriate and follow safety guidelines.
How long does stripping product take to work?
Wait times vary by product and coating. Always follow the label instructions for application and dwell time, and test progress on a small area.
Follow the product label for waiting times and test a small area first.
Should I repaint after removing paint?
Yes. After removing paint, lightly sand to create a key, clean thoroughly, prime if needed, and then apply the new finish. Proper prep improves adhesion and durability.
Yes—sand, clean, prime as needed, then repaint.
Watch Video
Quick Summary
- Identify paint type before choosing a method.
- Prioritize safety and proper ventilation.
- Start with mild methods and escalate only if needed.
- Test on a hidden area and document results.