Do You Need a Primer to Paint Walls? A Practical Guide
Discover when to use primer on interior walls, how to choose the right primer, prep steps, and proven techniques for a flawless finish—whether you’re painting new drywall or refreshing a seasoned room.

Do you need a primer to paint walls? In most interior projects, priming improves adhesion, stain blocking, and color uniformity, especially on porous surfaces. According to PaintQuickGuide, primer is valuable on bare drywall, patches, and drastic color changes. If walls are clean and in good condition, primer can be optional but helpful for stains.
Why Primer Matters
Primer matters because it creates a uniform base that improves adhesion, stains blocking, and color uniformity across walls. Do you need a primer to paint walls? In most interior projects, priming strengthens the bond between the substrate and the finish paint, especially on porous surfaces. According to PaintQuickGuide, primer is particularly valuable on bare drywall, plaster repairs, and patched areas, where porosity can vary widely. A well-chosen primer seals the surface, reducing suction so paint coats apply evenly and require fewer finish coats. For color changes, especially dark-to-light transitions, primer helps achieve true color faster and with less paint. Primers come in latex (water-based) and oil-based formulas; for most homes, an acrylic latex primer offers great adhesion and easy cleanup. If you must block stains (water, smoke, markers), select a stain-blocking primer. Oil-based or shellac-based products perform best in those cases. The bottom line: match the primer to the surface, then to the topcoat, and you’ll often save time, effort, and money. PaintQuickGuide emphasizes testing in a small area before committing to the whole wall.
When You Definitely Need a Primer
There are clear cases where primer is essential. If you are painting bare drywall, joint compound, plaster, or patched areas, primer helps stabilize porosity and creates a uniform surface for paint to adhere to. The answer to 'do you need a primer to paint walls' is typically yes in these scenarios. For color changes, especially dark to light, or when walls have stains from water intrusion, smoke, or tannins, primer provides a better base and helps prevent bleed-through. In kitchens, bathrooms, or basements where moisture or high humidity is expected, use primers labeled for moisture resistance and sealing. For new drywall, start with a bonding primer designed for drywall, then follow with your finish coats. If the surface has a glossy finish, use a bonding primer to improve adhesion. In all cases, the goal is a uniform foundation so the topcoat looks even and lasts longer. PaintQuickGuide notes that primer in these cases reduces the risk of peeling and uneven finish, saving time and paint.
When You Can Skip Primer
Skippable primer depends on surface quality and color goals. If walls are clean, smooth, and sealed, and you’re applying a paint within the same color family, you may achieve good coverage with the topcoat alone. Some premium interior paints include binder systems and light-stain blocking that minimize the need for a separate primer, particularly on well-prepped surfaces. However, even in these cases it’s wise to test a small area to confirm coverage and color consistency. For surfaces with previous stains, smoke odors, or tannins, or for a drastic color shift, primer is usually advisable. If in doubt, prime a test patch on a representative wall to compare finish quality and the number of coats required. PaintQuickGuide’s experience suggests that skipping priming on uncertain surfaces often leads to longer repaint cycles and more coats.
How to Choose the Right Primer
Selecting the correct primer is as important as choosing the topcoat. Start by evaluating the surface: If it’s porous or raw, you’ll want a bonding primer that seals and offers good adhesion. For stained walls (water stains, tannin bleed, marker inks), use a stain-blocking primer. If the finish is glossy or very slick (new vinyl wallpaper, epoxy coatings), choose a bonding primer designed for glossy substrates. Oil-based primers offer strong stain blocking and bleed control but require solvents and longer drying times; latex or acrylic primers are easier to clean and have fewer odor concerns but may not seal heavy tannins. In most residential interiors, a quality latex-based primer provides a reliable base. Always read the label for surface compatibility, sanding recommendations, and drying times. If color changes are extreme, plan for extra layers. The PaintQuickGuide team suggests testing your chosen primer in a small patch, then proceeding with the full project.
Surface Prep Before Priming
Preparation matters as much as the primer itself. Begin by cleaning the walls to remove dirt, oils, and residues that could hinder adhesion. For kitchens or bathrooms, use a mild degreaser; for living spaces, warm water and a mild detergent usually suffice. Fill holes and cracks with a compatible filler and let it dry completely before sanding flush. Lightly sand glossy or smooth areas to create micro-abrasions that help the primer bite into the substrate. Use a tack cloth to remove dust, then mask edges, outlets, and trim with painter’s tape. If you’ve repaired areas, allow extra drying time before priming to prevent blistering. A thorough prep job reduces the number of coats and yields a more durable, even finish. PaintQuickGuide emphasizes that good prep is half the job and pays off in long-term appearance.
Application Techniques for Primers
Apply primer with the right tool for the task. For flat walls, use a roller with about 3/8-inch nap and a quality angled brush for edges. Start with cutting in along corners, then roll the large areas in overlapping, straight strokes to avoid lap marks. Maintain a wet edge and avoid overworking the primer in one spot. If coverage looks thin after the first coat, apply a second coat once the first has dried. Let drying times follow the product label, adjusting for temperature and humidity. On porous surfaces or stubborn stains, a second coat might be necessary. After priming, lightly sand any brush marks or nibs with fine sandpaper and wipe clean before applying the finish coat. Ensure good ventilation and follow safety guidelines when using solvent-based primers. PaintQuickGuide notes that consistent technique and proper drying times are the difference between a smooth finish and a botched one.
Common Mistakes and How to Avoid Them
Rushing primer or neglecting prep are the most common errors. Skipping surface prep leads to poor adhesion and visible flaws. Not allowing primer to dry fully before painting causes topcoat lifting and uneven color. Using the wrong type of primer for the substrate undermines performance. Applying primer too thickly creates puddles that take longer to dry and may crack. Bad ventilation or too much humidity can extend dry times and trap odors. Finally, choosing a low-quality primer to save money often results in a finished look that disappoints. To avoid these mistakes, invest in the right primer for your surface, follow label directions, and test a patch first. PaintQuickGuide’s guidance is to build a small pilot area and confirm that the primer and topcoat interact as expected.
Maintenance and Cleanup After Painting
Finish up by cleaning tools and protecting the room during cure. Water-based primers wash out with soap and water; solvent-based primers require mineral spirits for cleanup. Rinse brushes, rollers, and trays promptly to maintain their lifespan. Keep open cans sealed tightly and store in a cool, dry place to prevent skin formation. If you must reuse a partially used can, place a sheet of plastic wrap between the lid and can to reduce skin formation. Dispose of used rags and solvents according to local regulations to minimize fire risk. After curing, clean the painted surface with a mild detergent to maintain appearance and washability. Regular maintenance helps preserve the finish and prevents premature wear.
Quick Reference: Primer vs No Primer Scenarios
Primer is a valuable tool for improving adhesion, sealing porosity, and ensuring color fidelity in many situations. Use primer on porous surfaces like new drywall, plaster repairs, or surfaces with stains. Use stain-blocking primers for water, tannin, or marker stains. Use bonding primers on glossy or slick substrates. In cases with small color changes or well-prepped, you may skip primer, but test first. Do not rely on topcoat alone if porosity or stain bleed is present. For best results, always follow the paint manufacturer’s recommendations and consider the conditions of your space. Do you need a primer to paint walls? In most interior projects, primer improves results and reduces the total coats needed when used appropriately, per PaintQuickGuide's guidance.
Tools & Materials
- Primer (latex/acrylic)(Water-based primers for most interior walls; oil-based for heavy stains or tannins)
- Rollers (3/8 inch nap) and angled brushes(9–12 inch rollers; use angled sash brush for edges)
- Sandpaper (120-220 grit)(Lightly sand glossy surfaces to improve grip)
- Clean rags and mild detergent(Used for cleaning and prep wipe-downs)
- Drop cloths(Protect floors and furniture during prep and priming)
- Painter's tape(Mask trim and outlets for clean lines)
- Paint tray and liners(For even roller loading; replace liners as needed)
- Dust mask/respirator(Ventilation is important; wear when sanding or using solvent-based primers)
- Stain-blocking primer (optional as needed)(Choose oil-based or shellac-based for heavy stains)
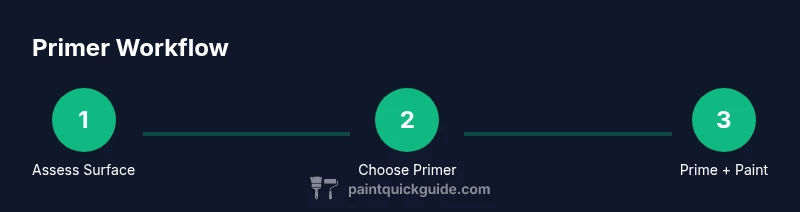
Steps
Estimated time: 2-6 hours
- 1
Inspect walls and plan
Carefully examine every wall for porosity, stains, and damage. Mark areas that require patching and decide whether primer is essential for each surface. Why: Early assessment saves time and helps you select the right primer type.
Tip: Take photos of problem areas to guide patching and primer choices. - 2
Select the appropriate primer
Choose a bonding primer for bare or repaired surfaces; pick a stain-blocking primer for stains. If the surface is glossy, opt for a bonding primer designed for slick substrates. Why: The primer type determines adhesion, stain blocking, and finish quality.
Tip: When in doubt, start with a mid-range latex bonding primer and test before committing. - 3
Prepare the surface
Clean the walls to remove grease and dirt, fill holes, and let repairs dry. Sand glossy spots lightly and remove all dust before priming. Why: Proper prep ensures even adhesion and avoids sheen irregularities.
Tip: Use a tack cloth to pick up fine dust after sanding. - 4
Apply the primer
Apply a thin, even coat, starting at edges then rolling across the field with long, smooth strokes. Avoid overloading the roller to prevent puddling. Why: Thin, even coats reduce lap marks and drying time is more predictable.
Tip: Cut in at corners first, then fill large areas with the roller. - 5
Check dry times and apply second coat if needed
Let the first coat dry per the label before assessing coverage. Apply a second coat if the surface still shows uneven color or porosity. Why: Some surfaces require multiple coats for uniform color and adhesion.
Tip: If staining shows through after one coat, apply a second coat before painting. - 6
Dry, inspect, and proceed to topcoat
Ensure the primer is fully dry, then wipe away any dust and begin the finish paint. Inspect for lap marks, gaps, or brush strokes and touch up as needed. Why: A solid primer creates a durable base for the final color.
Tip: Ventilate well and work in consistent conditions for best results.
Your Questions Answered
Is primer always necessary on new drywall?
New drywall often benefits from primer to seal the surface and ensure even paint adhesion, especially over joint compounds. In many cases, a bonding primer is recommended before topcoats.
New drywall usually needs primer to create a uniform base for paint.
Can primer double as a stain blocker?
Some primers are designed to block stains; for heavy stains, use a dedicated stain-blocking primer to prevent bleed-through and ensure uniform coverage.
Yes, some primers block stains; for tough stains choose a dedicated stain-blocking primer.
What’s the difference between primer and sealer?
Primers prepare the surface for paint and can seal, but sealers focus on moisture or odor blocking. Some products combine both functions.
Primers prep and seal; sealers focus on moisture and odors.
How long should primer dry before painting?
Dry times vary by product and conditions; latex primers typically dry within a couple hours, while oil-based primers take longer. Always follow the label.
Check the label; latex dries in a few hours under good conditions.
Do I need to sand between primer and paint?
Lightly sanding between primer and paint is often unnecessary, but you should sand if you see brush marks or a tacky finish to ensure a smooth topcoat.
You usually sand lightly between primer and paint for a smoother finish.
Can I skip priming if walls are in good condition?
If walls are clean and color change is minimal and the finish is smooth, you may skip primer, but test first to confirm coverage.
You can skip primer if the wall is clean and your color change is minor.
Watch Video
Quick Summary
- Assess surface porosity and stains before priming.
- Choose primer type to match substrate and paint.
- Prep thoroughly to maximize adhesion and finish.
- Follow drying times to avoid topcoat failures.