Can You Use Paint with Primer on Bare Wood? A Practical Guide
Learn whether you can use paint with primer on bare wood, how to choose primers, prep properly, and apply topcoats for durable, knot-blocking finishes. Practical steps, materials, and safety tips for DIYers.

Yes. On bare wood, always apply a primer before topcoating. Choose a wood primer (oil-based, water-based, or shellac-based) suited to the wood and environment, clean and sand the surface, then apply a thin coat and let it dry before painting. For knots or tannins, use stain-blocking or shellac-based primer.
Why primer matters on bare wood
The question can you use paint with primer on bare wood touches a crucial step in any wood project. Bare wood is highly porous and can absorb finishing products unevenly, leading to blotchy color, poor adhesion, and more frequent repairs. A high-quality primer on bare wood seals tannins, blocks knots, and creates a uniform base for your topcoat. This is especially important for pine, cedar, or other resinous woods where resins can bleed through paint if not properly blocked. The PaintQuickGuide approach emphasizes selecting the right primer for the wood species and the room’s conditions, ensuring your final finish is smooth, durable, and lasting. Proper priming reduces the number of topcoats needed and helps color stay true over time. When you start from a solid primed surface, you’ll save time and money and achieve a professional-looking result more reliably.
Not all bare woods are the same. Porous boards like softwoods drink finish quickly, while oily woods or woods with heavy tannins demand more careful priming. In such cases, the primer acts as a barrier that improves adhesion and helps prevent staining bleed. If you are unsure about the wood type, perform a small test on an inconspicuous area to check how the wood soaks in the primer and how the finish looks after the first coat dries. This upfront assessment aligns with PaintQuickGuide’s recommendations for a successful outcome.
In short, the core reason to prime bare wood is to improve adhesion, evenness, and longevity of the final paint job. Good primers are not optional for bare wood projects; they are the foundation that keeps your color consistent and your finish durable over time.
block blocksname doesn't apply
Primer options for bare wood: oil-based, latex, and shellac
Selecting the right primer is essential when you prepare bare wood for painting. Each primer type has distinct advantages depending on the wood species, environmental conditions, and the topcoat you plan to use. Oil-based primers (alkyd) are renowned for excellent adhesion and strong stain blocking, which makes them a popular choice for knot-heavy woods and exterior projects. They cure slowly and require mineral spirits for cleanup, but they leave a hard foundation that handles heavy wear well. Latex or water-based primers are easier to work with, have lower odor, and clean up with water. They are a good fit for interior walls and smooth woods, but they may need an extra coat on highly absorbent surfaces. Shellac-based primers are the go-to solution for severe knot bleeding or tannin transfer; they dry quickly and block most stains at the source, though they require good ventilation due to strong odor and longer cure times in humid rooms. Bonding primers are a modern option that can stick to glossy or previously painted surfaces if you are priming a piece that sits adjacent to a painted finish. For bare wood, the “best” choice depends on your project specifics, like indoor/outdoor use, humidity, and the topcoat you intend to apply. PaintQuickGuide recommends matching primer type to your topcoat’s chemistry and the wood’s particular challenges to maximize adhesion and finish quality.
Surface prep before priming
Before you apply primer to bare wood, perform thorough surface preparation. Start by cleaning the wood surface to remove dust, dirt, and oils. A damp cloth or a mild cleaner works well, but ensure the wood dries completely before proceeding. Lightly sand glossy areas with 180–220 grit sandpaper to create a micro-roughness that will help the primer grip. Wipe away dust with a tack cloth for a clean, dry surface. Check for holes, cracks, or gaps and fill them with appropriate wood filler, then sand flush once dry. If you’re priming outdoors, seal cracks and gaps against moisture exposure. Moisture content matters—wood stored in a damp environment will warp or bubble after priming and paint, so acclimate the material in a dry space for 24–48 hours if possible. The goal in prep is a smooth, clean, dust-free surface that accepts primer evenly. A well-prepped surface translates into better adhesion and a more even final appearance.
If you’re unsure about knots or resin pockets, plan to use a stain-blocking primer or shellac-based primer to prevent bleed-through. Always verify your wood is dry enough to accept primer; moisture content can affect drying times and primer performance. A good prep routine will reduce the number of topcoats needed and improve color uniformity across the surface.
How to test readiness: moisture and porosity check
After prep, test the wood to confirm it’s ready to prime. A simple moisture test can help you estimate how coatings will perform. Use a moisture meter if available; for interior projects try to keep the wood at typical room humidity before priming. For most residential interiors, aim for a moisture content in the single digits to low teens (percent). If the wood absorbs primer quickly or you see dark blotches spreading after a light wipe, that indicates high porosity and the need for an additional light sanding or a sealing step before applying primer. Another readiness check is to run a small 6–8 inch test strip of primer on a hidden area to observe how evenly it adheres and dries. If it beads, pools, or seems to lift, stop and reassess the surface or switch to a different primer according to the manufacturer’s instructions. The main idea is to ensure the surface is dry, smooth, and ready to hold primer evenly across the entire area.
How to apply primer on bare wood: technique essentials
Primer application on bare wood should be done with consistent, even coverage. Start with a high-quality brush or a short-nap roller suitable for the primer you chose. Apply a thin, tack coat to saturate the surface without pooling. Allow this coat to dry completely according to the product’s label, then inspect the surface. If wood grain shows through or you see blotchy areas, apply a second coat in the same manner. Sand lightly between coats with 220–320 grit for the smoothest possible finish, then wipe away dust before applying the final coat. When painting outdoors, brush techniques and drying times will be affected by sun exposure and temperature; monitor conditions and adjust. Your goal is to achieve a uniform, sealed surface that accepts topcoat evenly and safely. After the final primer coat dries, remove any masking tape and proceed to your chosen topcoat.
Knot and tannin management: blocking bleed
Knot bleed and tannins can ruin a paint job if not properly blocked. For knotty woods, select a stain-blocking primer such as an oil-based or shellac-based product to keep resin from seeping into the topcoat. In some cases, a dedicated knot-killer primer will perform better than a standard primer. If you are working with a very resinous species, consider applying a quick coat of shellac-based primer on knots first, then proceed with your chosen primer across the rest of the surface. After the primer has dried, test for bleed-through by applying a small patch of topcoat to see whether staining persists. If bleed-through remains, apply another coating of stain-blocking primer or switch to a more robust sealer. The aim is to prevent resin or tannin bleed without excessively delaying the project.
Selecting compatible topcoats after priming
Once the primer is fully cured, choose a topcoat that matches the primer and the project environment. For interior walls or trim, latex (water-based) topcoats are common and easy to clean. For wood projects in kitchens or bathrooms, consider durable acrylic or enamel finishes with higher durability. Exterior bare wood surfaces may require an oil-based or hybrid topcoat for better resistance to weather, but ensure good ventilation during application and curing. Always check the primer’s data sheet to confirm which topcoats are compatible, as some primers are not designed to be used with particular paint chemistries. In all cases, apply thin, even coats and allow adequate dry time. A well-chosen topcoat will complement the primer and deliver a solid, attractive finish that resists wear and moisture.
Environmental conditions and drying times you should respect
Environmental factors have a powerful effect on primer performance. Temperature, humidity, and air movement influence drying time and cure strength. Most primers require a dry, well-ventilated space and an ambient temperature within the product’s recommended range. High humidity or cool temperatures can lengthen drying times, while heat can accelerate cure but may cause uneven drying if the surface is not evenly heated. Always refer to the manufacturer’s data for specific drying times and recoat windows. In damp rooms or outdoors, consider temporary shelter or weather protection during cure to prevent dust and moisture from compromising the finish. Following the recommended environmental guidelines will lead to a stronger, longer-lasting finish that adheres well to bare wood.
Troubleshooting: common primer issues and fixes
Problems can arise even with proper preparation. If you notice poor adhesion, re-clean the surface and consider a more robust primer, or use a bonding-type primer designed for wood. If the primer dries too quickly and leaves brush marks or roller fuzz, switch to another applicator type and ensure a smooth, even coat. Blotches or sinking areas after drying may indicate excessive porosity; a second, lightly applied coat can help. If you observe odor or chemical sensitivity during application, ensure adequate ventilation and wear protective gear. Finally, if knots bleed after the topcoat is applied, re-evaluate your primer choice or apply a second coat of stain-blocking primer before continuing.” ,
Tools & Materials
- Primer (oil-based alkyd)(Choose stain-blocking or knot-friendly primer for resinous woods; oil-based types hold up well in harsh conditions.)
- Primer (water-based/latex)(Low odor and easy cleanup; good for interior walls and smooth woods.)
- Primer (shellac-based)(Best for heavy knot bleed; ensure proper ventilation.)
- Sandpaper 180–220 grit(Sands shrinkable glossy areas to create bite for primer.)
- Sandblock or tack cloth(Removes dust after sanding to ensure smooth primer surface.)
- Cleaners: mild soap or wood cleaner(Used prior to priming to remove oils and debris.)
- Mineral spirits or water for cleanup(Depends on primer type (oil-based vs water-based).)
- Brushes and rollers (synthetic for latex, natural for oil-based)(Choose sizes appropriate to surface; 1–2 inch brushes for trim; 9-inch rollers for larger areas.)
- Paint tray and liners(Holds primer for easy application.)
- Masking tape and drop cloths(Protects adjacent surfaces and floors from droplets.)
- Moisture meter (optional)(Helpful to assess wood moisture before priming.)
- Personal protective equipment (gloves, respirator/mask)(Ventilated area and safety gear essential.)
- Wood filler (optional)(Patches gaps before priming for a smoother surface.)
- Stir sticks(Stir primer thoroughly for consistent results.)
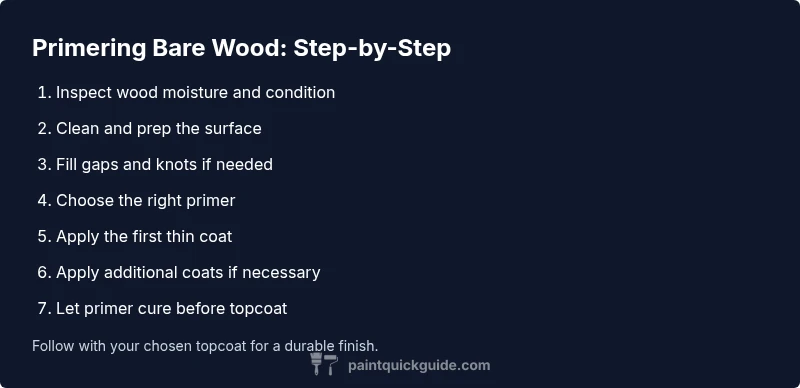
Steps
Estimated time: 2-6 hours (priming only, depending on wood type and number of coats).
- 1
Check wood moisture and condition
Use a moisture meter if available to assess the wood’s moisture content. If it’s above typical indoor targets (often in the low teens percentage), acclimate the boards in a dry area for 24–48 hours or longer before priming. Clean the surface to remove dust and oils so the primer adheres properly.
Tip: Acclimate wood in a dry environment to avoid warping after priming. - 2
Clean and prep the surface
Wipe the wood with a damp cloth or mild cleaner to remove oil and residue. Let it dry completely, then lightly sand any glossy areas to create a tooth for the primer. Wipe away dust with a tack cloth before priming.
Tip: Dust-free surfaces improve primer adhesion and finish uniformity. - 3
Fill gaps and knots (if needed)
Fill holes or deep gouges with wood filler; let cure per product instructions. Lightly sand flush once dry to ensure a smooth, even base for primer. Remove dust again before starting.
Tip: Use filler that sands easily to avoid ridges under the primer. - 4
Choose the right primer
Select oil-based for knotty, resinous woods or exterior projects; choose water-based for interiors or low odor needs; use shellac-based primer for heavy tannin bleed. Read the label to confirm compatibility with your topcoat.
Tip: When in doubt, test a small area to verify adhesion and blocking. - 5
Apply the first thin coat
Use a high-quality brush or roller to apply a thin, even coat. Avoid overloading the tool to prevent runs. Let the primer dry fully according to the label before inspecting the surface.
Tip: Thin coats dry more evenly and reduce brush marks. - 6
Apply additional coats if necessary
Assess coverage after the first coat dries. If grain shows or bleed-through remains, apply a light second coat in the same direction as the first. Sand lightly between coats if needed. Remove dust before topcoat.
Tip: Two thin coats often yield better adhesion and a smoother finish than one thick coat. - 7
Cure and prep for topcoat
Allow full cure per product guidelines before applying the topcoat. Lightly sand and wipe off dust to ensure a smooth surface for painting. Then proceed with your chosen topcoat following its directions.
Tip: Don’t rush the cure; improper curing reduces topcoat performance.
Your Questions Answered
Can I skip primer if I’m using a high-quality paint on bare wood?
Primers improve adhesion, evenness, and durability, especially on bare wood with knots or tannins. Skipping primer often leads to uneven color, blotching, and earlier wear. If the wood is smooth, clean, and has low tannins, you might be able to proceed, but primer is still recommended for best results.
Primer helps wood grip the paint and blocks stains, so skipping it is rarely worth the risk.
What’s the difference between oil-based and water-based primers for bare wood?
Oil-based primers offer excellent adhesion and knot blocking but require solvents and longer dry times. Water-based primers are easier to clean, have lower odor, and are better for interior projects. For knotty or tannin-heavy wood, oil-based or shellac-based primers often perform better.
Oil-based primes grip well and block stains; latex is easier to use but may need more coats on knotty wood.
How long before I can paint after priming?
Drying times vary by product and conditions. Most primers are ready for topcoat within 1–4 hours for water-based primers in optimal conditions, but some may require longer. Always follow the product’s label for recoat windows and cure times.
Check the label; don’t rush to the topcoat before the primer is fully dry.
Should I sand between primer coats?
Light sanding between coats (with fine-paper) helps remove nibs and creates a smooth surface for the next layer. Wipe away dust after sanding before applying the next coat.
A quick, gentle sanding between coats yields a cleaner finish.
Can primer block knot bleed on all woods?
Stain-blocking or shellac-based primers are effective for most knotty woods, but some species may bleed despite priming. In persistent cases, use a dedicated knot-blocking primer and follow with the topcoat after full cure.
Most knots are blocked by stain-blocking primers, but some woods need extra care.
Is it better to use a single thick coat or multiple thin coats of primer?
Multiple thin coats generally give a more even base and better adhesion than a single thick coat. Allow each coat to dry fully before applying the next.
Thin coats dry more evenly and reduce runs.
Watch Video
Quick Summary
- Assess wood moisture before priming
- Choose primer suited to wood and topcoat
- Prepare surface thoroughly for best adhesion
- Apply thin, even coats and cure fully
- Inspect for full coverage before topcoating