How to Get Rid of Lead Paint: Safe Home Guide 2026
Learn how to get rid of lead paint safely in homes built before 1978. This step-by-step guide covers testing, encapsulation vs removal, professional disposal, and cost ranges to help homeowners plan with confidence.

This guide explains how to get rid of lead paint safely in homes built before 1978, according to PaintQuickGuide. You'll learn when to test, whether to encapsulate or remove, and how to hire qualified professionals. We’ll cover safety, disposal regulations, and cost ranges. This quick answer sets expectations and points you to the full step-by-step guide.
What is lead paint and why it matters
Lead-based paint was widely used in homes and buildings until the late 1970s. When lead paint deteriorates or is disturbed, it can release dust and chips that pose risks to children and adults. Understanding what lead paint is and why it matters helps homeowners decide how to approach remediation. The goal of this guide is not to scare you but to provide practical, safe options for reducing exposure while staying within local regulations. As you explore options, keep in mind that any lead-containing activity should prioritize containment, cleanup, and disposal to protect your family and workers. According to PaintQuickGuide, many homes built before 1978 still have some lead-based finishes requiring attention; knowing the basics helps you start the right conversation with licensed professionals and local authorities.
Key terms to know include encapsulation (covering lead paint to prevent dust) and removal (taking it off the substrate). Both approaches have safety considerations and costs, which we cover in detail below.
Health risks and exposure pathways
Lead is a toxic metal that can affect the brain and nervous system, particularly in children under six. Exposure typically occurs through ingestion of lead dust or chips or through inhalation of contaminated dust during renovation work. Long-term exposure in adults can still cause health issues such as high blood pressure and kidney problems. The most effective prevention strategy is to minimize dust and prevent children and pets from accessing treated areas during work. Regular cleaning with damp cloths and HEPA-filtered vacuums, combined with proper containment, significantly reduces exposure risk. PaintQuickGuide emphasizes that proactive planning reduces potential health impacts and makes subsequent steps safer for occupants.
Lead paint in older homes: common scenarios and myths
Many older homes have lead paint in layers that were never disturbed. Common scenarios include painted trim, windowsills, and interior walls in basements or attics. A frequent myth is that just painting over lead paint is enough; in reality, containment or removal may be necessary to prevent future dust. Another misconception is that all lead paint is equally dangerous; the risk depends on its condition and what activities will disturb it. The safe approach balances protection, cost, and disruption. PaintQuickGuide highlights that pre-1978 houses are the primary targets for lead paint risk, and addressing even small areas can yield meaningful improvements in indoor air quality.
Testing, monitoring, and choosing a removal path
Testing confirms whether lead is present and at what levels. A professional assessment often includes surface swab tests, X-ray fluorescence (XRF) scans, and a review of renovation plans. Based on results, families choose an approach: encapsulation, enclosure, or removal. Each path has different dust-control requirements, costs, and timelines. The choice should align with future plans for the space and the presence of children or pregnant individuals in the home. PaintQuickGuide analysis shows that selecting the right path early helps avoid costly rework and reduces exposure risks.
Encapsulation vs removal: pros and cons
Encapsulation creates a durable barrier over lead paint, minimizing dust release. It is typically less disruptive and can be a cost-effective option when the painted surface is in good condition. Removal eliminates the lead-containing material but can generate more dust and requires strict containment and disposal procedures. Some situations favor encapsulation (e.g., busy living spaces, intact surfaces), while others demand removal (e.g., severely damaged paint or renovation work that disturbs the surface). Consider your renovation timeline, the presence of children, and local regulations when deciding which approach is best.
Safe work practices and disposal basics
Lead-safe work practices reduce dust, prevent cross-contamination, and ensure proper disposal. Key steps include sealing off the work area with plastic sheeting, using HEPA vacuums, wearing appropriate PPE, and avoiding dry sanding or open-flame heating. After work, all debris should be disposed of according to local hazardous-waste rules, and surfaces should be cleaned with damp wipes. Always verify disposal options with your municipality, and preserve documentation for any future resale or regulatory inspections.
Cost ranges and planning for removal or encapsulation
Costs vary widely based on surface area, method, and local labor rates. Expect that encapsulation tends to be less expensive than full removal, but both can entail disposal fees and permits in some regions. Planning should account for testing costs, containment setup, and potential follow-up clearance testing. While rough budgets can help homeowners prepare, the most reliable forecast comes from a licensed contractor who can assess the specific scope and provide a written estimate. PaintQuickGuide recommends obtaining multiple bids and checking references to ensure a solid project plan.
Timeline, disposal, and final clearance expectations
Remediation projects typically unfold in phases: testing and planning, containment setup, actual encapsulation or removal, cleanup, and post-work clearance testing where required. Clearance testing confirms whether areas meet safety standards before re-entry. Timelines can range from a few days to a few weeks, depending on the size of the project and the method chosen. Engage licensed professionals to ensure compliance with state and local regulations and to minimize your exposure during the process. PaintQuickGuide stresses the importance of following local disposal rules to avoid penalties and ensure safe waste handling.
Tools & Materials
- Lead test kit (EPA/CDC-approved)(For initial screening; confirm passing status before work begins)
- Damp microfiber cloths(Used for dust suppression and cleanup)
- Disposable coveralls(Protect skin and clothing; choose splash-resistant if possible)
- N95 respirator or half-face respirator with P100 filters(Protect breathing during disturbance)
- Safety goggles or face shield(Protect eyes from dust and debris)
- Plastic sheeting (6-mil or heavier)(Seal off the work area to contain dust)
- Tape and markers(Create zones and label containment boundaries)
- HEPA vacuum cleaner(Dust collection and cleanup; do not use standard vacuums)
- Mild detergent and water(Surface cleaning after removal/encapsulation)
- Rubbish bags rated for hazardous waste(Seal and dispose of debris properly)
- Sealed container for lead waste(Optional, based on local disposal rules)
- Certified lead abatement contractor contact info(If removal is needed or if regulations require licensure)
- Ventilation plan and air filtration(Use during work where allowed by rule; avoid cross-contamination)
Steps
Estimated time: 2-7 days (excluding lab analyses and scheduling with licensed professionals)
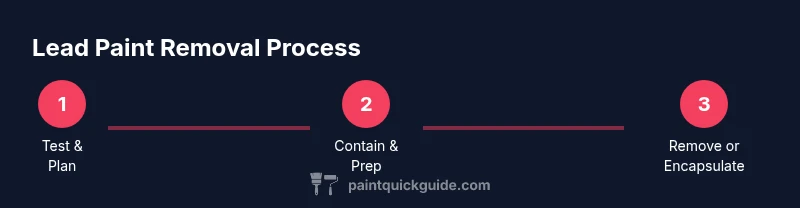
- 1
Test the paint for lead
Begin with an approved lead test to confirm presence and concentration. This identifies whether you need additional protective measures and what remediation path to pursue. If results show detectable lead, proceed with containment planning.
Tip: Test in representative areas and record results for your contractor. - 2
Contain and isolate the work area
Set up plastic sheeting to seal off the space. Use tape to create clean, sealed zones and minimize dust migration to other areas. This reduces exposure risk for occupants and workers.
Tip: Avoid gaps and overlap; ensure seals are secure before work begins. - 3
Decide on encapsulation or removal
Evaluate the paint condition, surface type, and future use of the space. If surfaces are sound, encapsulation may be appropriate; otherwise, removal by a licensed pro may be necessary. Obtain a written plan from your contractor.
Tip: Encapsulation is typically faster and less disruptive, but removal may be required for extensive damage. - 4
Perform removal or encapsulation with safety in mind
Follow lead-safe work practices: damp-wipe, HEPA vacuum, and avoid dry sanding. If removal is chosen, a licensed contractor should manage dust control and disposal according to regulations.
Tip: Never burn or sand dry; use damp methods to limit dust. - 5
Clean up and decontaminate
After work, perform thorough cleaning of all surfaces, tools, and the surrounding area. Use damp cloths and HEPA vacuums; dispose of waste per local rules.
Tip: Document the cleanup with photos for your records. - 6
Test for clearance and finalize disposal
If required, conduct post-remediation testing to verify lead levels meet safety standards. Ensure proper disposal of all lead-containing waste and obtain any required disposal documentation.
Tip: Keep clearance documents for future home inspections or resale.
Your Questions Answered
Is it legal for homeowners to remove lead paint themselves?
Rules vary by location, but many places require licensed professionals for lead paint removal. Some jurisdictions permit testing and encapsulation by homeowners with proper safety training. Always check local regulations before starting any removal work.
Local rules vary, so check with your city or state first. Testing and encapsulation may be allowed, but removal often requires a licensed professional.
What is encapsulation and when is it recommended?
Encapsulation covers lead paint with a specialized coating to prevent dust release. It is generally recommended when paint is in good condition and the area will not be heavily disturbed. It is less disruptive and can be cost-effective compared to removal.
Encapsulation coats the paint to seal it, ideal when the surface is stable and not subject to heavy renovation.
How long does a remediation project typically take?
Remediation timelines vary by scope, ranging from a few days to a couple of weeks. Testing, containment setup, removal or encapsulation, and cleanup all contribute to the schedule. Always obtain a written timeline from your contractor.
Most projects take days to a couple of weeks, depending on size and method.
What disposal rules apply to lead paint waste?
Lead waste is considered hazardous in many regions. Waste must be contained, labeled, and disposed according to local regulations. Your contractor should guide you on responsible disposal and provide required documentation.
Lead waste disposal follows local hazardous waste rules; your contractor will handle the paperwork.
How can I verify that the lead paint removal was effective?
Post-remediation testing (often by a certified lab or inspector) confirms lead levels are within safe limits. Clearance testing is essential in high-risk areas or for homes with young children. Keep the results for your records.
Post-remediation tests show whether lead levels meet safety standards.
What should I do if my home was built before 1960?
Older homes may have multiple layers of lead paint and additional hazards. Prioritize professional assessment and follow recommended containment and disposal practices. Local regulations may have specific requirements for older structures.
Older homes often need thorough assessment and specialized handling.
Can lead paint be safely encapsulated in all rooms?
Encapsulation can be suitable in many rooms, especially where surfaces are in good condition. However, heavily damaged surfaces or high-traffic areas might require removal. A professional assessment will determine feasibility per room.
Encapsulation works in many rooms, but damaged surfaces may need removal.
Is there a simple DIY test to confirm a room is safe after work?
A professional post-remediation test provides the most reliable confirmation. DIY tests can offer preliminary indicators but should not replace certified clearance testing when required.
Professional clearance tests are the best way to confirm safety.
Watch Video
Quick Summary
- Test early to determine lead presence before work starts
- Choose encapsulation for manageable, less invasive cases
- Hire licensed professionals for removal to ensure compliance
- Contain and clean thoroughly to minimize exposure
- Keep proper disposal records and clearance results