Why is my paint sprayer spitting? Troubleshooting guide
Urgent, practical guide to diagnose and fix paint sprayer spitting with step-by-step checks, safety notes, and maintenance tips to prevent future issues.

Why is my paint sprayer spitting? The most likely cause is air or dried material in the nozzle, filter, or fluid passages, causing spurts. The quickest fix is to flush the system, clean or replace the nozzle and filter, reseat seals, and verify the spray tip matches your material and pressure. According to PaintQuickGuide, a fast cleanup and proper setup often resolves the issue.
Why paint sprayer spits: common symptoms and scenarios
If you’re asking why is my paint sprayer spitting, you’re not alone. Most often, the issue shows up as erratic spurts, sudden bursts of paint, or an inconsistent spray pattern. Homeowners notice it after refilling, changing materials, or moving the unit, especially when switching from a thin to a thicker material. The root causes typically involve air entering the system, a clogged nozzle or filter, or worn seals. By recognizing these symptoms, you can diagnose quickly and avoid costly mistakes. This guide will help you observe the problem, reproduce the symptoms safely, and prioritize the quickest fixes first. Keep in mind that paints with high solids or low volatile content can aggravate spit-back if the nozzle is not matched to the material. According to PaintQuickGuide, regular maintenance reduces spit-back risk and preserves spray quality over time.
Quick checks before you tear it apart
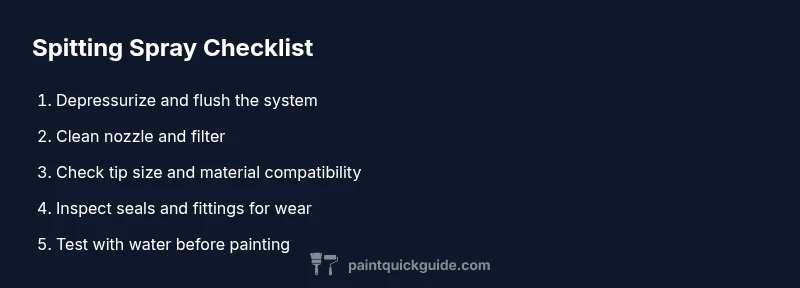
Before dismantling components, perform a few basic checks that often resolve the problem without tools. Ensure the sprayer is depressurized and unplugged, the tip matches the material, and the nozzle and filter are clean. Rinse the system with water or the appropriate solvent according to the material. Check for obvious leaks at seals and fittings. If the paint has dried in the line, a quick flush can restore flow. These steps are fast, safe, and can confirm whether more involved maintenance is necessary.
Common causes and how they lead to spitting
Air in the line: A small air pocket can push out bursts of paint when pressure changes. Cleaning and reseating seals often fixes this. Clogged nozzle or filter: Dried pigment or oversized particles block flow and create spurts. Correct tip size matters: Using a tip too small for thick material causes restriction and spits. Worn seals or packing: Over time, gaskets can allow air ingress or fluid leaks that manifest as spit-back. Material incompatibility: Heavier paints or lacquers require a different flow setup. Each cause has a straightforward remedy, usually involving cleaning, replacement, or re-timing the spray setup.
Diagnostic flow: symptom → diagnosis → solutions
Start with the symptom: spurts and inconsistent spray signal a disruption in the fluid path. Diagnosis points include air in the line (high likelihood), a clogged nozzle or filter (high likelihood), incorrect tip size for the material (medium likelihood), or worn seals (low likelihood). Fixes range from flushing and priming, to nozzle/filter cleaning or replacement, to resealing worn joints and confirming material compatibility. Following this flow helps you isolate the root cause with minimal disassembly.
Step-by-step: fix most common cause
- Power down and depressurize the system, then unplug. 2) Flush the line with clean water (or compatible solvent) to remove residual paint. 3) Remove the nozzle and clean the tip and filter; reinsert securely. 4) Inspect seals and packing for wear; replace if needed. 5) Confirm tip size matches material; adjust pressure if required. 6) Reassemble, prime with water, and test on a scrap surface before spraying material. 7) If spit-back persists, repeat with fresh parts or consider a deeper service.
Safety, maintenance, and prevention
Always wear eye protection and gloves when handling sprayers. Depressurize the system before any disassembly. Use the correct tip size for your material and keep the nozzle and filter clean to prevent buildup. Store the sprayer in a clean, dry area to avoid moisture and new clogs. Schedule regular maintenance checks to catch worn seals or leaking fittings early.
Key takeaways and prevention tips
- Clean the nozzle and filter to prevent spit-back
- Use the right tip size for your material
- Maintain regular cleaning to reduce future spatters
- Always depressurize and unplug before disassembly
Steps
Estimated time: 45-60 minutes
- 1
Power down and depressurize
Turn off the sprayer, unplug, and relieve any pressure in the line by triggering a safe spray into a waste container or by following the manufacturer’s depressurizing procedure. This prevents accidental spray and protects you.
Tip: Double-check that the system is fully depressurized before touching fittings. - 2
Flush the line with solvent or water
Connect a clean container and flush the line to remove dried paint and debris. Run several cycles until the output is clear. This step often resolves air-related spit-back.
Tip: If you’re testing with water, ensure the solvent is compatible with your material when you switch to paint. - 3
Disassemble nozzle and clean components
Remove the nozzle and wipe or soak the tip and filter in the appropriate solvent. Use a soft brush to clear resin buildup without scratching seals or gaskets.
Tip: Keep track of small parts; lay them out in order to reassemble correctly. - 4
Inspect seals and packing
Look for cracks, wear, or hardening on seals and packing. Replace any signs of damage to restore airtight seals and consistent flow.
Tip: Use OEM parts when possible to ensure proper fit and seal integrity. - 5
Verify tip size and material compatibility
Check that the tip size suits the viscosity of your material. A mismatch can cause restriction and spurts. If needed, switch to a larger or smaller tip and retest.
Tip: Consult your material’s viscosity guidelines before changing tips. - 6
Reassemble and test with water
Reassemble all parts, re-prime with water, and run a test spray on scrap material or water to confirm a smooth spray.
Tip: Document your test results for future reference. - 7
Test with actual material and adjust
Once the water test looks clean, run a small quantity of the actual material to ensure the spray is stable. Adjust pressure and tip as needed.
Tip: If issues continue, consider deeper service or professional help.
Diagnosis: Sprayer spits/puffs of paint instead of a smooth spray
Possible Causes
- highAir in line or at seals
- highClogged nozzle or filter
- mediumIncorrect tip size for material
- lowWorn seals or packing
Fixes
- easyFlush and bleed the line; re-prime the pump
- easyRemove nozzle; clean or replace; clean filter; inspect seals
- easyChoose correct tip size; adjust pressure; thin material if necessary
- mediumReplace worn seals or gaskets; reseal connections
Your Questions Answered
What causes a paint sprayer to spit?
Spitting is usually due to air in the line, a clogged nozzle or filter, an incorrect tip size for the material, or worn seals. Start with a thorough clean and flush before replacing parts.
Spitting is typically caused by air or dried material blocking the nozzle or filter. Begin with cleaning and flushing, then check seals if needed.
How do I fix a spray gun that spits?
Flush the system, clean or replace the nozzle and filter, reseat seals, and verify the tip size and pressure meet the material requirements.
Flush and clean, then replace clogged parts and check the tip and pressure.
Can I test with water before using paint?
Yes. Testing with water helps confirm a smooth spray without risking material waste. Always follow the manufacturer’s testing procedure.
Testing with water is fine to verify spray quality before loading paint.
When should I replace seals or gaskets?
Replace seals or gaskets if you notice leaks, cracks, or hardening. Worn seals are a common source of air ingress and spit-back.
If seals show wear or leaks, replace them to prevent future problems.
Is it worth hiring a pro for spray issues?
For persistent spit-back after basic maintenance, a professional service can diagnose internal wear and replace worn components safely.
If it still spits after basic fixes, consider a pro for deeper diagnostics.
Can material viscosity cause spitting?
Yes. Materials that are too thick for the chosen tip or pressure can cause spitting. Adjust viscosity, tip size, and pressure accordingly.
Thick material can cause spit-back; adjust the setup.
Watch Video
Quick Summary
- Clean the nozzle and filter to prevent spit-back
- Use the correct tip size for your material
- Maintain regular cleaning to reduce future spatters
- Depressurize and unplug before disassembly