Why You Need to Paint Two Coats: A Practical Guide
Learn why two coats are essential for hiding power, color depth, and durability. Practical steps, surface prep, timing, and cost considerations for durable, vibrant results.

Two coats are often essential for smooth, even color and lasting coverage. This guide explains when a second coat is required, how to prep surfaces, and the best sequencing for interior and exterior projects. You’ll learn timing, product choices, and cost considerations to achieve a professional finish. Whether you’re painting walls, cabinets, or metal surfaces, the two-coat rule improves durability and color depth. This snippet confirms the approach and sets expectations.
The Core Reason Why Two Coats Matter
If you're asking why do you need to paint two coats, the short answer is hiding power, color depth, and durability. A single thin layer can look uneven, show underlying stains, or lean toward the color of the surface beneath. Two coats build a uniform film that blocks underlying tones and creates a consistent finish. According to PaintQuickGuide, two coats are often essential for achieving professional results across most interior walls, cabinetry, and metal surfaces, especially with high-pigment paints and bold colors. In practice, the first coat lays down the base and fills minor imperfections; the second coat seals the color, evens tone, and enhances durability by forming a continuous, defect-resilient film. This isn't about wasted materials; it's about a durable, visually even result that resists scuffs and wear over time. Plan on a second coat whenever you face porous substrates, highly contrasting colors, or finishes that demand long-lasting coverage.
When a Second Coat Is Essential
There are several situations where a second coat makes sense. Bold colors over a light base often require a second pass to ensure the hue is true and uniform. Surfaces with stains, water damage, or repair patches benefit from a second coat to even out tone and hide repairs. When the first coat dries, it may still show lap marks or uneven sheen on flat walls or textured surfaces. PaintQuickGuide highlights that two coats provide the best hide on porous substrates and reduce the risk of color slivers showing through. Finally, if you’re repainting from a very dark shade to a much lighter one, plan for two coats to prevent stubborn undertones from peeking through.
Surface Type: Porous vs Non-Porous
Porous surfaces—like unprimed drywall, plaster, concrete, or wood—absorb primer and paint unevenly, which often necessitates a second coat to achieve even color and coverage. Non-porous surfaces—such as metal, finished wood, or sealed drywall—tend to hold color more uniformly but may still benefit from two coats when switching from a dark to a bright color or when using high-viscosity paints. The key is to assess porosity, blotching, and the existing finish. If the surface is rough or patched, you’ll likely need two coats to achieve a flawless look. On truly perfect surfaces, a single, well-applied coat with proper drying can suffice, but two coats are a safer bet for professional results.
Color and Coverage: Light vs Bold Colors
Light colors can require two coats less often than bold colors, which tend to reveal underlying tones more readily. Two coats help achieve true color depth and consistency across large areas. When applying bold colors, you may notice fewer color shifts if you apply a mid-tone base or a tinted primer, which can sometimes reduce the need for a second coat. In practice, expect to use more paint with bold hues, but the payoff is a richer, more uniform finish that looks intentional and durable across walls, cabinets, or furniture.
Prep for Two-Coat Success
Preparation is the foundation of a successful two-coat project. Start by thoroughly cleaning the surface to remove dust, grease, and wax. Repair any cracks or holes with filler, then sand smooth and remove dust. If the surface is glossy, scuff lightly with sandpaper to improve adhesion. Mask off trim and adjacent surfaces to create crisp lines. Finally, choose compatible primers and paints and ensure you have enough product for two coats. Good prep reduces the risk of peels, blisters, and uneven color after the second coat.
Primer: Do You Need It Before Two Coats?
Primer can be a game changer for two-coat projects, especially on porous or repaired surfaces, or when changing from a dark to a light color. A primer improves adhesion, reduces stain bleed, and often enhances coverage for the first coat. If you’re working with new drywall, stained surfaces, or a slick finish (like enamel), primer is a wise investment before the first coat. Some projects can skip primer if the surface is in excellent condition and the new color is similar in opacity to the old one, but when in doubt, primer helps ensure the second coat goes on evenly and true.
Application Order: Primer, First Coat, Second Coat
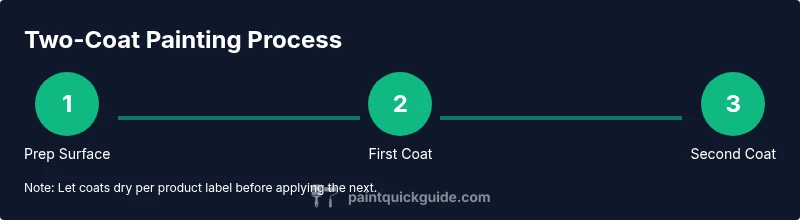
The typical sequence is: prepare the surface, apply primer if needed, apply the first coat evenly, allow to dry fully, then apply the second coat. Each coat should be applied in consistent, overlapping strokes to minimize lap marks. After the second coat, inspect for coverage and evenness. Touch up any missed areas, then allow the final coat to cure according to the product instructions. This order minimizes waste and maximizes color accuracy and durability.
Drying and Curing Times: Timing Your Second Coat
Wait for the first coat to dry to the touch according to the product label before applying the second coat. Drying times can vary with humidity, temperature, and paint type. If you’re unsure, perform a light touch test in an inconspicuous area. Avoid extreme heat or humidity during painting, as it can cause peeling or wrinkling. Proper ventilation helps the paint cure evenly, which improves finish and durability over time.
Tools, Materials, and Product Choices
Choose tools that promote even application and reduce texture buildup. A quality 3/8 inch nap roller is a good general-purpose choice for walls; use a 1/4 to 3/8 inch nap for smoother surfaces like drywall. Use angled brushes for cut-ins along edges and corners. Select a compatible primer and two-coat-ready paint with the desired sheen. Keep extra rollers, trays, and painter's tape handy. High-quality brushes and rollers save time and produce a smoother finish, especially on larger projects. Refer to the project notes for specific brand and product recommendations.
Cost Considerations: Budgeting for Two Coats
Two coats naturally increase material costs compared to a single coat, but the savings from fewer touch-ups and improved durability may offset this. When budgeting, factor in primer (if used), paint for two coats, and extra supplies like tape, drop cloths, and brushes. If you’re painting over a strong pigment or staining surface, plan for additional coats or specialized primers. Keep in mind that higher-quality pigments often provide better hiding power, possibly reducing the number of coats needed, but at a higher upfront cost. A simple calculation of paint volume, coverage per gallon, and coats required helps you estimate costs more accurately.
Common Mistakes and How to Avoid Them
Common mistakes include skipping prep, skimping on drying time, and applying coats in overly thick layers. Thick coats are prone to drips and uneven curing, causing a rough finish that requires sanding and a third coat. Inconsistent roller technique can leave lap marks, and failing to protect adjacent surfaces leads to unplanned touch-ups. Always follow the manufacturer’s recommendations for drying times and recoat windows. Testing a small area first helps identify issues before tackling an entire room.
Quick Start Checklist for Your Project
- Inspect surface for damage; repair and sand as needed
- Clean surface and remove dust
- Mask edges and protect floors
- Prime if the surface is porous or you’re switching colors
- Apply first coat evenly; allow to dry
- Apply second coat and inspect coverage
- Touch up as needed; remove tape and clean tools
- Allow final cure time before heavy use
Tools & Materials
- drop cloths(Protect floors and furniture from paint splatters)
- painter's tape(For crisp edges and masking trim)
- drop cloths or old sheets(Cover hard floors and furniture)
- roller frame with roller cover (1/4-1/2 inch nap)(For smooth to lightly textured walls)
- angled paintbrushes (2–3 inch, 1 inch)(Cut-in along edges and corners)
- paint tray and liners(Keep paint evenly loaded on roller)
- sandpaper (120-220 grit)(Smooth glossy or repaired areas)
- primer(Required for porous surfaces or color changes)
- paint (two coats worth)(Choose appropriate sheen and color)
- paint thinner or water (depending on paint type)(Only for cleanup or thinning if recommended)
Steps
Estimated time: 3-6 hours
- 1
Inspect and prep surface
Check for damage, clean, sand, and patch as needed. This creates a uniform base and improves adhesion for both coats.
Tip: Wear a dust mask and safety glasses while sanding. - 2
Choose materials
Select primer (if needed), paint type, and finish. Ensure colors are ready for two coats and match the project requirements.
Tip: Test a small swatch to preview color depth. - 3
Prime (if needed)
Apply primer to porous or repaired areas to improve coverage. Let it dry fully before coating.
Tip: Primer helps avoid patchy or blotchy areas under the top coats. - 4
Stir and prepare
Stir paint thoroughly and pour into the tray. Load the roller evenly to prevent thick spots.
Tip: Avoid air bubbles by rolling in multiple directions. - 5
First coat
Apply a smooth, even layer with consistent pressure. Use light, overlapping strokes for uniform color.
Tip: Cut in edges with a brush before rolling large areas. - 6
Dry and inspect
Let the first coat dry according to product guidelines. Inspect for coverage gaps or patches that may need a touch-up.
Tip: Check under different lighting to catch missed spots. - 7
Second coat
Apply the second coat with the same technique as the first. This builds depth and hides the base color entirely.
Tip: Keep a wet edge to prevent lap marks. - 8
Final checks and cleanup
Inspect overall coverage, remove masking tape while paint is tacky or dry to the touch, and clean tools thoroughly.
Tip: Dispose of rags safely to prevent spontaneous combustion.
Your Questions Answered
Do you always need two coats?
Not always. Some surfaces and colors may only require one coat if the base is clean, the color is similar, and hiding power is sufficient. However, for bold colors, stains, or porous surfaces, a second coat is often advisable.
Not always. Some jobs may only need one coat, but bold colors and porous surfaces usually need two for even color and durability.
When can you skip the second coat?
You can skip it if the first coat provides complete coverage and the color is not changing dramatically. Always test a hidden area before deciding.
You might skip it if the first coat fully covers and color change isn’t dramatic, but test a small area first.
How long should you wait between coats?
Wait until the first coat dries to the touch and reaches its recommended hardness before applying the second coat. Check the product label for exact guidance.
Wait for the first coat to dry to the touch per the product label before applying the second coat.
Does primer count as a coat?
Primer is a base layer, not a finish coat. It improves adhesion and coverage, and it can reduce the number of top coats needed.
Primer is a base layer that helps the top coats look better and cover more evenly.
Can surface prep reduce the need for a second coat?
Yes. Thorough prep, including cleaning, sanding, and repairing, can improve adhesion and sometimes reduce the number of coats needed.
Good prep can help you avoid extra coats and get a smoother finish.
Is two coats always necessary for exterior surfaces?
Exterior projects often benefit from two coats for durability and color longevity, particularly in challenging weather or high-UV areas.
For exteriors, two coats are commonly recommended to withstand weather and sun.
Watch Video
Quick Summary
- Two coats improve hiding power and color depth.
- Prep and priming are critical for a flawless finish.
- Porous substrates often need primer and two coats.
- Wait for proper drying between coats to avoid issues.
- Quality tools and controlled technique yield professional results.