What to Use for Spray Paint Art: A Practical Guide
Discover essential supplies for spray paint art—paints, caps, primers, safety gear, and techniques. Practical tips for beginners and DIY artists to achieve clean lines, bold textures, and durable finishes.

Goal: Learn how to pick the best sprays, caps, and protective gear for spray paint art, plus practical tips for layering and cleanup. You’ll understand which caps and brands deliver consistent results, how to choose nozzle sizes for different effects, and how to set up a safe, ventilated workspace. By the end, you’ll be ready to start creating with confidence.
Why spray paint art benefits from the right materials
Spray paint art is as much about the tools you choose as the technique you apply. The right materials give you control over texture, color density, and edge definition, while reducing the risk of drips and uneven coverage. When you start with quality paints, reliable caps, and proper safety gear, you create a solid foundation for experimentation. According to PaintQuickGuide, selecting the correct spray formats and cap geometry is the foundation of predictable results, especially for beginners who are learning to layer. Begin with a clean surface or prepared canvas, a ventilated workspace, and a restrained color palette to develop your technique before expanding to complex compositions. Testing on scrap material helps you gauge spray pressure, flow, and cap type, so you can calibrate your setup without wasting precious stock. Consistency in your baseline materials saves time and reduces frustration as you push for bolder textures and advanced masking later on.
As you advance, you’ll notice how the surface texture (smooth, rough, or glossy) interacts with your paint. A quick test panel lets you compare line quality, opacity, and drying time under your light conditions. Keep a small color notebook or digital swatch library to track which brands perform best on certain surfaces. This systematic approach reduces guesswork and improves repeatability in your designs. The PaintQuickGuide team emphasizes that establishing a reliable material kit is the first step toward expressive, repeatable spray art.
If you’re unsure where to start, begin with a minimal set: a few basic colors, a couple of cap types, a primer, a compatible clear top coat, and a respirator. Once you’re comfortable, you can expand your palette and experiment with metallics, pearls, or pearlescent finishes to add depth. Remember that the goal is to build confidence and control through practice, not to overwhelm yourself with too many products at once.
Tools & Materials
- Aerosol spray paints (various colors)(Choose high-quality, fast-drying formulas; consider water-based or low-odor options for indoor use.)
- Nozzle caps (assorted sizes)(Include fine-detail caps (0.2-0.4 in) and larger coverage caps (0.5-1 in) for texture variety.)
- Primer and clear coat(Primer improves adhesion; apply a clear sealer to protect color and adjust sheen.)
- Respirator or organic vapor mask(NIOSH-approved with organic vapor cartridges; replace filters as needed.)
- Safety glasses or goggles(Protect eyes from overspray and fumes.)
- Drop cloths or old newspapers(Shield floors and surrounding objects from overspray.)
- Ventilation setup (fans, open window)(Create continuous airflow; avoid confined spaces.)
- Stencils and masking tape(For crisp edges and negative space effects.)
- Solvent or odor-neutral cleaner(Use in well-ventilated areas for quick cleanup.)
- Work gloves(Protect hands from solvents and paint transfer.)
- Sandpaper or fine steel wool(Lightly scuff surfaces for better adhesion on slick materials.)
- Palette or mixing cups(For testing colors and blending before applying to the final piece.)
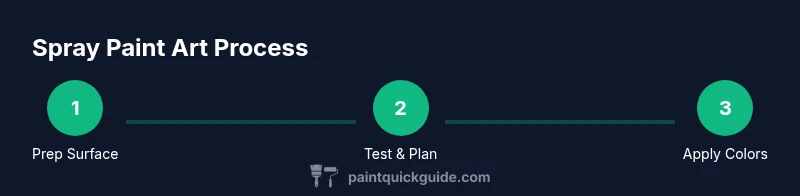
Steps
Estimated time: Active work: 3-6 hours; drying and curing: 24+ hours for final seal
- 1
Set up a ventilated workspace
Choose a well-ventilated area, ideally with a door or window to create airflow. Lay down drop cloths, arrange your paints and caps within arm’s reach, and put on your respirator and eye protection. This step reduces inhalation risks and keeps your work area clean as you begin. Take a moment to wipe surfaces and test spray on a scrap panel to confirm your cap choice and color density.
Tip: Position a small fan to direct fumes away from your face and keep humidity stable for more predictable drying. - 2
Prepare the surface
Clean the surface to remove dust, oils, and residues. If needed, sand glossy finishes to create a rough texture that helps paint adhere. Wipe again with a tack cloth before applying primer. A well-prepped surface yields crisper edges and longer-lasting color.
Tip: For curved or textured surfaces, use a light primer mist before a full coat to even out irregularities. - 3
Test spray and adjust
Spray a quick test patch on a scrap panel to dial in pressure, distance, and cap type. Note how the paint mists, how quickly it dries, and how it covers on the surface. Adjust your distance (6-12 inches is typical for base layers) and cap choice as needed.
Tip: Keep a log of cap types for each color so you can reproduce the effect later. - 4
Apply base layers
Begin with light, even coats to establish the background color and tone. Build up gradually, allowing each layer to dry before adding more. If you’re layering different colors, use strategic timing to prevent muddy blends. Keep movements smooth and consistent to avoid heavy concentrations that cause drips.
Tip: Use a sweeping motion with a slightly angled nozzle to prevent blobs. - 5
Add texture and details
Switch caps for texture work—use finer accents for lines and broader caps for soft gradients. Layer colors strategically, letting some edges bleed for organic transitions. Mask or stencil areas to maintain sharp shapes where you want contrast.
Tip: Work from light to dark for easier control of depth and shadow. - 6
Mask and refine with stencils
Apply masking tape or stencils for precise shapes, negative space, or letterforms. Spray with controlled light strokes to minimize bleed. Remove stencils while paint is tacky to prevent peeling. Re-apply where you want crisp edges and repeat as needed.
Tip: Peel slowly to avoid lifting underlying layers. - 7
Seal and cure
Once color layers are complete, apply a clear coat suitable for your project (matte, satin, or gloss). Allow adequate curing time in a dust-free area. A proper seal protects the artwork from UV exposure and abrasion while enhancing color depth.
Tip: Check the product’s cure time and temperature recommendations for best results. - 8
Cleanup and storage
Clean caps and spray tips with the recommended cleaner, wipe down surfaces, and store paints upright in a cool, dry place. Label colors and keep a kid- and pet-safe zone around the work area. Proper storage extends shelf life and keeps materials ready for your next session.
Tip: Rinse and air-dry caps to prevent clogging and ensure smooth future sprays.
Your Questions Answered
What spray paints are best for art projects?
For indoor art projects, look for water-based, low-odor sprays with good pigment density. Outdoor pieces often benefit from durable, solvent-based formulas, but ensure proper ventilation and weather protection.
Water-based sprays are great indoors for ease and safety; solvent-based paints are tougher outdoors but require ventilation.
Do I need primer before spray painting?
Yes. Primer improves adhesion on smooth or glossy surfaces and helps even out texture, which leads to more uniform color and fewer coats.
Primer helps color stick and look even, especially on slick or uneven surfaces.
How long should I wait between coats?
Wait until the spray layer feels dry to the touch and no longer feels tacky. Drying times vary with temperature, humidity, and spray type; use light coats for faster drying.
Let each coat dry to touch before the next, to avoid unwanted blending or runs.
Is it safe to spray indoors with ventilation?
Ventilated spaces reduce fume exposure, but spray painting indoors still carries risk. Use a dedicated spray booth or outdoor area if possible, and wear protective gear.
Ventilation helps, but try to spray in a well-ventilated area or outdoors.
How should I dispose of empty spray cans?
Follow local hazardous waste guidelines. Do not puncture cans; take them to a recycling or hazardous waste facility when empty.
Check your city’s rules for disposing of spray cans at approved facilities.
Can I spray over dried layers to fix mistakes?
Yes, after a thin dry layer you can recoat or adjust. Avoid piling on too many layers in one session to prevent cracking or clumping.
You can fix mistakes with a light recoat after the previous layer dries.
Watch Video
Quick Summary
- Prepare a ventilated workspace before spraying.
- Test colors and caps on scrap panels first.
- Layer gradually and use masking for clean edges.
- Seal with an appropriate top coat after drying.
- Store materials properly to extend shelf life.