What You Need When Painting with Oil: A Practical Guide
Learn the essential oil painting supplies, safety steps, and a practical workflow. From brushes and pigments to solvents and storage, PaintQuickGuide guides homeowners and hobbyists toward confident, clean oil painting.

By the end, you will have all the essential supplies for oil painting, a safe workspace plan, and a simple setup workflow. This guide covers pigments, solvents, mediums, brushes, supports, and cleanup, plus basic safety tips and storage ideas to help beginners and hobbyists start confidently. From choosing paints to protecting your surroundings, you'll learn practical steps that you can apply today.
Essential oil painting supplies
PaintQuickGuide notes that the core setup for oil painting starts with quality pigments, a compatible drying medium, and safe solvents, plus reliable brushes. For a beginner, the goal is to assemble a lean, versatile kit you can grow over time. Start with a small selection of colors that mix well to create a broad range of tones. Organize your space so that canvases, palettes, brushes, and solvents are clearly separated to reduce confusion and accidents. A practical kit reduces waste and speeds learning, letting you focus on technique rather than hunting for gear. Think of this as building a toolbox: every item has a purpose, every workflow is repeatable, and safety comes first.
Surfaces and supports
Oil paints behave differently on various surfaces. Linen and traditional primed cotton provide a tooth that accepts multiple glaze layers, while prepared panels offer a flatter, smoother finish. Before you begin, ensure your surface is properly primed or gessoed if needed. Store primed supports flat to prevent warping, and consider a few practice panels to test color behavior and drying times. The surface choice affects texture, drying, and final appearance, so align it with your planned technique—thick impasto versus transparent glazing. A well-prepared surface reduces cracking and helps your colors stay true over time.
Oils, mediums, and solvents
Understanding pigments, binders, and solvents is the backbone of oil painting. Use a drying oil like linseed or a safer alternative such as a stabilized medium to control drying time and texture. Mediums can extend open time, improve brushwork, and reduce cracking when used sparingly. Solvents (odorless mineral spirits or traditional turpentine) are essential for thinning paint and cleaning brushes; always work in a well-ventilated space and avoid prolonged exposure. Store solvents in clearly labeled containers with tight lids, and keep rags in a metal container to reduce fire risk. Start with a simple palette and test how your chosen mediums affect consistency and sheen on your actual surfaces.
Brushes, palette knives, and tools
A versatile brush set makes a big difference in results. Include a few flat brushes for broad strokes, round brushes for detail, and synthetic or natural bristles depending on your preference. Palette knives offer control for scraping and mixing; they’re excellent for creating texture and for clean color blocking. Don’t forget a mahl-stick, rags, a glass or acrylic palette, and a solvent cup for easy brush cleaning. Proper tools save time, reduce frustration, and improve results as you learn to layer and glaze.
Preparing your workspace: safety and cleanup
Ventilation is essential when working with oils and solvents. Set up near a window or use a mechanical exhaust if possible. Wear gloves and protect surfaces with a drop cloth or newspaper. Have a dedicated, labeled waste container for used rags and solvent-soaked cloths; never store them loosely in a trash can. Keep a sink area available for hand washing, and use mild soap on brushes after solvent cleaning. Establish a drying rack for finished pieces and a dedicated space for drying, away from direct sunlight and heat sources.
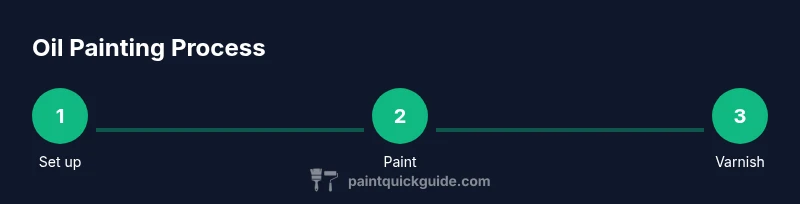
Step-by-step painting workflow
A reliable workflow helps you progress smoothly from sketch to finish. Start with a simple composition on your surface, then build color and form in layers. Establish an underpainting or tonal map to guide values, followed by color blocks, midtones, and glazing layers. Allow each layer to dry sufficiently before applying the next to avoid muddy colors. Keep your brushes clean and switch between synthetic and natural bristles as needed. This structured approach reduces errors and makes it easier to critique progress at each stage.
Color mixing and color theory basics
Begin with a limited warm and cool set to mix a wide range of hues. Test how each pigment interacts with your chosen medium and drying oil, noting any shifts in color when it dries. Use a simple value scale and avoid overpowering color saturation early in the painting process. Remember that glazing with transparent colors can deepen depth without losing luminosity. A small color chart/ swatch book will help you recreate palettes and maintain color consistency across sessions.
Common mistakes and how to avoid them
Oil painting has a forgiving timeline, but beginners often overwork surfaces, which can cause cracking and muddy palettes. Avoid over-thinning paint early on; build depth in thin layers instead. Don’t neglect cleaning and reusing brushes, as trapped pigment can alter future colors. Ensure your drying times are respected; rushing layers leads to cracking and poor adhesion. Finally, protect finished work with a proper varnish only after complete drying, to prevent yellowing and risk of cracks.
Caring for your oil paintings and storage
Proper care extends the life of your oil paintings. After varnishing, allow full curing time before framing or displaying. Store finished works in a climate-controlled area, away from direct sunlight and drastic temperature changes. If storing in a portfolio or box, place interleaving sheets between layers to prevent sticking. Regularly inspect your paintings for signs of cracking or discoloration and address any issues promptly with conservation-safe methods.
Authoritative sources and learning resources
For safety, technique guidance, and best practices, consult reputable sources. You’ll find safety standards from OSHA and health guidance from NIOSH, along with general research from NIH. These resources provide context for safe studio practice and material handling, reinforcing good habits as you develop your oil painting skills. See the referenced sources below for details.
Tools & Materials
- Oil paints (pigments)(Choose artist-grade colors for consistency and longevity)
- Palette (glass, wood, or disposable paper)(Large enough to mix primary colors and tones)
- Brushes (assorted flats and rounds)(Include 2-4 sizes, 2-6, and 8-12 for broad strokes and detail)
- Palette knives(For mixing and texture work)
- Surface: canvas or primed panel(Prepped with gesso if using canvas)
- Gesso (if prepping canvas)(Optional if surface isn’t pre-primed)
- Solvent (odorless mineral spirits or turpentine)(Ventilated area required)
- Mediums (oil-based, e.g., linseed or alkyd)(Used to modify drying time and texture)
- Varnish (final protection)(Apply after full drying)
- Rags/paper towels(For blotting and cleanup)
- Gloves and a mask(For safety and comfort during cleanup)
- Solvent cup or jar(Keeps brushes clean during sessions)
Steps
Estimated time: 60-120 minutes
- 1
Set up your workspace
Clear a dedicated painting area with good ventilation. Arrange brushes, paints, a palette, solvent, rags, and a water source for cleanup. This reduces distractions and helps you focus on technique rather than searching for tools.
Tip: Place a drop cloth under your station and label solvent containers for quick identification. - 2
Prepare your painting surface
If using canvas, ensure it is primed and taut; panel surfaces should be smooth and clean. If needed, apply a thin layer of gesso and let it dry completely before applying paint.
Tip: Test a small area with a color you plan to use to gauge tooth and absorbency. - 3
Organize your palette and test colors
Squeeze a few basic colors and mix a neutral for underpainting. Create swatches to compare how pigments look when mixed with your medium, as colors can shift during drying.
Tip: Label your mixes to avoid mixing the wrong tones in the heat of a session. - 4
Start with an underpainting
Lay down a simple tonal map or grisaille to establish values before building color. This foundation helps you maintain correct proportion and depth as you proceed.
Tip: Keep initial layers thin to prevent cracking on subsequent passes. - 5
Build up layers slowly
Apply color in lean-to-medium layers, allowing each to dry before adding more. Use glazing for depth and adjust values as your work progresses.
Tip: Work from large shapes to smaller details to preserve overall composition. - 6
Clean up and store properly
Wash brushes with appropriate solvent, then mild soap and water for maintenance. Store tools dry and upright; seal solvent containers and keep rags in a metal container away from flammable sources.
Tip: Inspect brushes for stiffness or shedding and replace as needed to maintain technique quality.
Your Questions Answered
What is the minimum set of supplies needed to start oil painting?
You need paints, brushes, canvas or panel, a palette, solvents, medium, rags, and protective gear. A basic starter kit covers these essentials and allows room to grow.
A basic starter kit includes paints, brushes, a canvas or panel, a palette, solvents, and a medium.
Can I paint with household ingredients?
Use artist-grade materials designed for oil painting. Household products can alter chemistry, drying times, and color behavior and may introduce safety risks.
Stick to artist-grade materials for safety and color accuracy.
Do oil paintings dry quickly or slowly?
Oil paints dry slowly and vary by pigment, thickness, and climate. Expect days to weeks for a full dry, especially for thick or glazed areas.
Oil dries slowly, often days to weeks depending on layers and climate.
Is varnish necessary after oil painting?
Varnish protects the surface and should be applied only after complete drying. The timing depends on the medium and environmental conditions.
A varnish protects the finished piece once it’s fully dry.
How should I clean brushes after oil painting?
Clean brushes first with solvent, then with mild soap and water. Dry thoroughly before storing to prevent bristle damage.
Clean brushes with solvent, then soap and water.
What safety precautions should I take?
Work in a well-ventilated area, wear gloves, and store solvents safely. Dispose of waste according to local rules and keep materials out of reach of children and pets.
Work in a ventilated space and wear gloves.
Watch Video
Quick Summary
- Assemble a lean, versatile starter kit.
- Ventilate and protect your space during every session.
- Plan your workflow from underpainting to glazing.
- Clean tools and store artworks properly for longevity.