Stained Glass with Paint: A Practical Guide for DIYers
Practical, step-by-step guidance on painting stained glass with enamel paints, safety considerations, firing, and long-term care for DIYers and hobbyists.

You will learn how to paint stained glass with vitreous enamel, including surface prep, color layering, firing, and care. This guide covers safety, tool choices, and a clear step-by-step process you can follow at home or in a studio. A kiln or glass-firing oven is typically needed to fuse the paint for lasting color.
Understanding stained glass with paint
Stained glass with paint blends traditional glassworking with modern surface decoration. Rather than cutting new glass pieces for every color, you can add color and detail by applying vitreous enamel paints that fuse to the surface during firing. This technique is popular for customizing panels, lampshades, and small decorative panes. It offers vibrant color, precise control, and the ability to revise a design before final firing. According to PaintQuickGuide, the key to success is clean glass, compatible enamel formulations, and a properly controlled firing cycle. When done well, painted glass remains bright, durable, and resistant to light fading. If you are new to glass painting, start with simple shapes and limited color palettes to build confidence before tackling complex compositions.
On the other hand, traditional leaded or copper-foil stained glass achieves color through colored glass pieces joined with lead came or copper foil. painted glass sits on the opposite end of the spectrum, providing a layer of color that can be applied to existing glass without reworking the entire panel. This makes the technique accessible for hobbyists who want to experiment with shading, line work, and fine details. The success of stained glass with paint hinges on choosing the right pigments, maintaining surfaces, and observing safe firing temperatures. You will find that planning your color map and test-swatching on scrap glass saves time and prevents costly mistakes later. In short, this method opens up expressive possibilities while preserving the glass’s inherent beauty.
Why readers love this approach: it’s forgiving for practice, yields striking color, and can be used on a variety of glass surfaces, including upcycled or decorative pieces. The PaintQuickGuide team emphasizes starting with a clean, oil-free surface and selecting vitreous enamels formulated for glass. A careful approach reduces waste and improves the likelihood of a successful fusion during firing.
Safety first: health, ventilation, and materials
Painted glass work involves pigments, solvents, and high-temperature firing. Proper safety practices protect you and others in your workspace. Lead-containing pigments exist in some legacy colors, so you should avoid inhaling dust and keep paints away from heat sources when uncured. Work in a well-ventilated area; wear a respirator or at least a properly fitted mask, safety goggles, and gloves. Keep children and pets away from the work area during cleaning and firing. Always read the enamel manufacturer’s safety data sheet (SDS) before mixing colors or using thinners. After firing, wash hands and surfaces to remove any residue. PaintQuickGuide’s recommendations emphasize planning for safe ventilation, using dedicated tools, and disposing of waste according to local regulations.
Materials and color strategies for stained glass painting
Selecting the right paints determines durability and clarity. Vitreous enamels are designed to fuse at high temperatures, producing a durable, dishwasher-safe finish when sealed by firing. Transparent enamel layers create luminous, stained-glass-like effects, while opaque colors can be used for bold accents and details. Color strategy matters: plan a light-to-dark order to preserve visibility of lines and shapes, and consider layer transparency to simulate shading and depth. Mixing colors on a glass palette allows for subtle gradients and blended tones. For outlines, a fine brush or 'line work' using a dark enamel adds definition without compromising luminosity. The workflow often includes swatching on spare glass to confirm hue temperatures and glaze compatibility before applying to the final piece. PaintQuickGuide suggests testing a few swatches on similar glass to anticipate color shifts after firing.
Techniques: applying paint, layering, shading, and details
Begin with a clean slate and plan your color map. Apply base colors in thin, even coats to avoid pooling, which can cause crystal formation during firing. Build layers gradually, allowing each layer to dry completely before adding next colors or details. When painting details such as veins, highlights, or fine textures, use a small pointed brush for crisp lines. For shading, mix slightly darker hues and apply along suggested light sources to create depth. You can also use dotting or stippling techniques to mimic glass texture or to simulate lead lines without permanently embedding them in the panel. After completing the design, inspect for areas that need touch-ups and schedule the firing in a kiln. A controlled ramp rate minimizes stress on the glass and reduces the chance of cracking.
Maintenance and troubleshooting for long-lasting results
Once fired, painted stained glass requires minimal maintenance beyond regular cleaning. Use a soft brush or microfiber cloth to remove dust; avoid abrasive cleaners that could scratch the enamel surface. If you notice color loss or dullness after sun exposure, a re-fire with a glaze touch-up may be needed. Store finished pieces in a climate-controlled area to reduce thermal stress. If you encounter crazing, check your firing schedule and temperature ranges; overly aggressive ramp rates or excessive temperatures can cause micro-cracks. For permanent installation, consider applying a protective clear coat compatible with vitreous enamel, if you intend to hang or expose the piece to elements. PaintQuickGuide emphasizes documenting each project’s color map and firing parameters so you can replicate successful results in future work.
Tools & Materials
- Glass cleaner(Remove oils and residues before painting)
- Isopropyl alcohol (70-90%)(Wipe surfaces after cleaning and degreasing)
- Painter's tape(Mask sections to protect from accidental paint)
- Vitreous enamel paints(Special glass paints that fuse under firing)
- Fine glass brushes (0-5/0-10 tip)(Detail work and thin lines)
- Kiln or glass firing oven(Fuse enamel paints at appropriate temperature)
- Safety gear (gloves, respirator, goggles)(Protect skin and lungs during painting and firing)
- Palette or mixing cups(Label colors and keep color separation)
- Distilled water and mild detergent(For gentle cleaning and thinning if needed)
- Soft cloths or squeeges(For smoothing and removing excess paint)
Steps
Estimated time: Total time: 2-6 hours (including drying and firing)
- 1
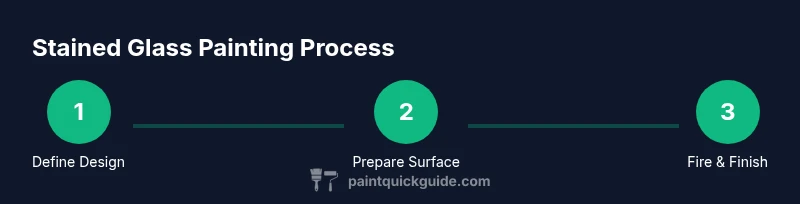
Define design on glass
Sketch your motif on tracing paper and transfer to glass with a gentle pencil or marker. Ensure line weight is clear enough to guide painting, and plan where colors will go. A well-defined design reduces mistakes during painting and firing.
Tip: Test color order on a small scrap of glass before applying to the final piece. - 2
Prepare glass surface
Wipe the glass surface with cleaner and then with isopropyl alcohol to remove oils. Dry thoroughly to avoid paint spreading irregularly. A clean surface improves paint adhesion and color vibrancy.
Tip: Work in a dust-free area and verify the glass is at room temperature before painting. - 3
Mask and plan colors
Mask areas you don't want painted with painter’s tape. Decide a color hierarchy and lay out a tentative palette to minimize color changes during the session. This approach yields crisper lines and faster painting.
Tip: Label paint cups to prevent accidental color mixing. - 4
Apply first layer of enamel
Using a fine brush, apply a light, even wash of base color over intended areas. Avoid thick deposits that can lead to chipping or uneven firing. Allow this layer to dry completely before adding additional colors.
Tip: Keep brush tips clean to maintain even edges. - 5
Add detail and shading
Mix darker shades for outlines and lighter tones for highlights. Apply in thin lines and build color gradually. Let each layer dry fully to preserve sharpness and prevent color bleed.
Tip: Use a magnifying glass for ultra-fine lines if needed. - 6
Fire to fuse color
Place the piece in a kiln and fire following the enamel manufacturer's guidelines. Use a controlled ramp rate and a careful soak, then allow the piece to cool gradually to avoid thermal shock.
Tip: Never rush cooling; rapid changes can crack the glass.
Your Questions Answered
Do I need to fire the painted glass?
Yes. Vitreous enamel paints fuse to glass when fired in a kiln, creating durable, lightfast color. Air-dried paints may wash away or wear off over time.
Painting usually requires firing in a kiln for lasting color.
Can I use regular acrylics on stained glass?
Acrylics can be used for short-term experiments, but they are not as durable as vitreous enamels. They may craze or wear off with cleaning or sunlight.
Acrylics aren’t ideal for long-lasting stained glass.
What safety steps are essential?
Work in a well-ventilated area, wear PPE, and keep solvents away from heat. Handle glass with care to avoid cuts, and dispose of waste per local regulations.
Ventilation and PPE are essential for safety.
How long does firing take?
Kiln cycles vary; plan for a full firing schedule that includes ramp rate, soak time, and cooling. Check the enamel manufacturer’s instructions for exact times.
Kilns require a proper cycle; timing depends on enamel.
How should I care for a painted stained glass piece?
Dust gently with a soft brush or microfiber cloth. Avoid harsh cleaners; if needed, use mild soap and water and dry immediately.
Clean gently and avoid abrasive cleaners.
Watch Video
Quick Summary
- Plan design and color flow before painting.
- Use vitreous enamels for durable, fused color.
- Fire with a controlled ramp and proper ventilation.
- Protect yourself with PPE and handle glass safely.