Rabbit Paint: A Practical Guide for Home and Auto Projects
Learn how to select, prep, apply, and troubleshoot rabbit paint for walls and automotive surfaces. This practical guide covers safety, tools, steps, and tips to achieve durable, professional results in 2026.

By the end of this guide you will know how to choose, prep, and apply rabbit paint for both home and auto projects. You'll learn what to look for in quality rabbit paint, how to prep surfaces, and the best application techniques to achieve durable, even finishes. This quick-start overview sets you up for a safe, clean, and satisfying results in 2026.
What is rabbit paint and when to use it
Rabbit paint is a versatile, beginner-friendly painting option designed for interior walls, furniture, and select vehicle accents. In this guide we treat rabbit paint as a practical, low-odor, water-based option that performs well on wood, drywall, and lightweight metal. For homeowners and auto refinishing hobbyists, rabbit paint offers a straightforward path from bare surface to finished look with relatively short curing times. When used correctly, rabbit paint minimizes strong fumes and heavy cleanup while delivering durable color and a smooth finish. In 2026, the accessibility of rabbit paint makes it a reliable starting point for both DIY home projects and small automotive touch-ups. You’ll see this term used throughout PaintQuickGuide to describe a reliable family of paints that balances ease of use with respectable durability.
In everyday scenarios, rabbit paint shines on interior walls, kitchen cabinets, and hobby projects where moderate wear is expected. For auto refinishing, test the product on a small panel first, ensuring proper surface prep and a compatible clear coat. Always follow the manufacturer’s data sheet for drying times and ventilation recommendations. The goal is to achieve a clean, even finish with minimal lap marks and a uniform color lay-down.
Key differences from standard paints
Rabbit paint differs from traditional solvent-based or higher-VOC finishes in several practical ways. First, most rabbit paints are water-based, which reduces strong odors and simplifies cleanup with water and mild soap. Second, they typically cure faster to a usable surface, but may need a topcoat for extended durability on high-traffic walls or automotive panels. Third, bonding agents and primers vary by brand; ensure you have a compatible primer if you’re painting glossy surfaces, raw metal, or heavily stained wood. Finally, rabbit paints often feature lower environmental impact profiles, which is a meaningful consideration for indoor projects. Expect a slightly different sheen behavior than oil-based paints, and plan for a protective topcoat for long-lasting results.
When choosing rabbit paint, inspect the can label for low-VOC claims, water-based base, and the intended surface compatibility. For auto-related work, look for formulations rated for metal and plastic substrates, but be prepared to use an appropriate sealer or epoxy primer for enhanced adhesion on challenging surfaces. Always perform a patch test on a small area before committing to a full project.
How to choose rabbit paint for home vs auto projects
Selecting rabbit paint hinges on surface type, finish preference, and durability needs. For interior walls, prefer a sheen that balances washability and glare, such as eggshell or satin, and choose a formula labeled for high-traffic areas if you expect frequent cleaning. For cabinets and furniture, consider a semi-gloss or satin finish that cleans easily and resists scuffs. When moving to auto-related work, confirm the product is compatible with the material (metal, plastic, fiberglass) and whether a dedicated automotive clear coat is required to protect the color, resist UV fading, and withstand washing. If you’re painting a vehicle, consider a separate primer and a compatible topcoat to maximize durability and color match. Always perform a small test on an inconspicuous area to verify adhesion and color accuracy before committing to the full job.
In all cases, reading both the rabbit paint technical data sheet and the surface’s primer recommendations helps avert adhesion problems and peel-back issues later on. PaintQuickGuide recommends selecting a low-odor, low-VOC rabbit paint for interiors and ensuring the base and topcoat are compatible for any automotive application. Keep a color swatch or sample board handy to visualize how the final hue will look under your lighting conditions.
Note: Always work in a well-ventilated area and keep pets and children away during application and curing. The PaintQuickGuide team emphasizes safety first when experimenting with new finishes, particularly in smaller spaces.
Surface prep for rabbit paint
Preparation determines the success of any paint job. Start by clearing the area and laying down drop cloths to protect floors. Clean surfaces thoroughly to remove dust, grease, and wax that could impede adhesion. For walls, wash with a mild detergent and rinse; allow to dry completely. For metal or glossy plastics, scuff lightly with fine-grit sandpaper to create a mechanical key, then wipe away dust with a tack cloth. Remove peeling paint, repair cracks, and fill gouges where necessary. If staining or tannins bleed through, apply a stain-blocking primer before the rabbit paint. Sand again lightly after priming and sweep away all residue. The goal is a smooth, matte surface with no glossy patches that could cause uneven paint layers.
If priming is recommended by the manufacturer, apply thin, even coats and allow adequate dry time between layers. For auto surfaces, the prep may include sanding and degreasing with specialized cleaners; always follow the product’s guidelines for surface preparation. Correct surface prep minimizes grain raising, improves adhesion, and helps you achieve a consistent color finish.
Application techniques and timing
Apply rabbit paint using the method that suits the project: brush, roller, or spray. For walls and furniture, a high-quality synthetic brush will produce smooth edges, while a short-nap roller yields even coverage on flat surfaces. For automotive panels, you may prefer a spray technique with multiple light passes to avoid runs and sags. Test the technique on a sample board first to identify brush marks, roller texture, or spray pattern. Maintain a wet edge to prevent lap marks and work in controlled, evenly spaced strokes.
Start with a thin first coat and allow adequate drying time as recommended by the manufacturer. Two light coats generally outperform one heavy coat for durability and color consistency, especially with rabbit paint that has a lower build on porous surfaces. After the final coat, inspect for uniform coverage and color match. If you notice any streaks or patches, lightly adjust your technique and apply a second pass where needed. For auto projects, a clear coat is usually applied after the color has fully cured to protect the finish from UV damage and cleaning agents.
If spraying, ensure proper ventilation, wear a respirator, and mask off surrounding areas to protect from overspray. Clean spray equipment immediately after use, paying attention to thinning requirements that some rabbit paints may specify for spray application.
Safety, ventilation, and cleanup
Ventilation is essential when working with any paint, including rabbit paint. Open doors and windows when possible, and use a portable fan to create airflow that directs fumes away from the workspace. Wear protective gear such as nitrile gloves, eye protection, and a mask or respirator when applicable. Keep children and pets out of the area during application and cure times. If sanding, wear a dust mask to prevent inhalation of fine particles. After painting, clean brushes and rollers with warm water and mild soap unless the product specifies a different method. Dispose of used rags and solvents according to local regulations and allow the finish to cure fully before heavy use. Read the label for flash-off times and guidance on recoat windows.
Store rabbit paint in a cool, dry place away from direct sunlight. If spills occur, wipe them immediately while the surface is still wet to avoid staining. Always check local environmental guidelines for disposal of cans and used materials.
Pro tip: label your paint can with the project name and date to keep track of drying times and recoat windows.
Troubleshooting common issues
Common issues with rabbit paint include poor adhesion on slick surfaces, uneven coverage, and longer-than-expected dry times. If adhesion problems occur, ensure you have properly cleaned and abraded the surface and that you are using a compatible primer. For streaks or lap marks, adjust your technique to maintain a wet edge and apply lighter coats. If the color looks blotchy, ensure you have thoroughly stirred the paint to achieve a uniform pigment dispersion and avoid using paint straight from the can without thorough mixing. In hot or direct sunlight, drying times accelerate and can lead to brush marks; minimize sun exposure or work in cooler hours.
For automotive projects, scuff sanding between coats can improve adhesion of subsequent layers. If you notice fisheyes or cratering, check for oil or silicone contamination; use a dedicated cleaner and re-sand if necessary. Always test on a small panel first to catch issues before applying to the entire surface.
Maintaining and protecting your finished project
To maximize the lifespan of your rabbit paint finish, apply a suitable topcoat or sealant according to the product’s instructions. Regular cleaning with a soft cloth and mild detergent will help maintain the color and finish, while avoiding abrasive cleaners that could dull the surface. For walls, use touch-up kits that match the original color to fix minor chips or scuffs. Keep climate conditions consistent during cure and avoid high humidity, which can affect curing and adhesion. Periodically inspect the surface for signs of wear and recoat as needed to maintain a fresh appearance.
AUTHORITY SOURCES
- https://www.epa.gov/iaq/volatile-organic-compounds-vocs
- https://www.osha.gov
- https://www.cdc.gov/niosh
Tools & Materials
- Rabbit paint (water-based, low-VOC)(Choose the base and finish appropriate for the project)
- Paint brushes (synthetic, various sizes)(Flat and angled brushes for edges and corners)
- Rollers with short nap (4-6 mm)(Fine texture for smooth surfaces)
- Paint tray and liners(Keep clean/workable surface for loading)
- Stir sticks(Thoroughly mix to distribute pigment)
- Painter's tape(Mask edges and protect adjacent surfaces)
- Drop cloths(Protect floors and furniture)
- Respirator or mask(Use for spray applications or poorly ventilated areas)
- Primer (compatible with rabbit paint)(Block stains and improve adhesion)
- Topcoat/clear sealer(Protect the finished surface)
- Mild soap and water(Cleanup tools after painting)
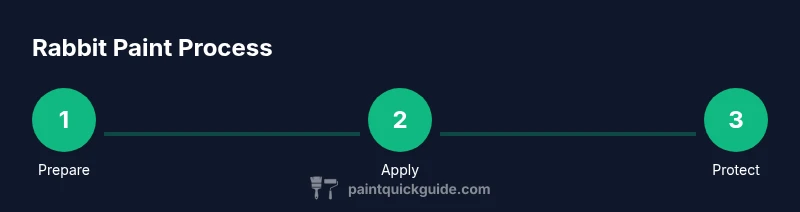
Steps
Estimated time: 60-90 minutes
- 1
Prepare workspace and surface
Clear the area, lay drop cloths, and clean the surface to remove dust, grease, and residues. A clean base ensures even coverage and prevents staining or adhesion issues.
Tip: Mask edges with painter's tape and protect nearby furnishings. - 2
Stir and test mix
Thoroughly stir rabbit paint to re-distribute pigments. Do a small test patch on a hidden area to confirm color and adhesion before full application.
Tip: Use a clean stirring stick and avoid air bubbles during mixing. - 3
Prime if needed
If the surface is glossy, raw metal, or stained, apply a compatible primer and let it dry completely according to the label.
Tip: Prime high-contrast areas to avoid color bleed. - 4
Load and load test
Load your brush or roller and test on a scrap board to gauge flow and coverage. Adjust technique as needed.
Tip: Load evenly; avoid overloading to prevent drips. - 5
Apply first coat
Apply a thin, even coat with long, smooth strokes. Maintain a wet edge to prevent lap marks and allow proper dry time between coats.
Tip: Work in sections to keep edges wet. - 6
Apply second coat and finish
After the first coat dries, apply a second coat for uniform color and durability. Inspect for streaks and touch up as necessary.
Tip: Lightly sand between coats if the product recommends it.
Your Questions Answered
What is rabbit paint and where is it best used?
Rabbit paint is a water-based finish designed for interior walls, furniture, and select automotive surfaces. It offers low odor and easy cleanup, making it a practical choice for DIY projects. Start with clean surfaces and test on a small area before full use.
Rabbit paint is a water-based finish ideal for walls, furniture, and some auto projects. Start with a small test patch to confirm adhesion and color.
Can rabbit paint be used on metal surfaces?
Yes, rabbit paint can be used on metal provided the surface is properly prepped and primed. For bare metal, use a compatible primer to promote adhesion and corrosion resistance before applying the rabbit paint.
Rabbit paint works on metal if you prep and prime the surface first.
Do I need a primer when using rabbit paint?
Primer is often recommended on glossy, stained, or porous surfaces to improve adhesion and color consistency. Always follow the rabbit paint’s guidance for primer compatibility and recoat windows.
Primer helps with adhesion and color evenness. Check the product’s instructions for compatibility.
What is the typical drying time for rabbit paint?
Drying time varies by product and conditions, but expect the first coat to dry within a few hours under normal room conditions. Complete curing and readiness for handling may require longer drying times as specified on the label.
Drying times depend on the product and temperature. Check the label for exact guidance.
How should I clean tools after painting with rabbit paint?
Clean water and mild soap are usually sufficient for rabbit paint tools. Wipe down brushes and rollers promptly to prevent hardening of pigment and extend tool life.
Wash brushes and rollers with soap and water right after painting.
Is rabbit paint suitable for high-traffic areas?
Rabbit paints rated for interior use can perform well in moderate-traffic spaces, but for high-traffic walls or auto surfaces, a topcoat or protective sealant will enhance durability and washability.
For busy areas, finish with a protective topcoat to boost durability.
Watch Video
Quick Summary
- Choose the right base and finish for each project
- Prepare surfaces thoroughly for best adhesion
- Use thin coats and allow proper dry time between layers
- Ventilate and protect the workspace to stay safe
- Test patches before full application